Five animals, four steps each, no eraser required. That’s the whole idea behind easy animal drawing — start with two or three basic shapes, add the face last, and the character shows up almost by accident.
Every tutorial below breaks down into simple circles and curves before any detail gets added. Kids as young as five can follow the bee and the ladybug; the mouse sketch is a good next step once you’re comfortable holding a pencil loosely instead of tracing.
See also: more step-by-step tutorials on the blog if you want to keep practicing after these five.
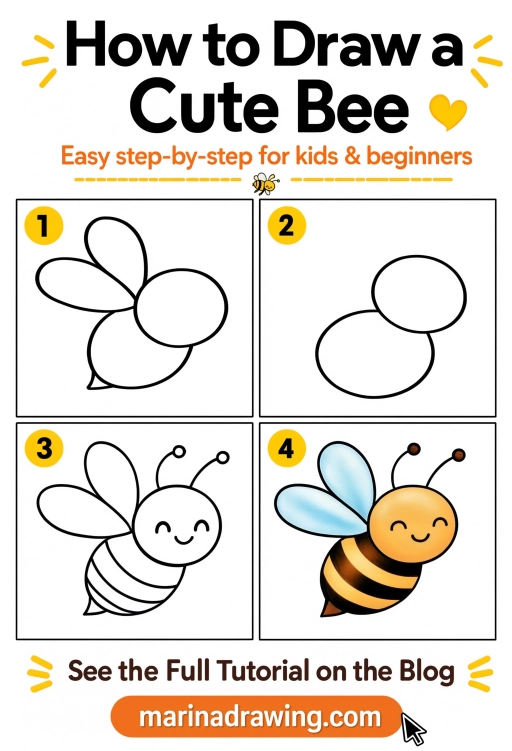
1. How to Draw a Cute Bee
Start with two overlapping ovals — a smaller one for the head, a bigger one for the body. That’s step one, and it’s the part most beginners rush through, which is why the proportions end up off.
Add two teardrop-shaped wings coming off the back of the head oval, then two thin antennae with round tips. The stripes come last — three curved bands across the body, not straight lines, or the bee reads as a robot instead of an insect.
2. How to Draw a Cute Jellyfish
42 hours of pencil drawing training, lifetime access
The video course I point plateaued students to — full lessons on portraits, hands, and realistic shading, not another short tutorial.

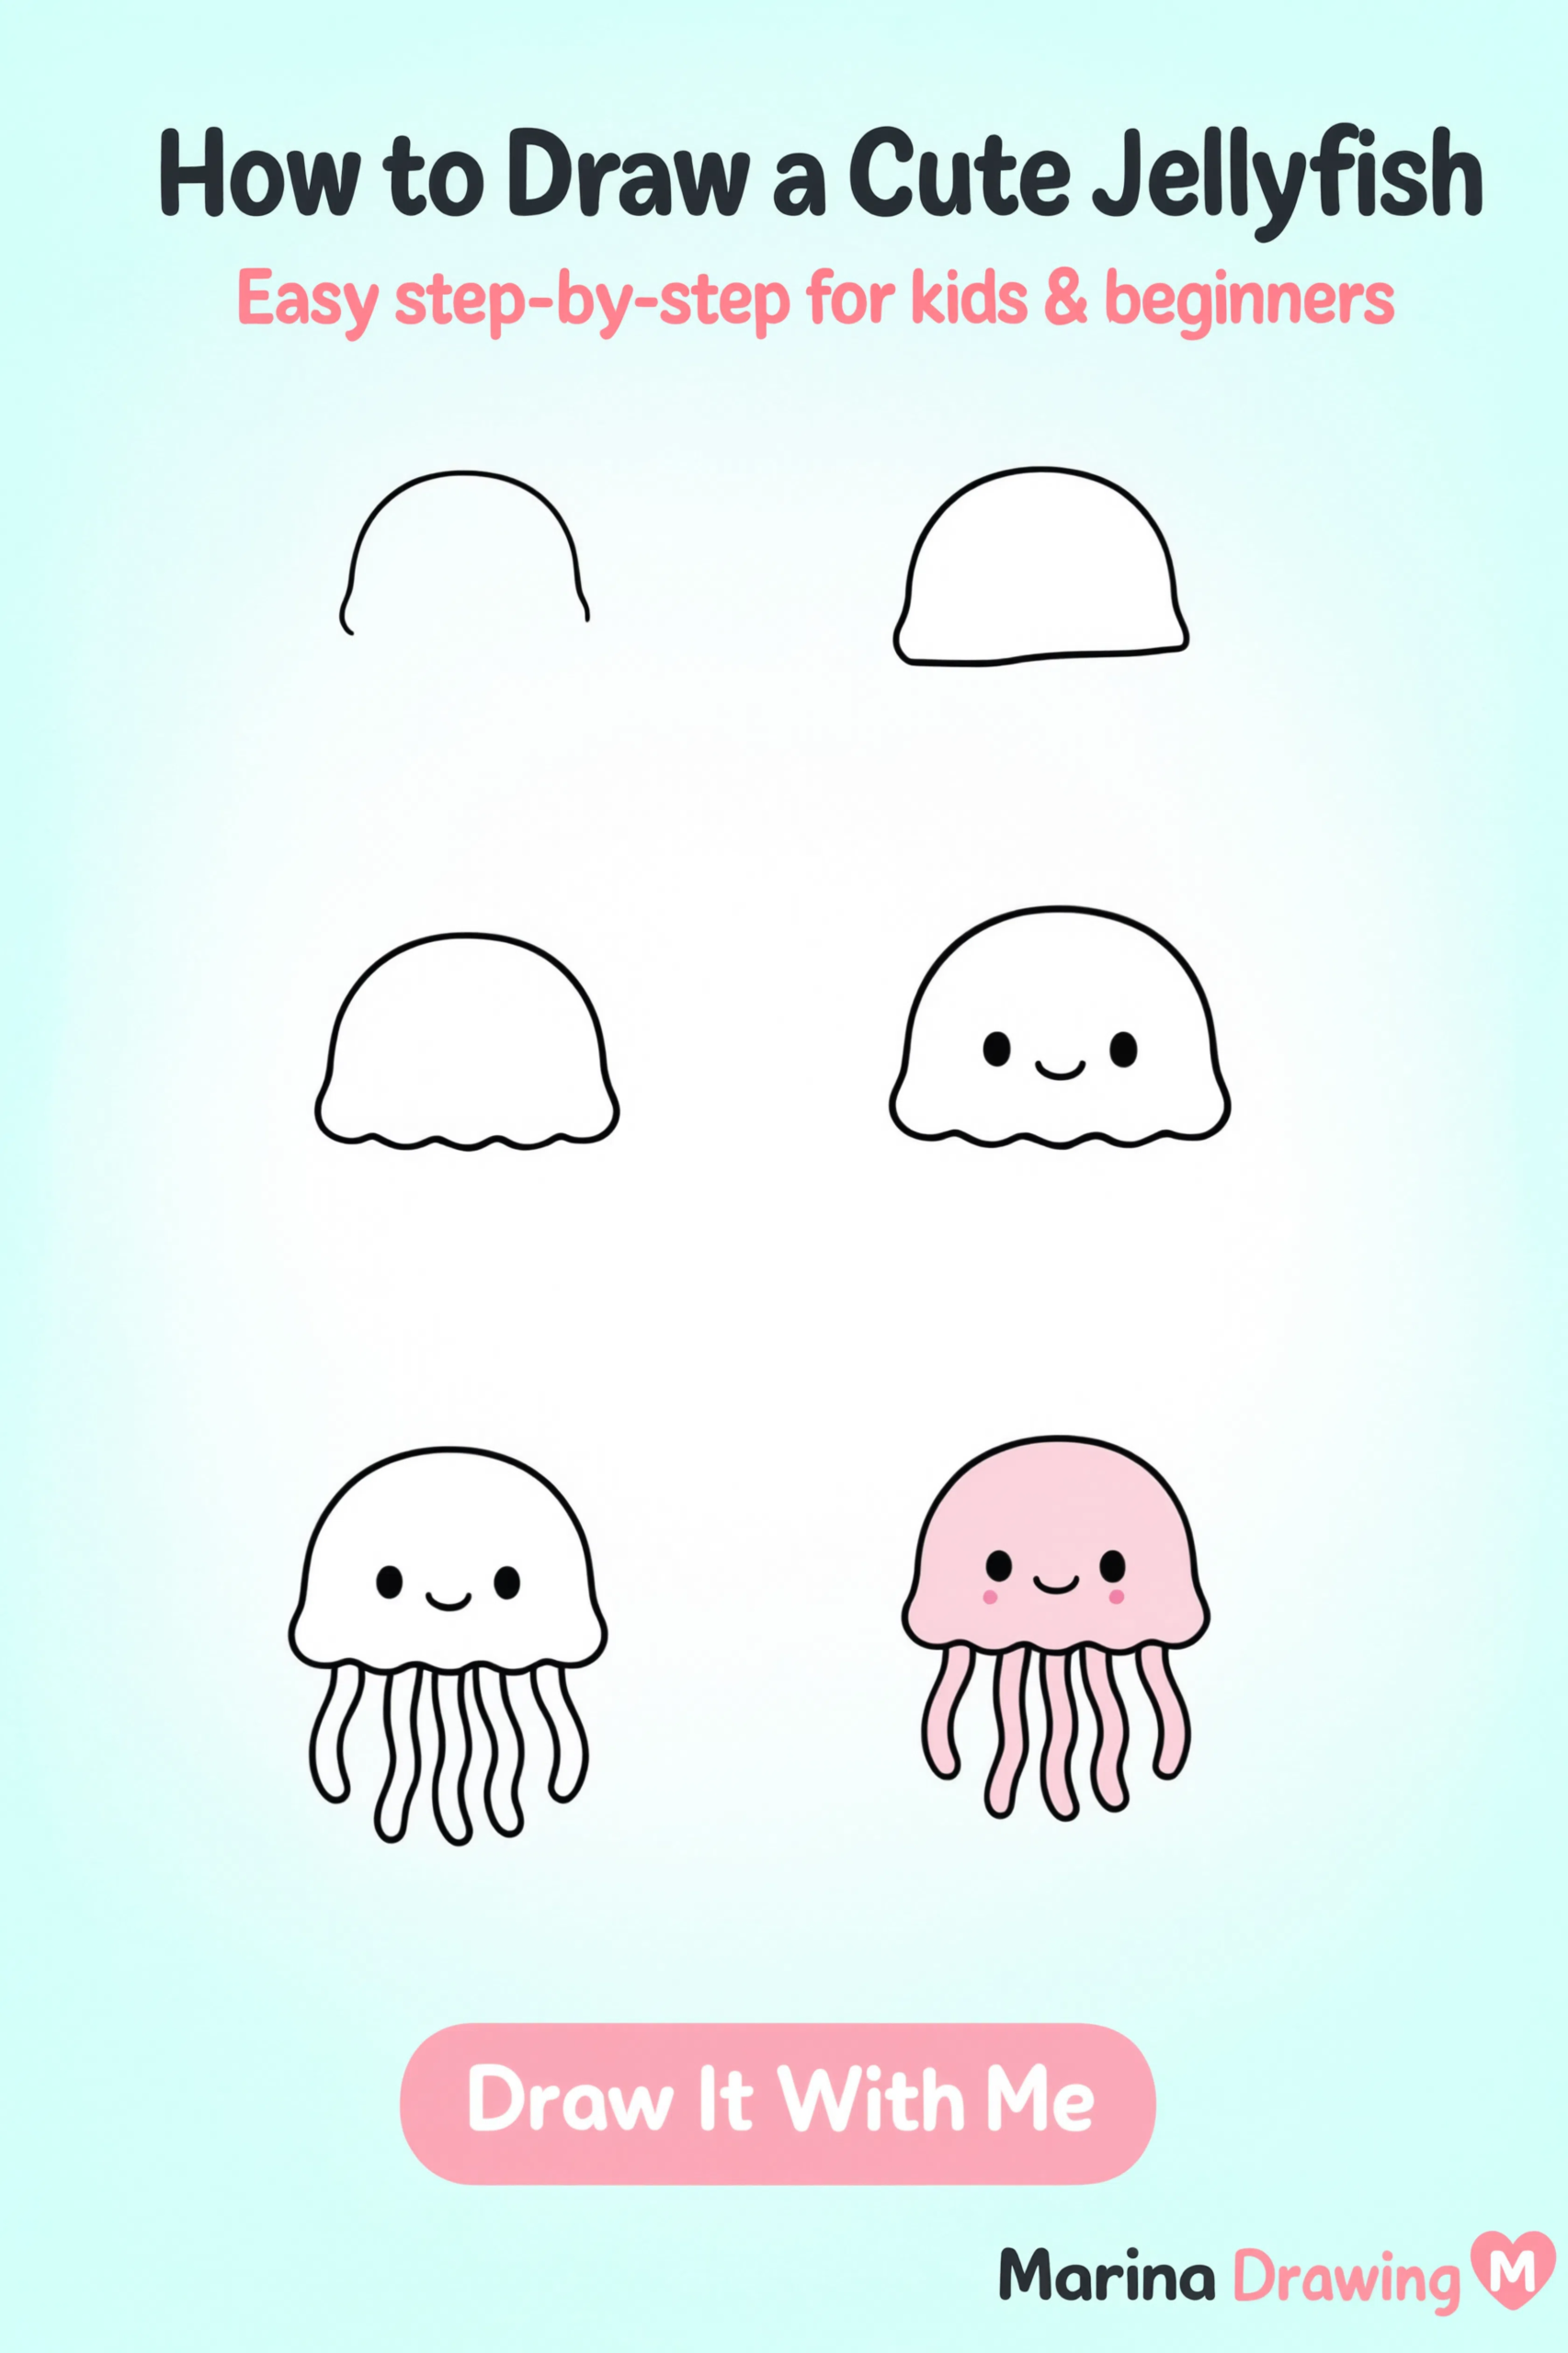
This one starts as a dome, not a circle. Draw a half-oval shape, flatten the bottom edge, then give that bottom edge a wavy scalloped line instead of a straight one — that’s what separates a jellyfish from a mushroom.
Face goes in the center of the dome: two dot eyes, a small curved smile, done. For the tentacles, draw six to eight wavy vertical lines hanging from the scalloped edge. Uneven spacing actually looks more natural here than a perfectly symmetrical row.
3. How to Draw a Ladybug
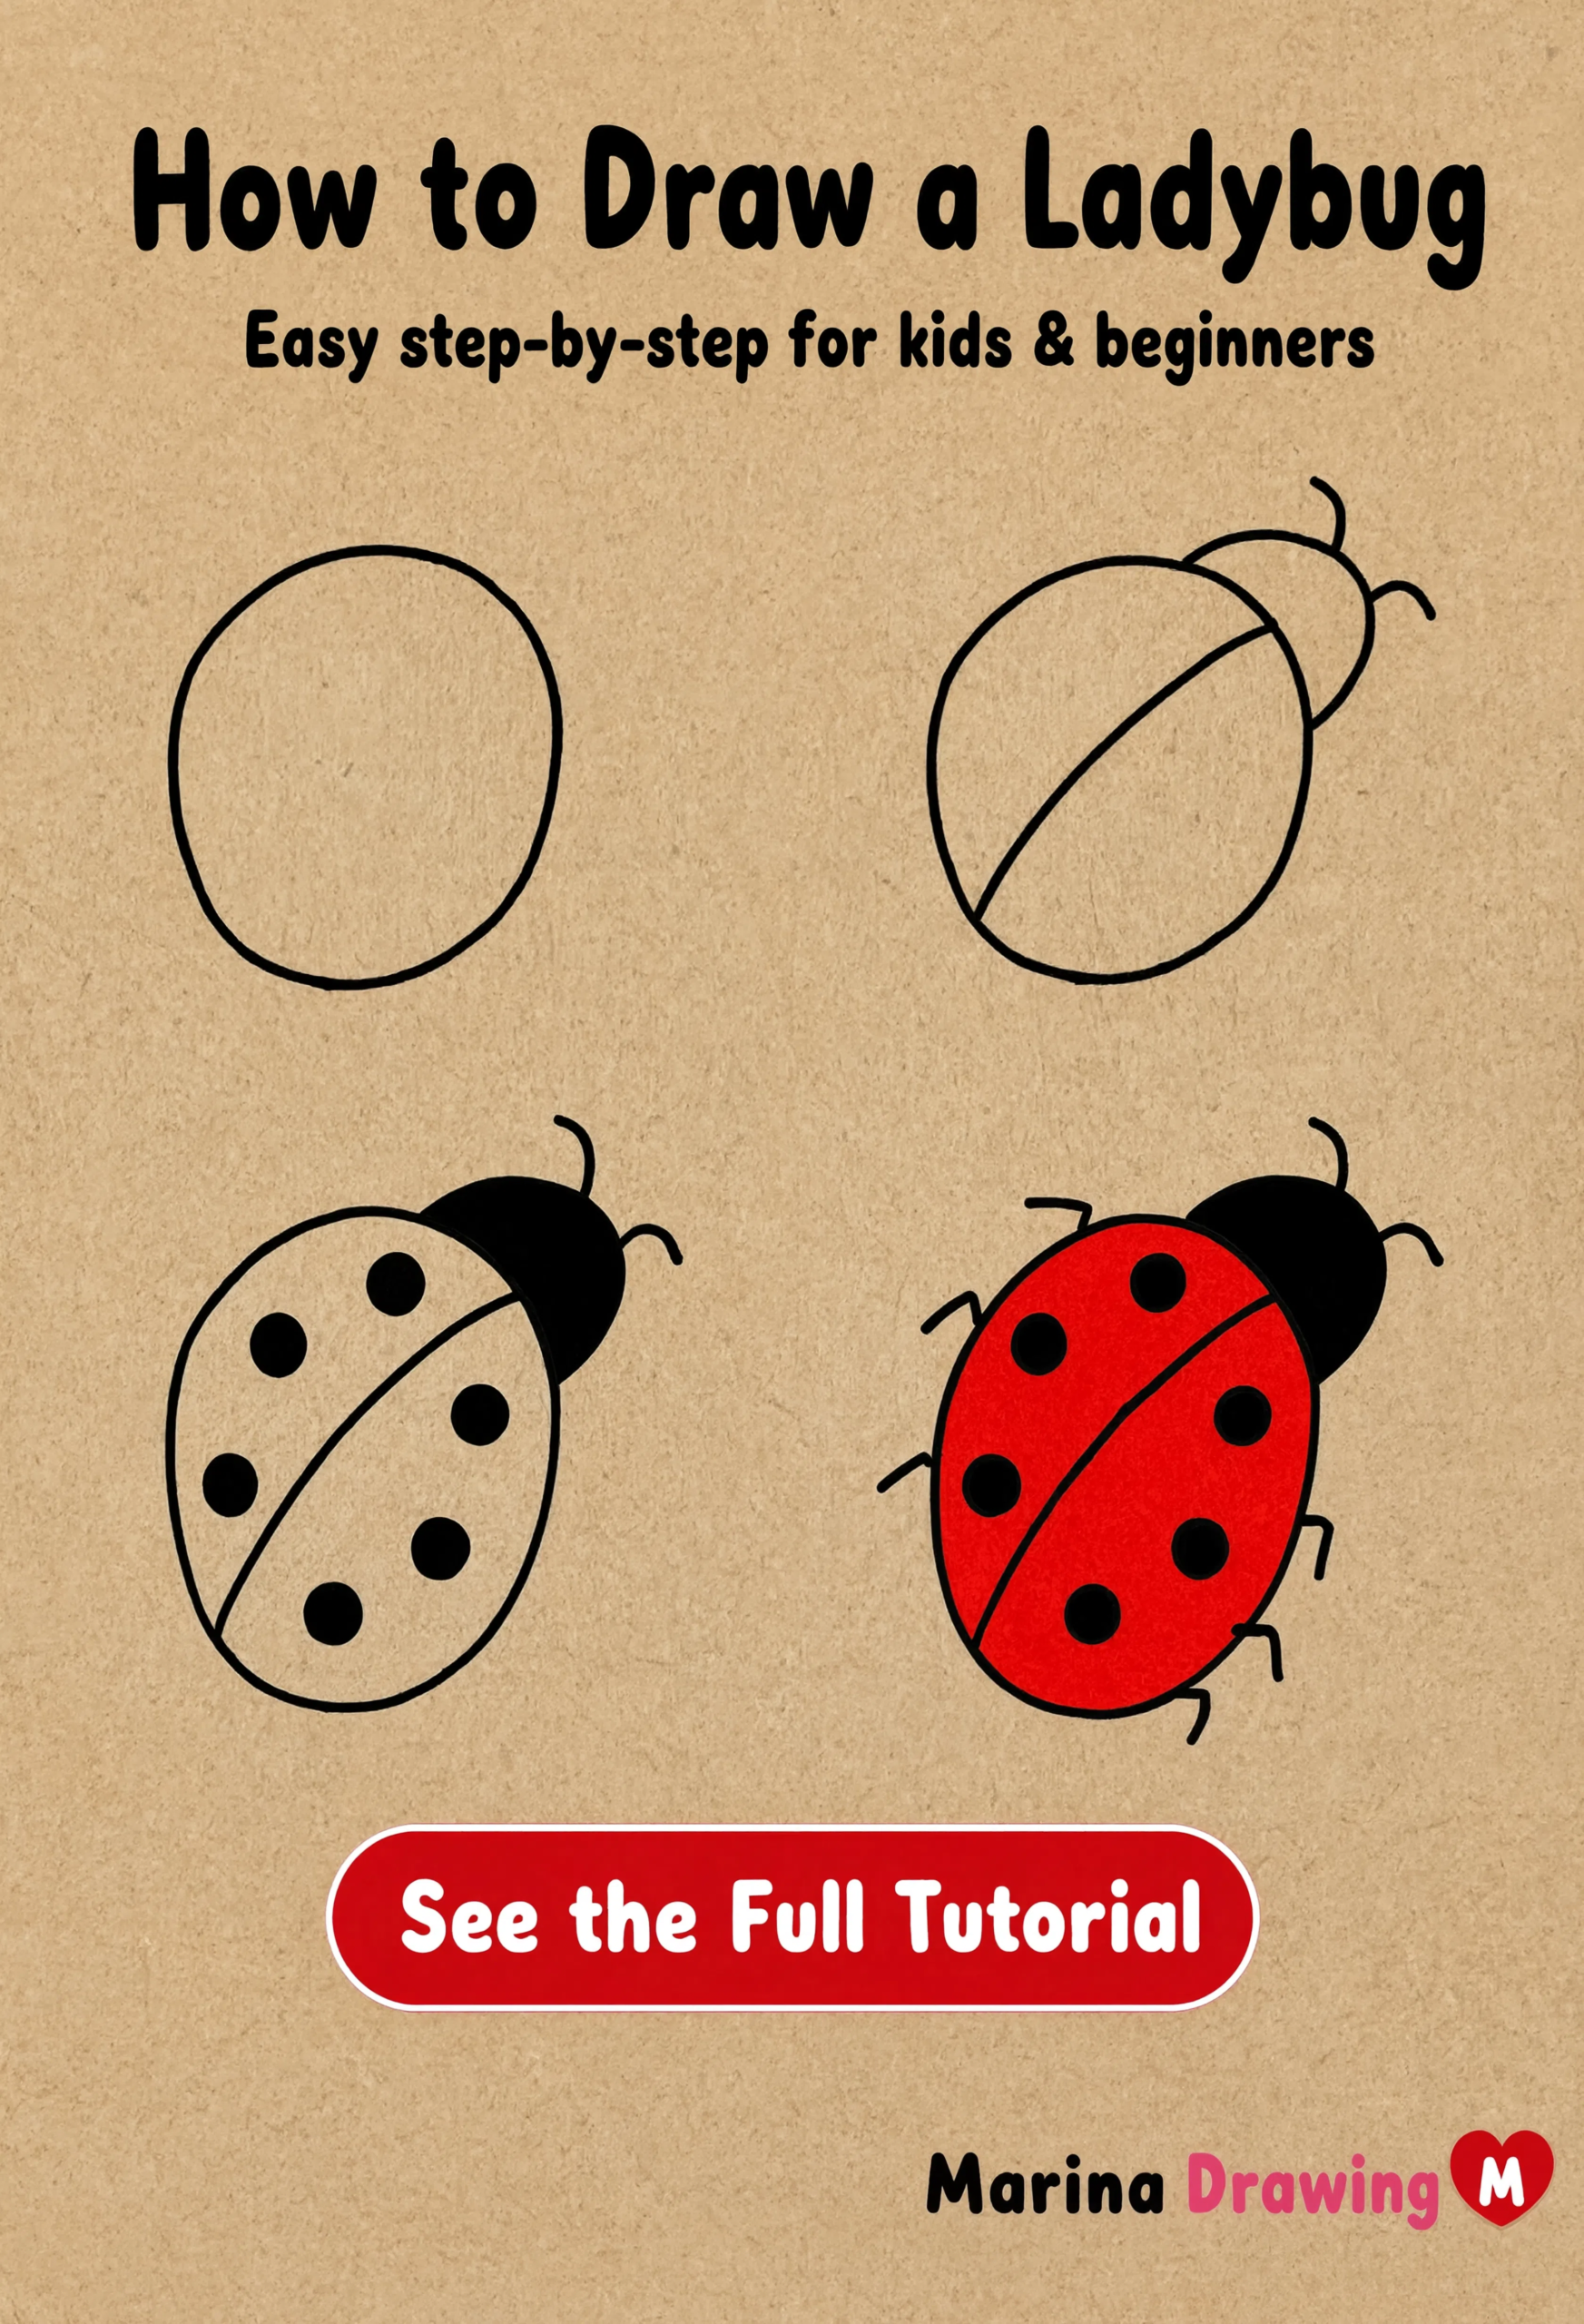
One oval for the body, a smaller half-circle overlapping the top for the head. The head sits slightly off to one side, not dead-center — that’s the detail that makes the pose feel alive instead of stiff.
A single curved line splits the oval down the middle into two wing shells. Spots go on after — five or six, uneven in size, never in a straight grid. Two thin antennae and three little legs on each visible side finish it off.
4. How to Draw a Cute Squirrel
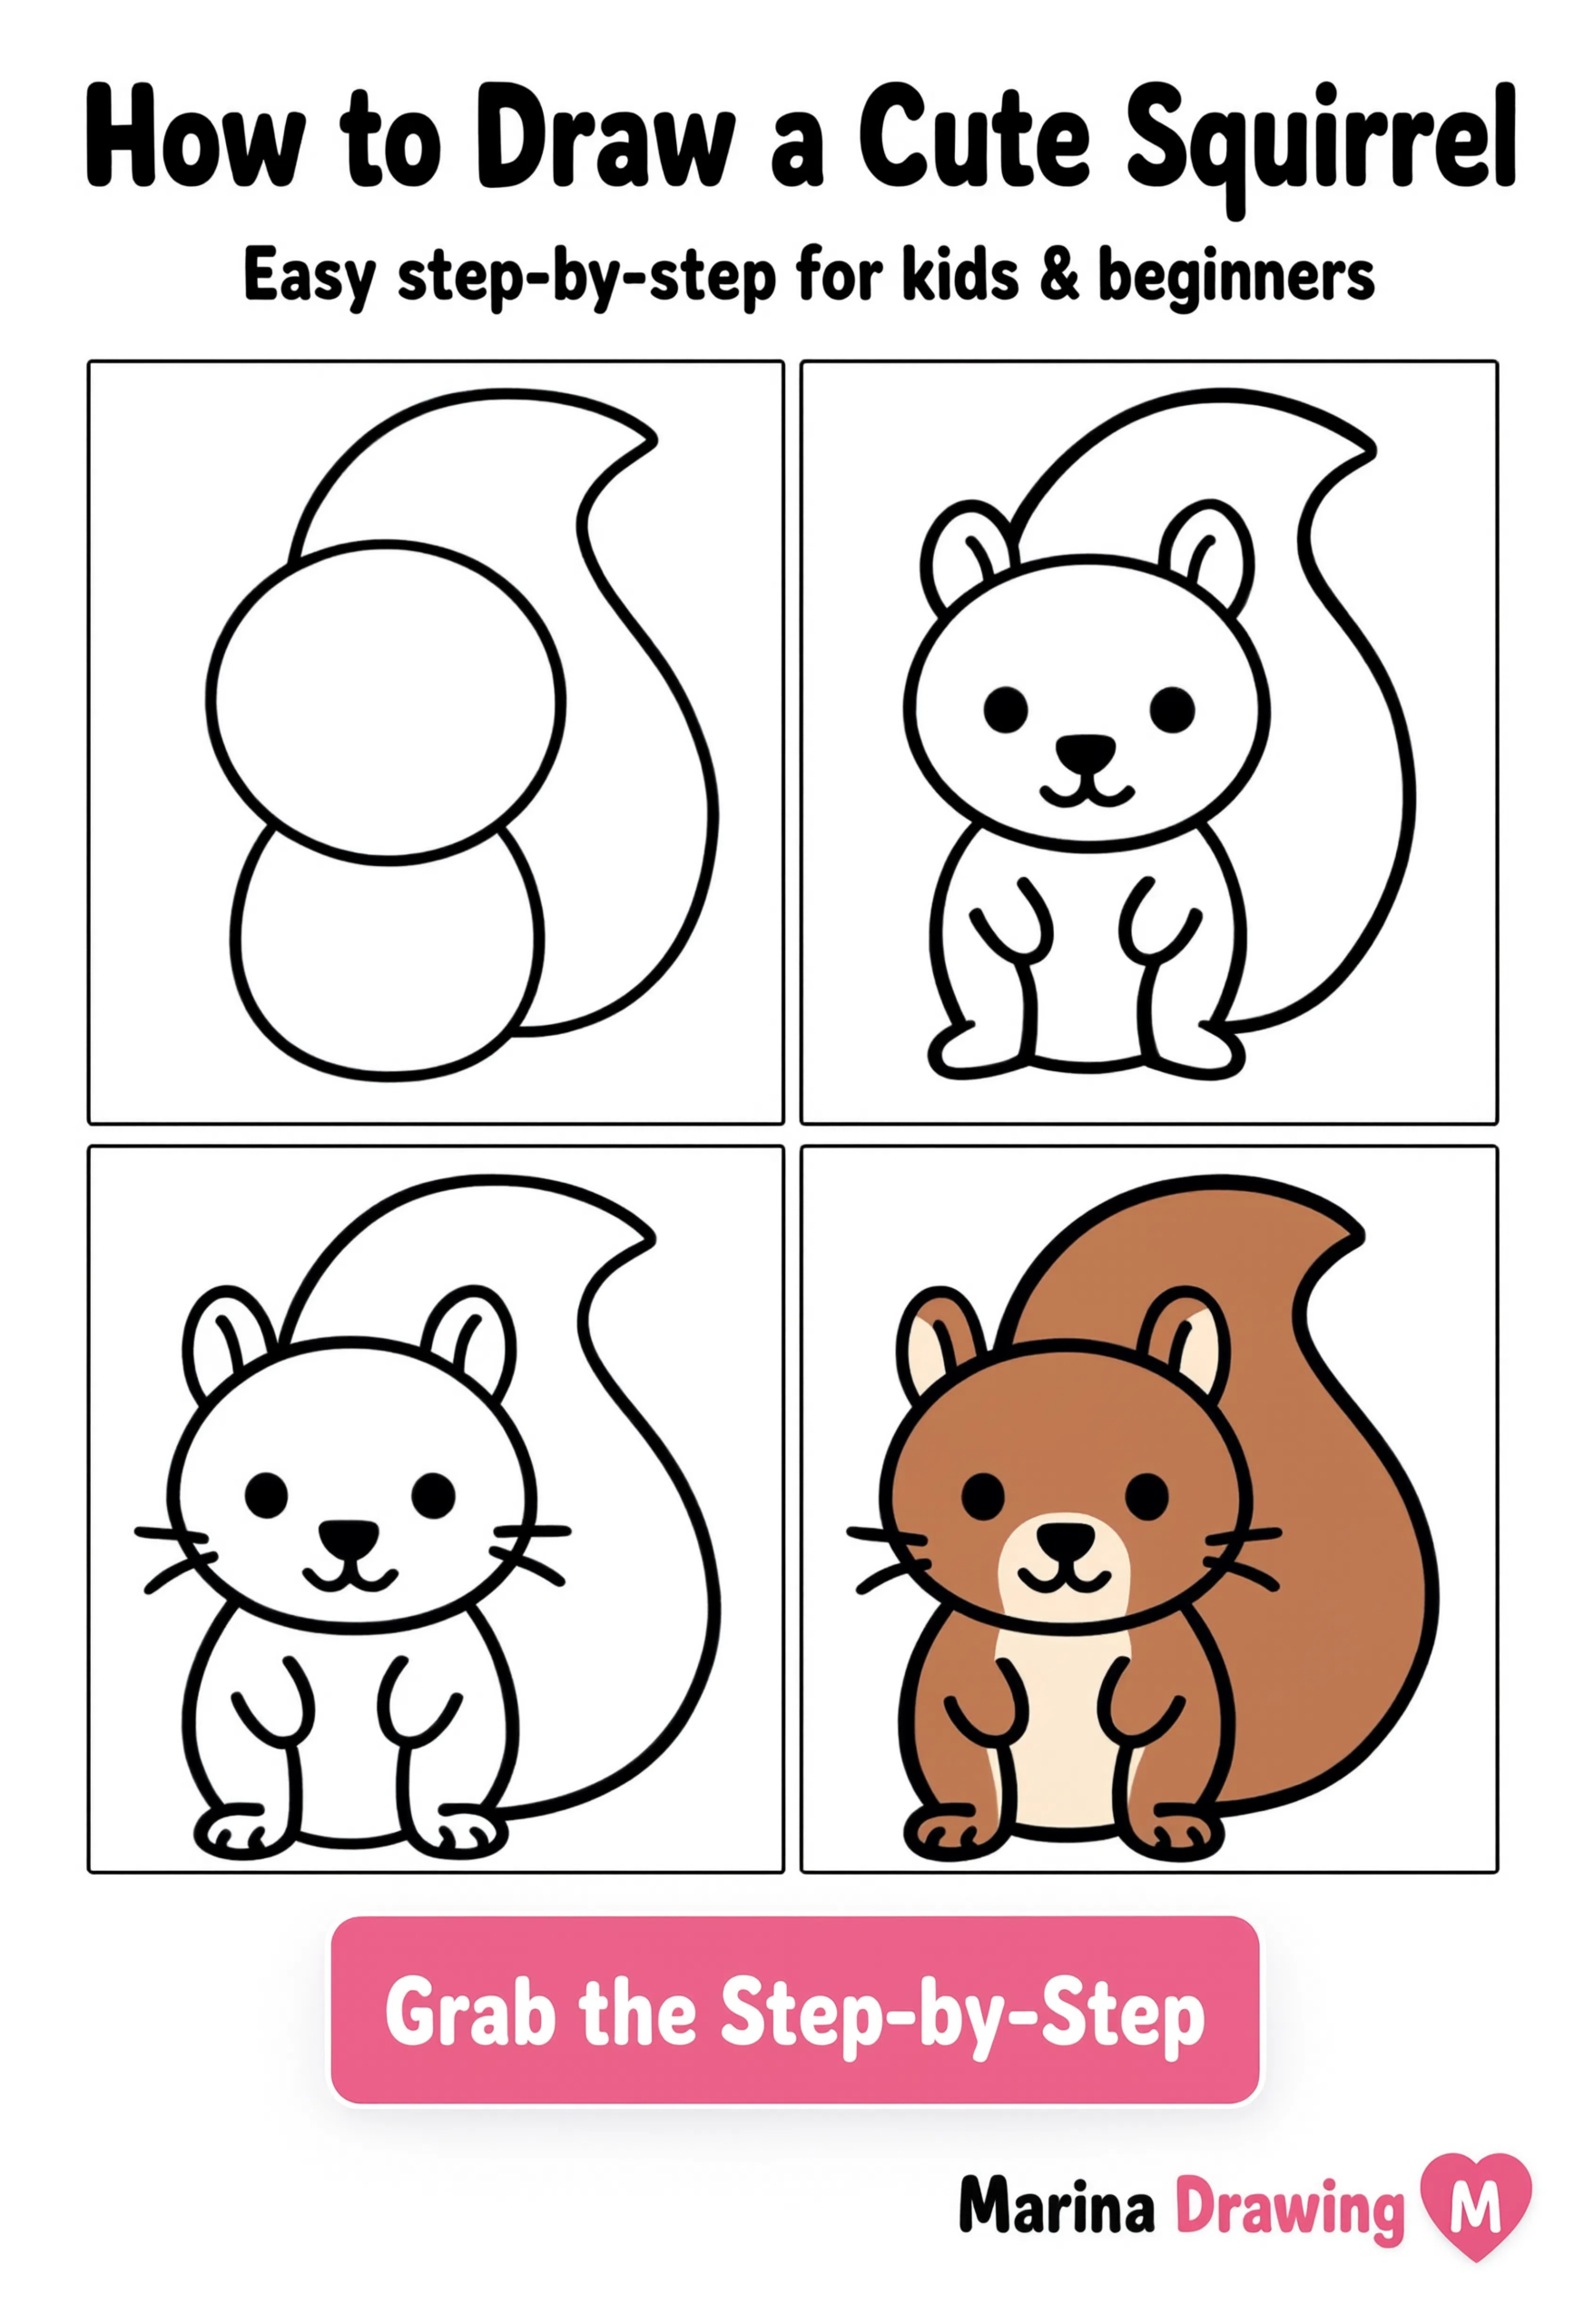
The tail is what makes this one fun and also the part people get stuck on. Draw two stacked circles for the head and body first, then the tail as one big comma-shaped curve arcing up and over from behind the body — it should end up almost as tall as the squirrel itself.
Ears are two small half-circles on top of the head, paws are little rounded bumps at the bottom of the body. Add a lighter patch on the belly and muzzle before coloring — that two-tone shading is what sells the squirrel look, more than the outline does.
5. How to Draw a Cute Mouse
42 hours of pencil drawing training, lifetime access
The video course I point plateaued students to — full lessons on portraits, hands, and realistic shading, not another short tutorial.
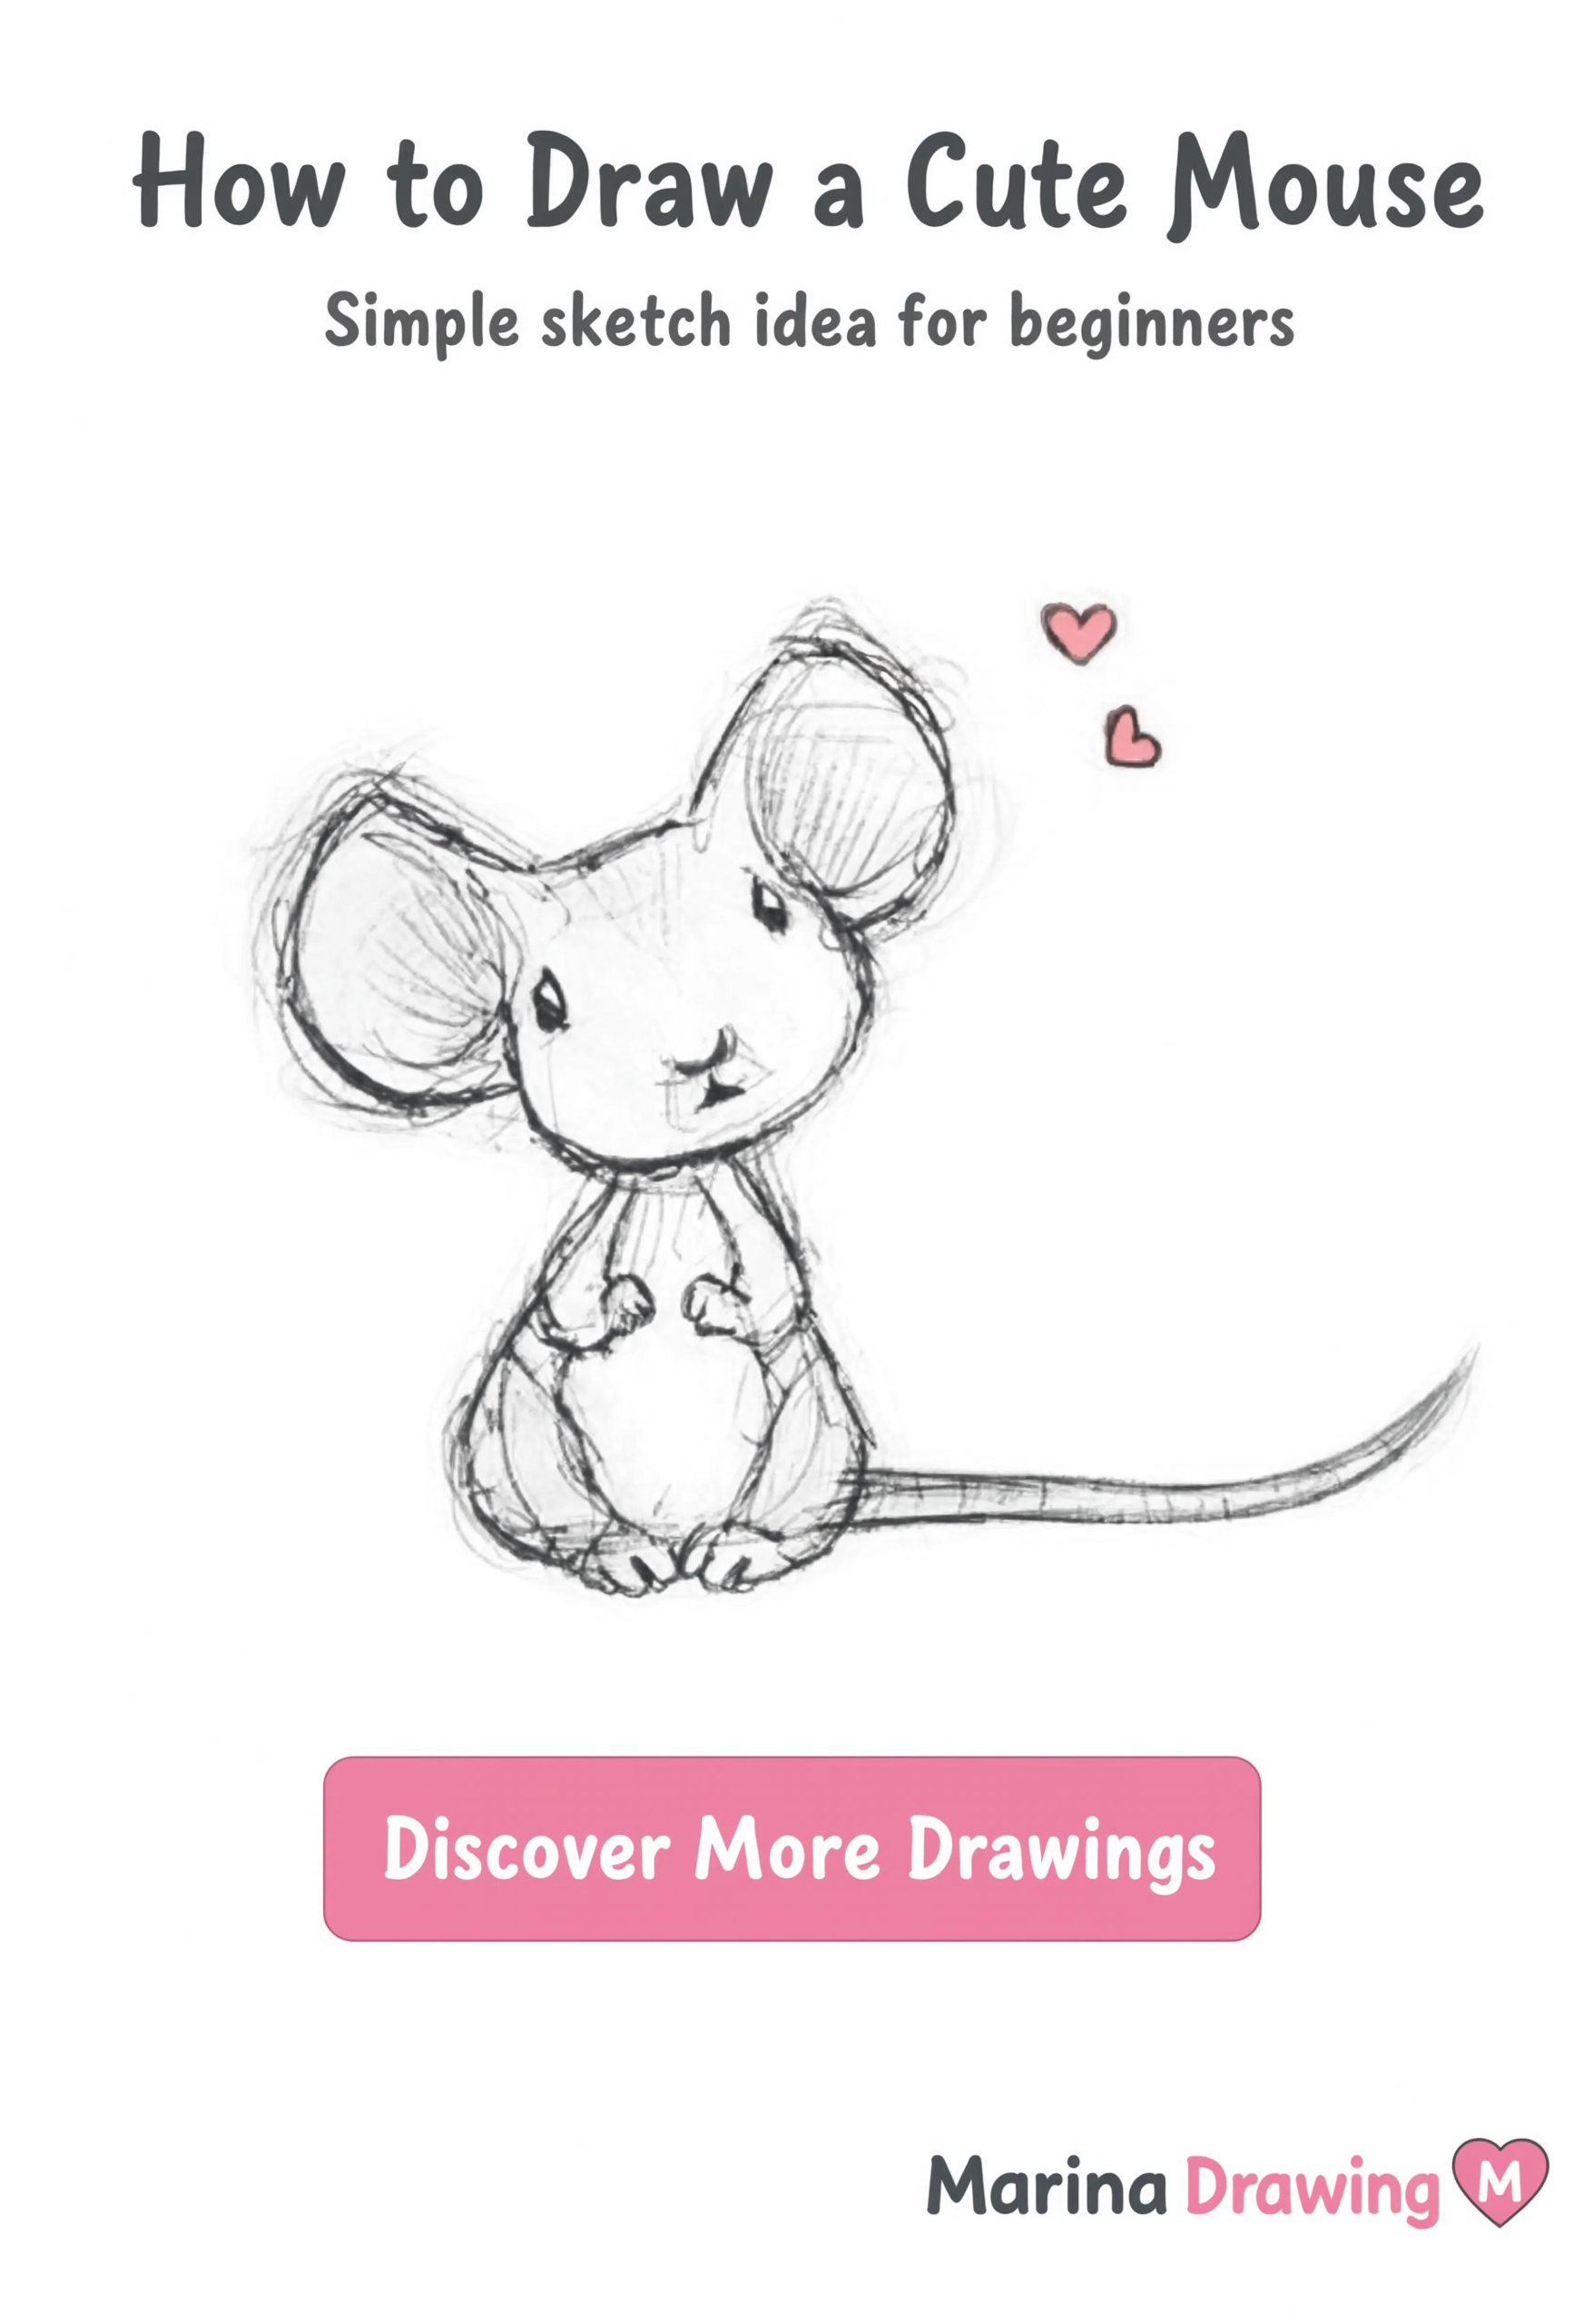
Not a step-by-step this time — this one’s a looser sketch, which makes it the right next exercise once the four tutorials above feel easy. Big round ears take up almost a third of the total head size, drawn slightly uneven on purpose.
Keep the line work loose instead of clean. A wobbly outline on the tail and a few stray pencil marks around the ears actually read as more charming than a perfectly smooth line — worth trying once you’re past tracing shapes exactly.
Cute animal drawings almost always come down to two or three basic shapes first, face last — the shape decides the pose, the face just adds the personality.
Once the bee and ladybug feel easy, the jump to looser sketches like the mouse is smaller than it looks. Check the course pages if you want structured lessons instead of one-off tutorials, or browse the full tutorial library for more animals, characters, and step-by-step guides.
Key Takeaways
- Start every animal with 2-3 basic shapes — circles, ovals, teardrops — before adding any detail
- The face always goes on last, after the body shape is settled
- Uneven spacing (spots, tentacles, fur patches) looks more natural than perfect symmetry
- Loose, slightly wobbly line work suits sketch-style animals better than clean outlines
Frequently Asked Questions
What’s the easiest animal to draw for a beginner?
The bee and the ladybug are the easiest starting points — both build from one or two ovals plus simple details like stripes or spots, with no tricky proportions to get wrong.
Do I need to draw a straight guideline first?
No. All five of these start freehand from basic shapes. A light guideline can help with symmetry on the jellyfish’s tentacles, but it’s not necessary for any of the others.
Why does my drawing look stiff compared to the example?
Usually it’s symmetry — perfectly even spots, perfectly straight tentacles, perfectly centered faces. Nudge things slightly off-center and the drawing loosens up immediately.