By Marina · Last updated: September 29, 2026
Hair looks flat when you draw it as an outline filled with lines, instead of a mass of strand clusters sitting on a 3D skull. That one mix-up is why so many drawings end up with hair that reads as a helmet and not as something growing out of a scalp.
I made this mistake for years. The face looked fine, then the hair ruined the whole portrait, and I could not say why.
You get six steps here that fix it. Each step names the mistake it prevents, and you can follow them with any pencil.
Hair reads as real when you see clusters, direction and uneven volume. Single strands are the last thing you add.
Quick answer: draw the skull first, split the hair into 3–5 big clusters, add direction lines, then strand groups. Push volume out only at the crown, the parting and the ends. Shade in three passes.
Key Takeaways
- Hair follows the curve of the skull. Draw the head shape first and the hair second.
- Split hair into 3–5 large clusters before you draw a single strand.
- Volume sits at the parting, the crown and the ends. It is not even across the head.
- Shade with the direction of growth, never against it.
The 3 Mistakes That Make Hair Look Flat
42 hours of pencil drawing training, lifetime access
The video course I point plateaued students to — full lessons on portraits, hands, and realistic shading, not another short tutorial.

Check your last drawing against this list. You will probably find at least two of them.
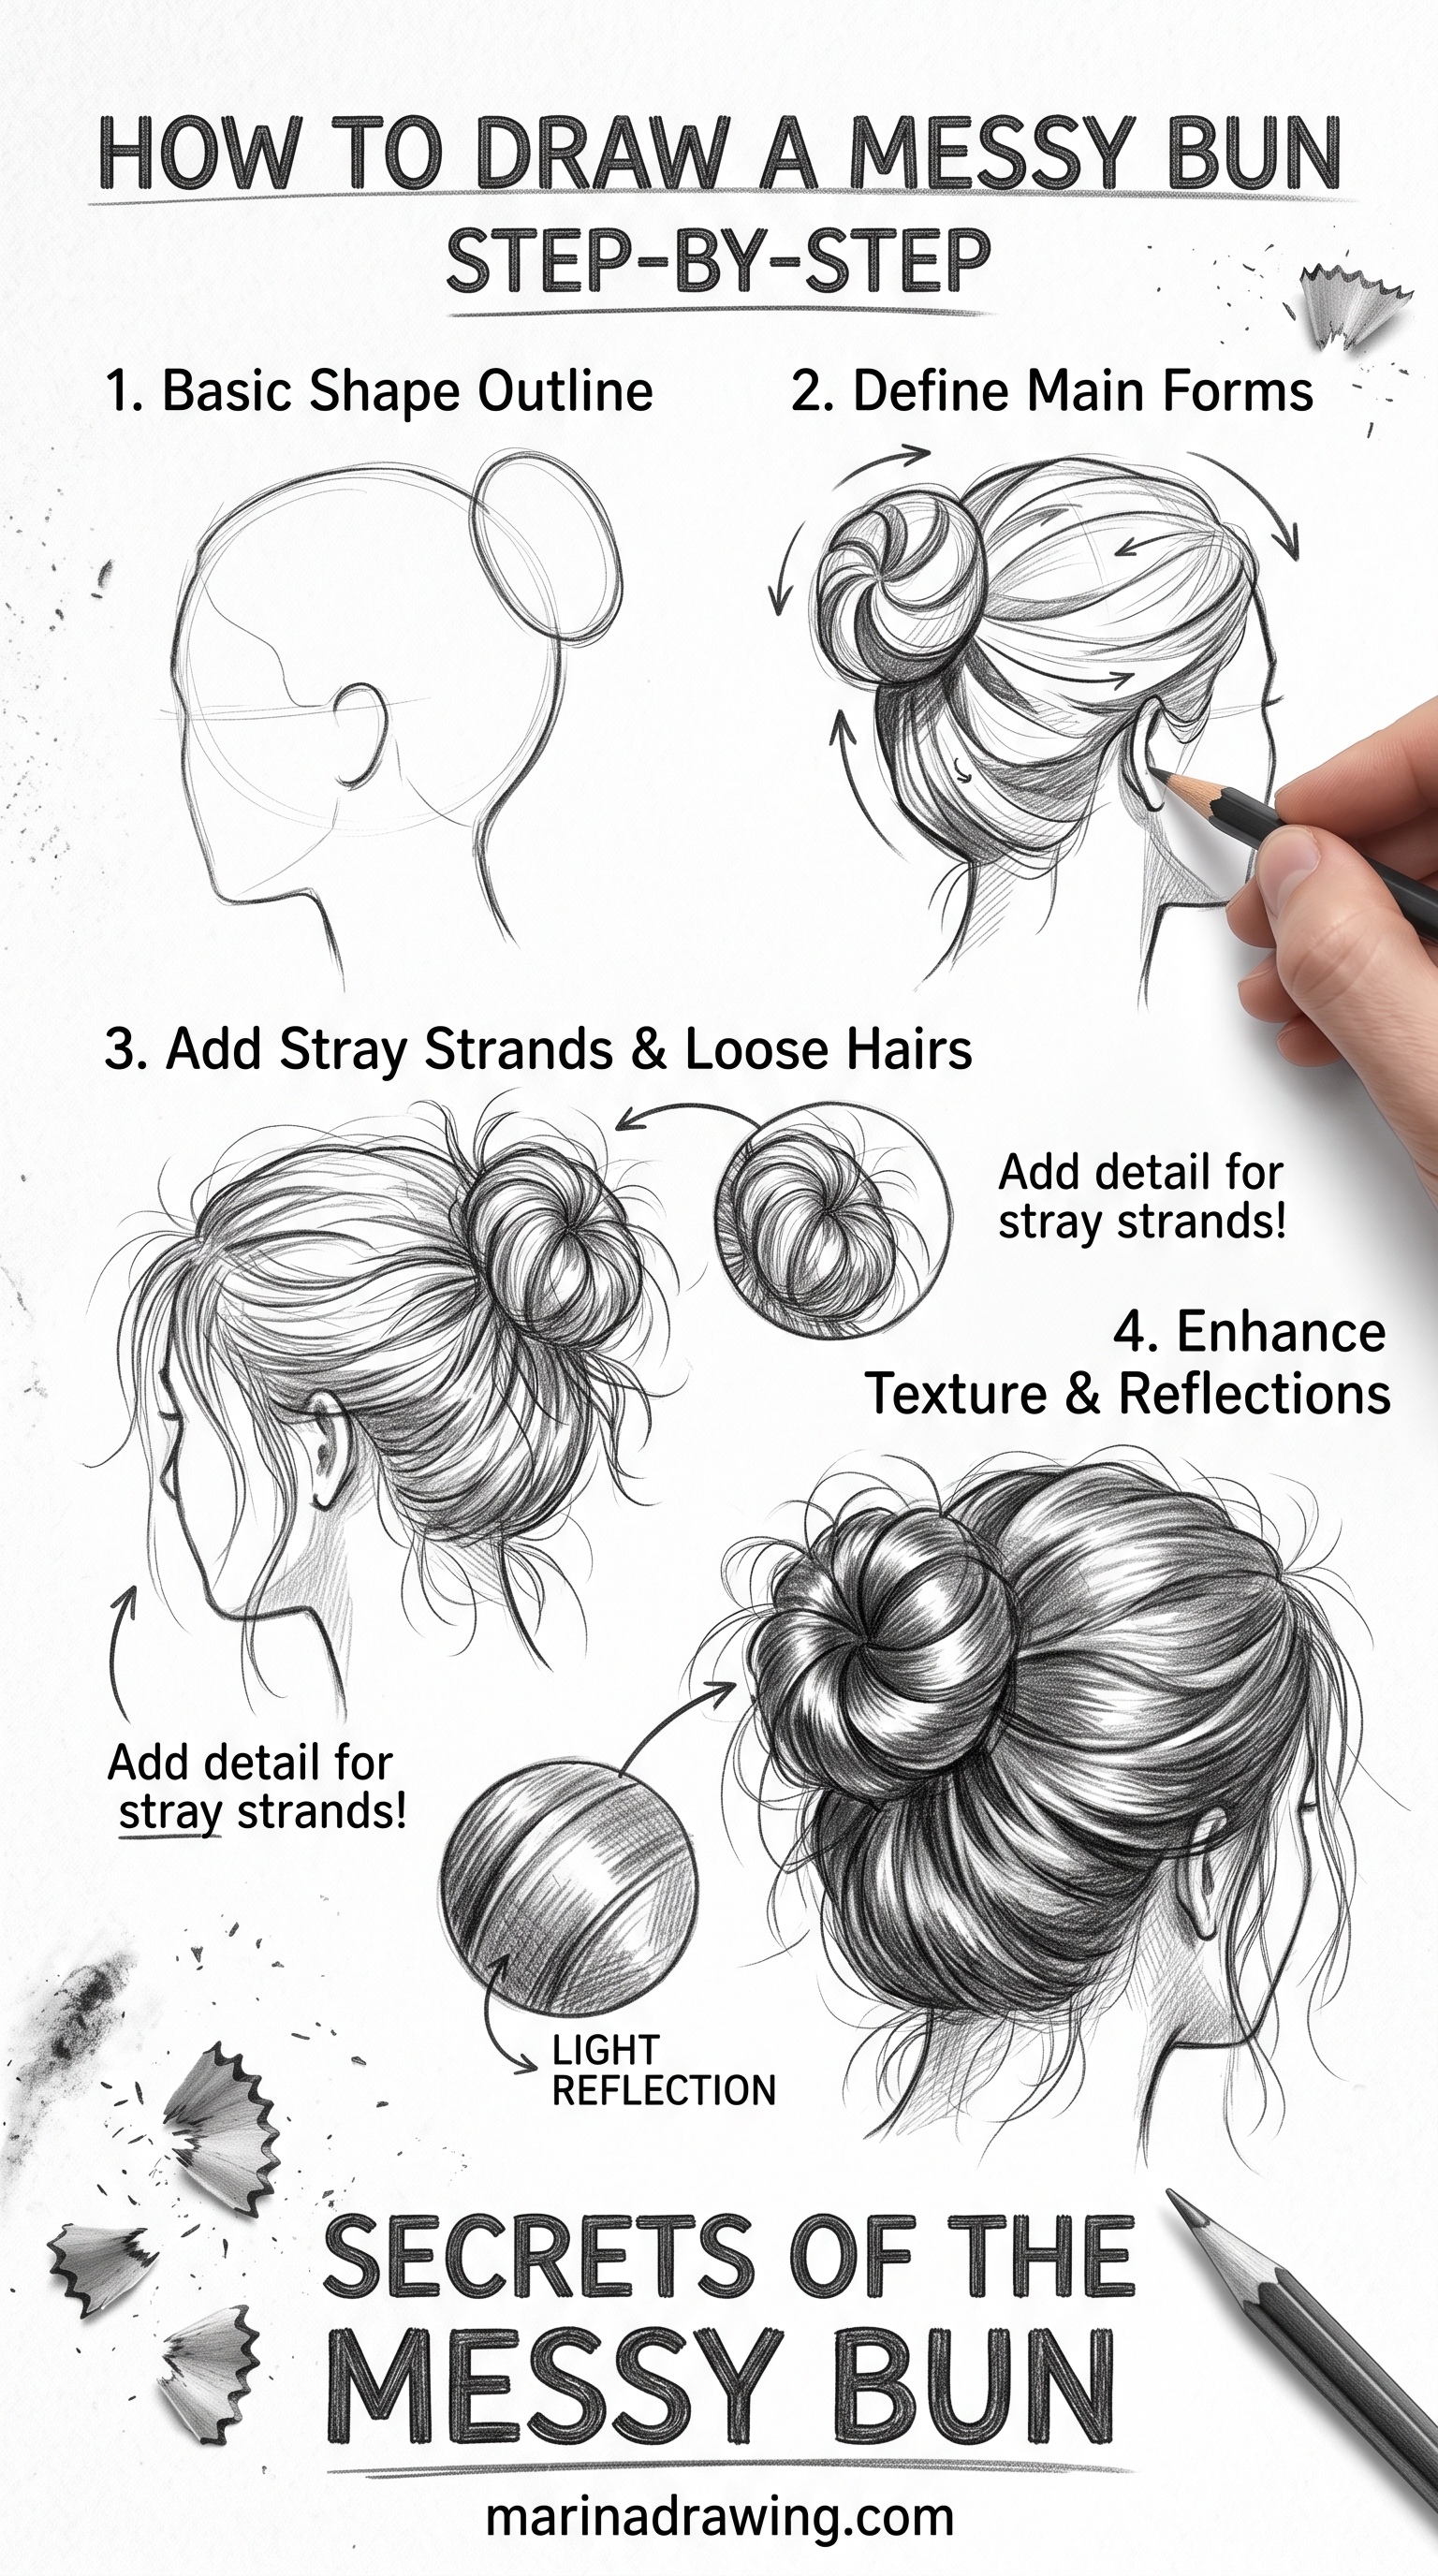
- Mistake 1: no skull underneath. The hair is pasted onto a flat face, so it reads as a cap. Step 1 fixes it.
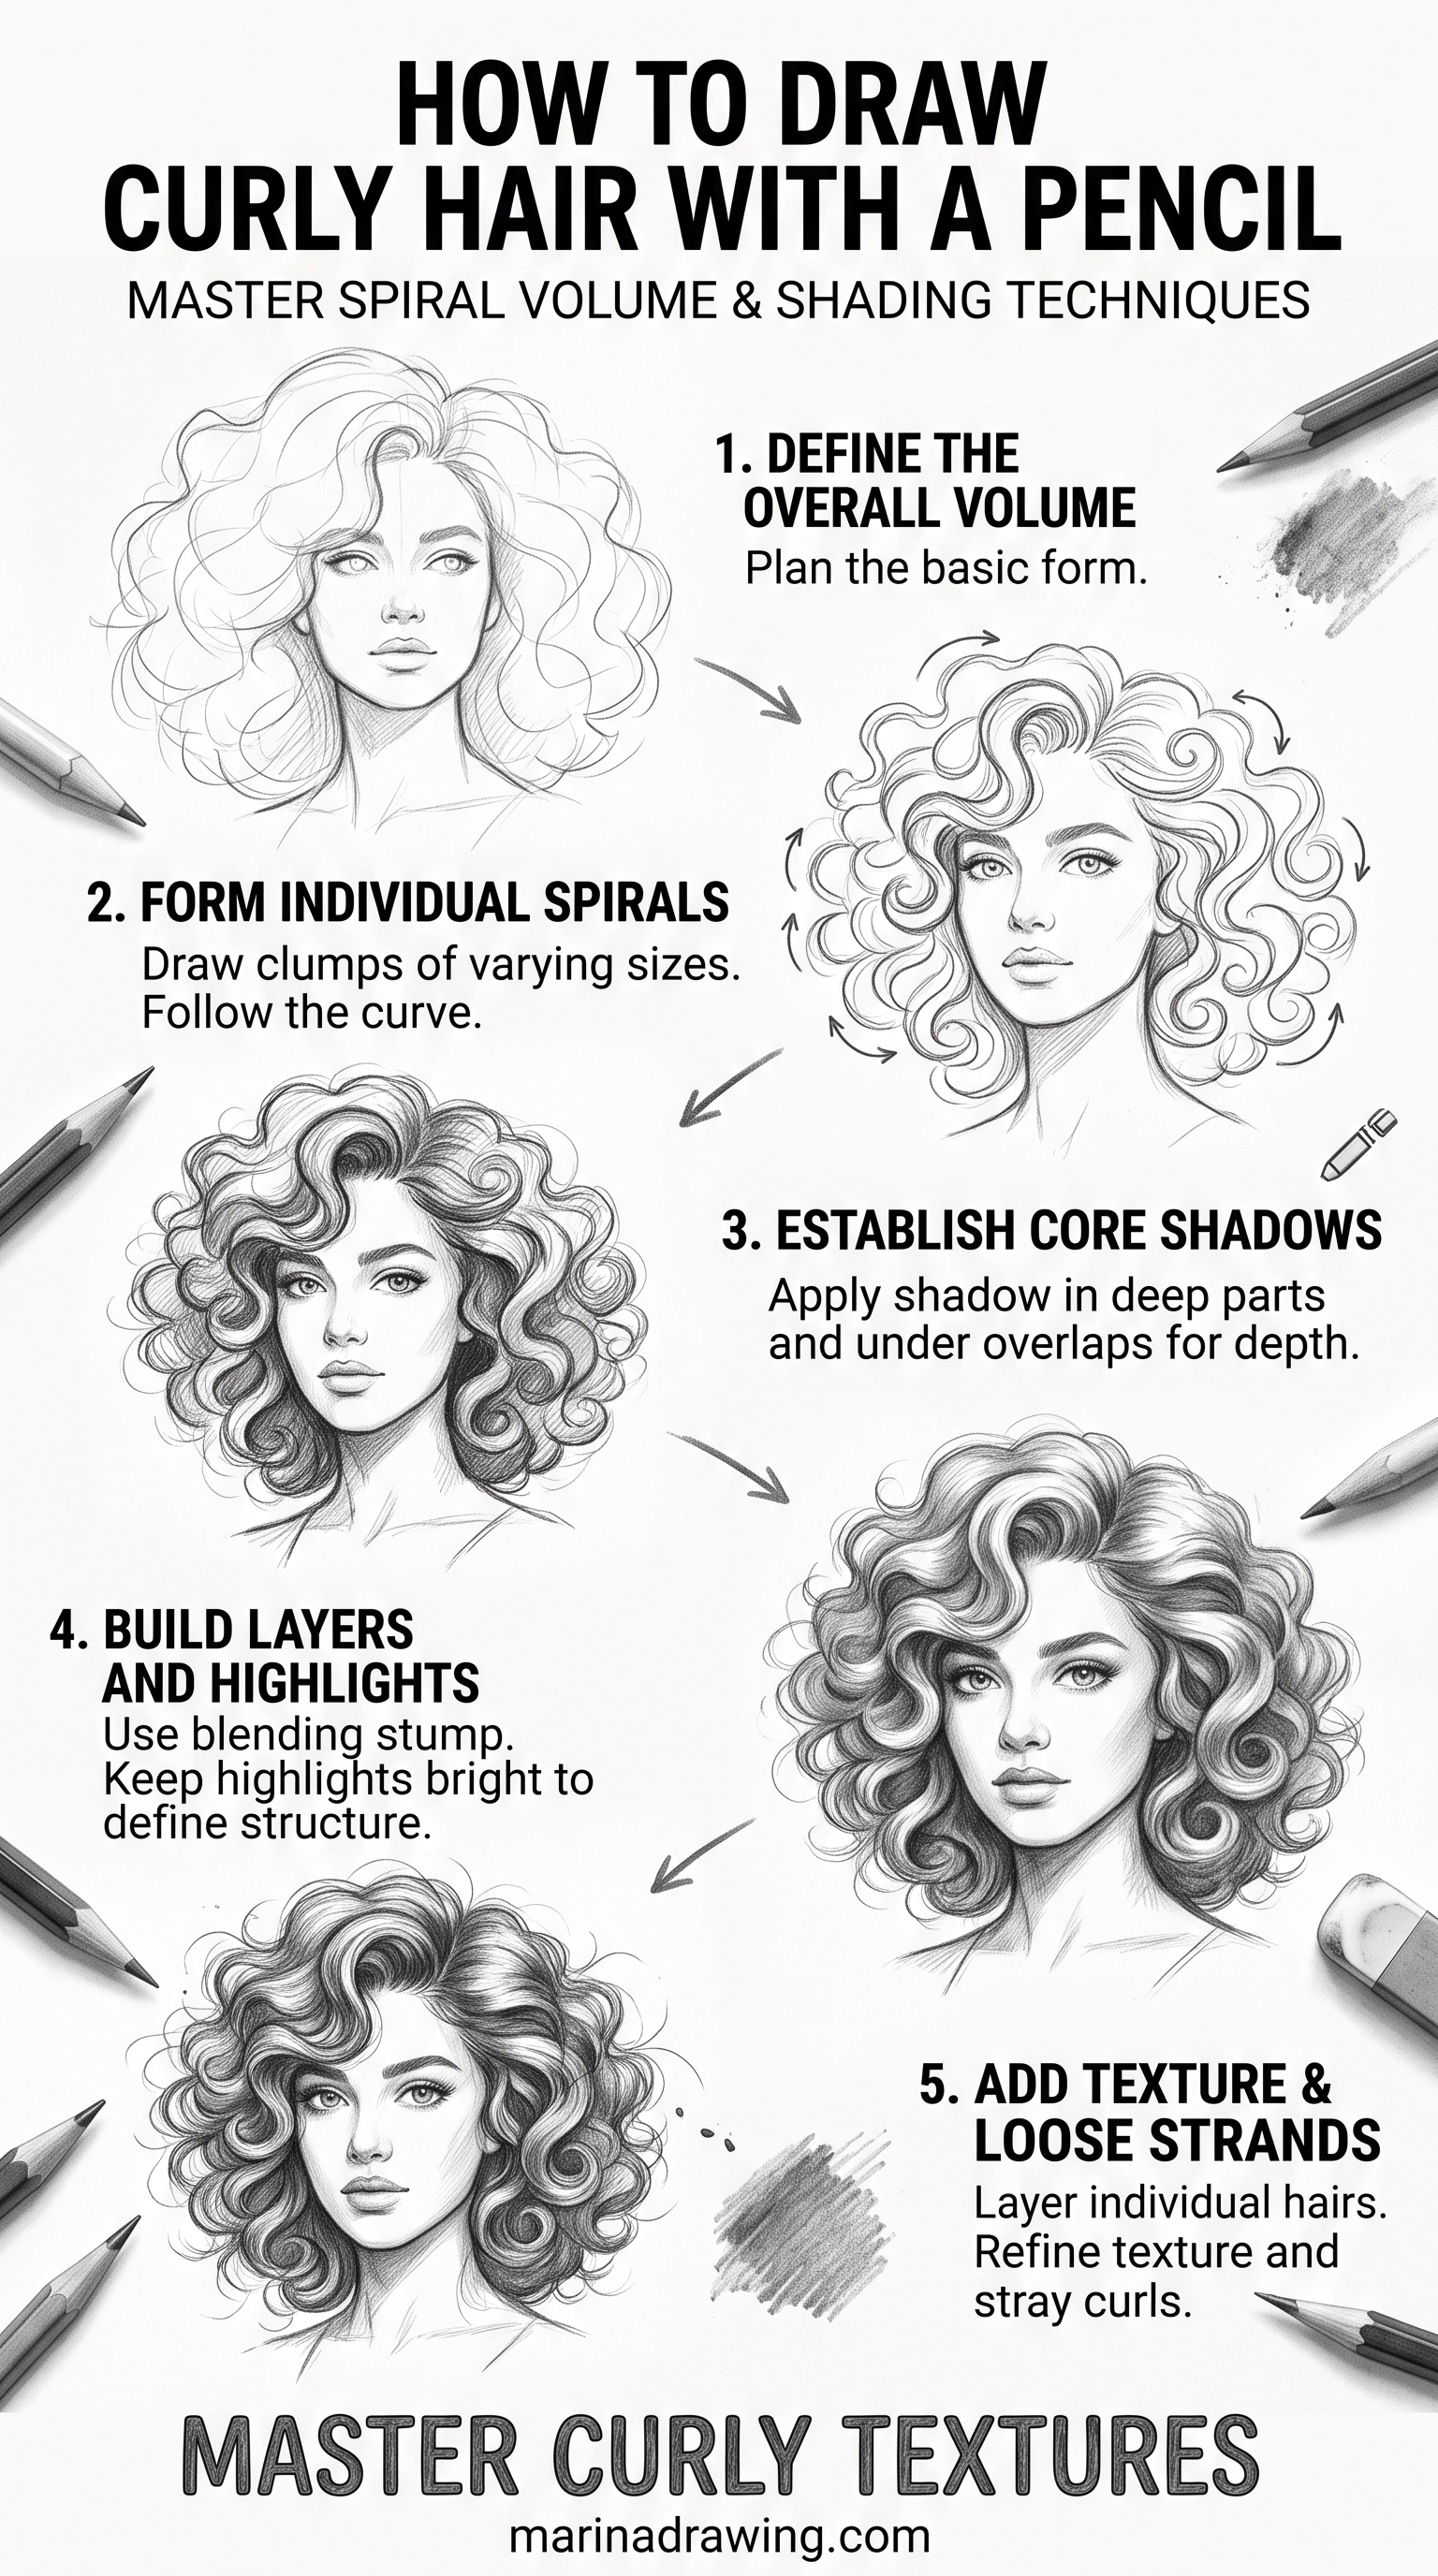
- Mistake 2: strands instead of clusters. You draw hundreds of single hairs. The result looks like straw. Steps 2 and 4 fix it.
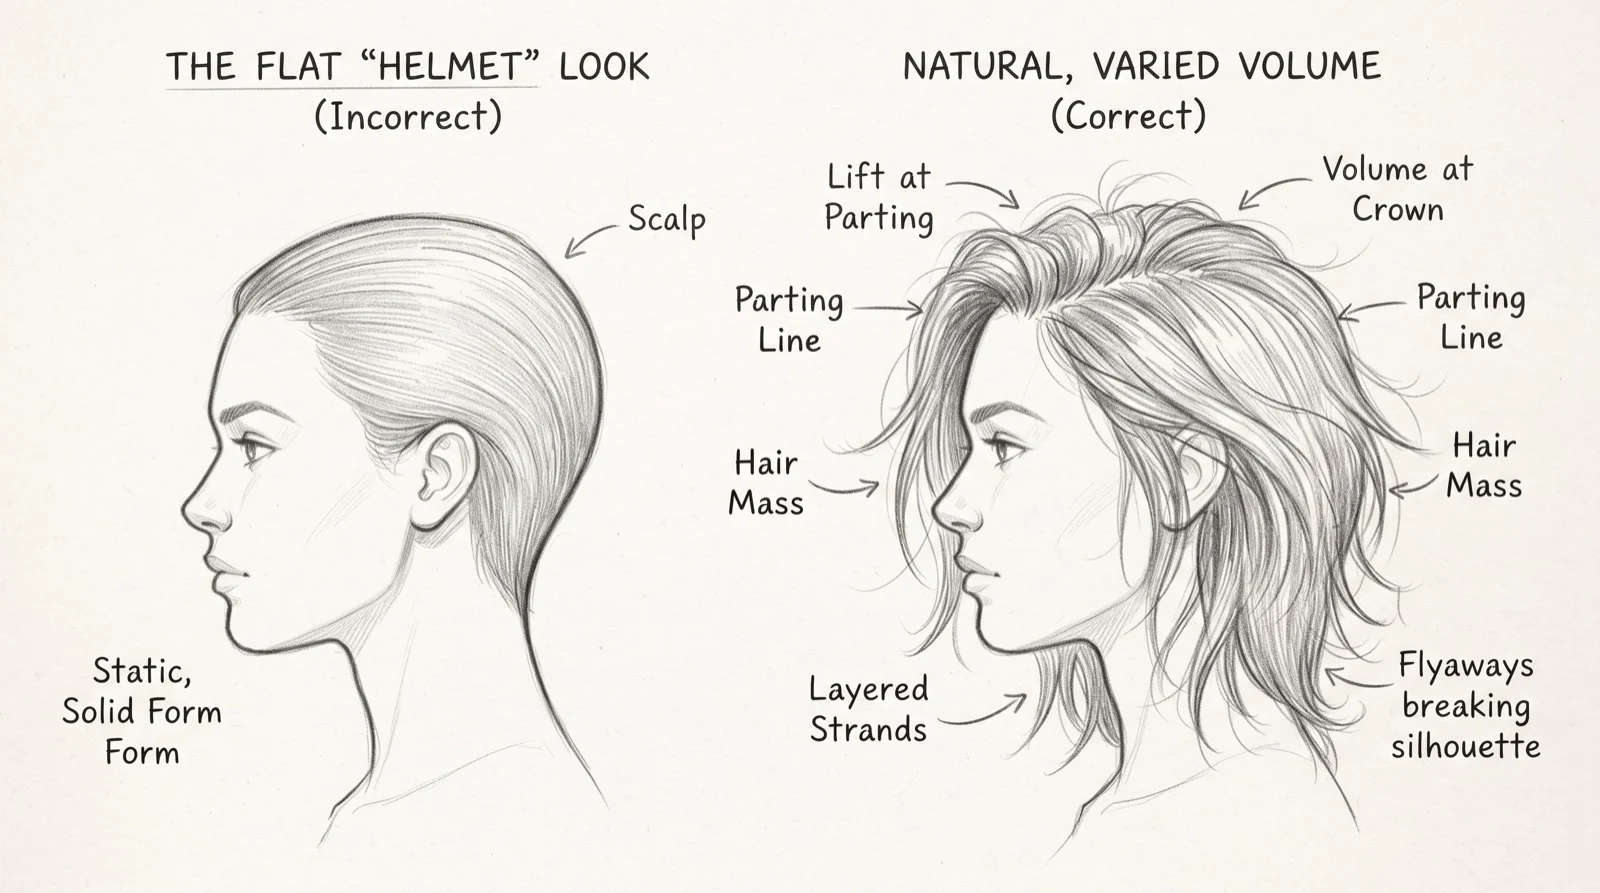
- Mistake 3: same thickness everywhere. The outline is even all around the head, like a helmet. Step 5 fixes it.
What You Need
- A sharp HB pencil for the skull and the clusters.
- A 2B and a 4B pencil for the mid-tones and the darks.
- A kneaded eraser to lift highlights.
- A photo reference with clear light and a visible parting.
Pick a reference with a simple hairstyle first. You will get better results on long straight hair or a loose ponytail.
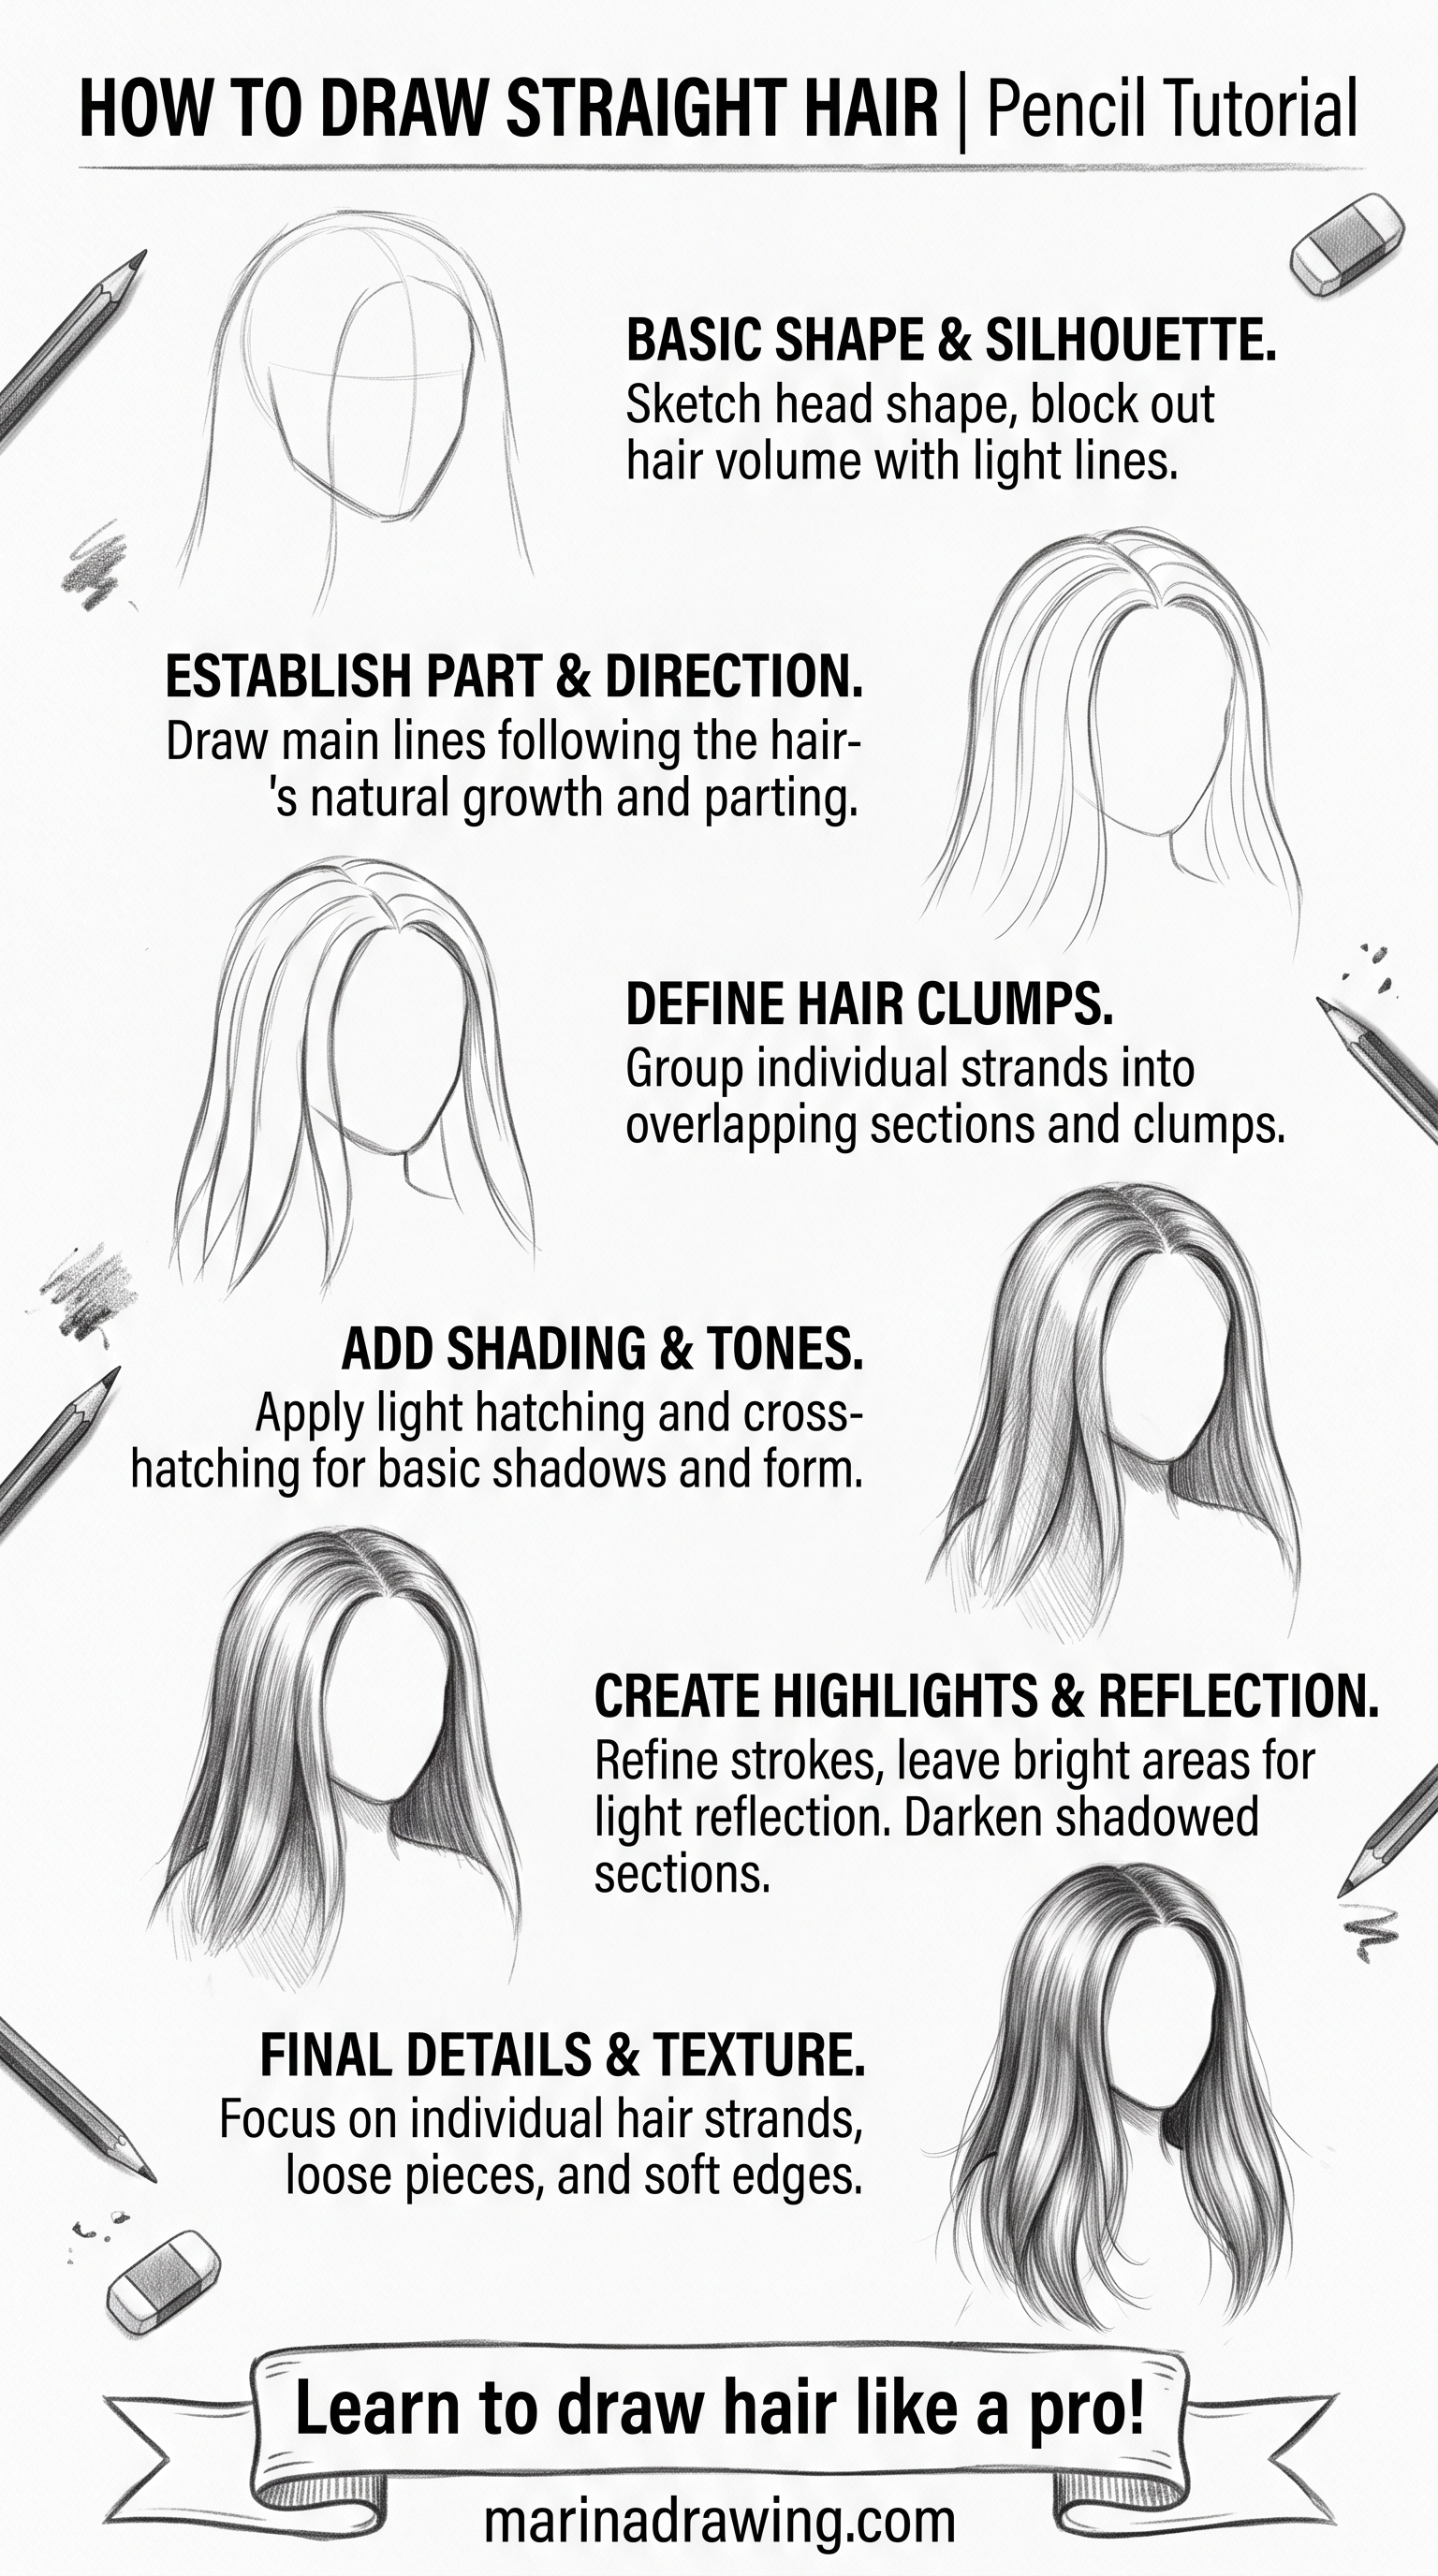
How to Draw Hair Step by Step
42 hours of pencil drawing training, lifetime access
The video course I point plateaued students to — full lessons on portraits, hands, and realistic shading, not another short tutorial.
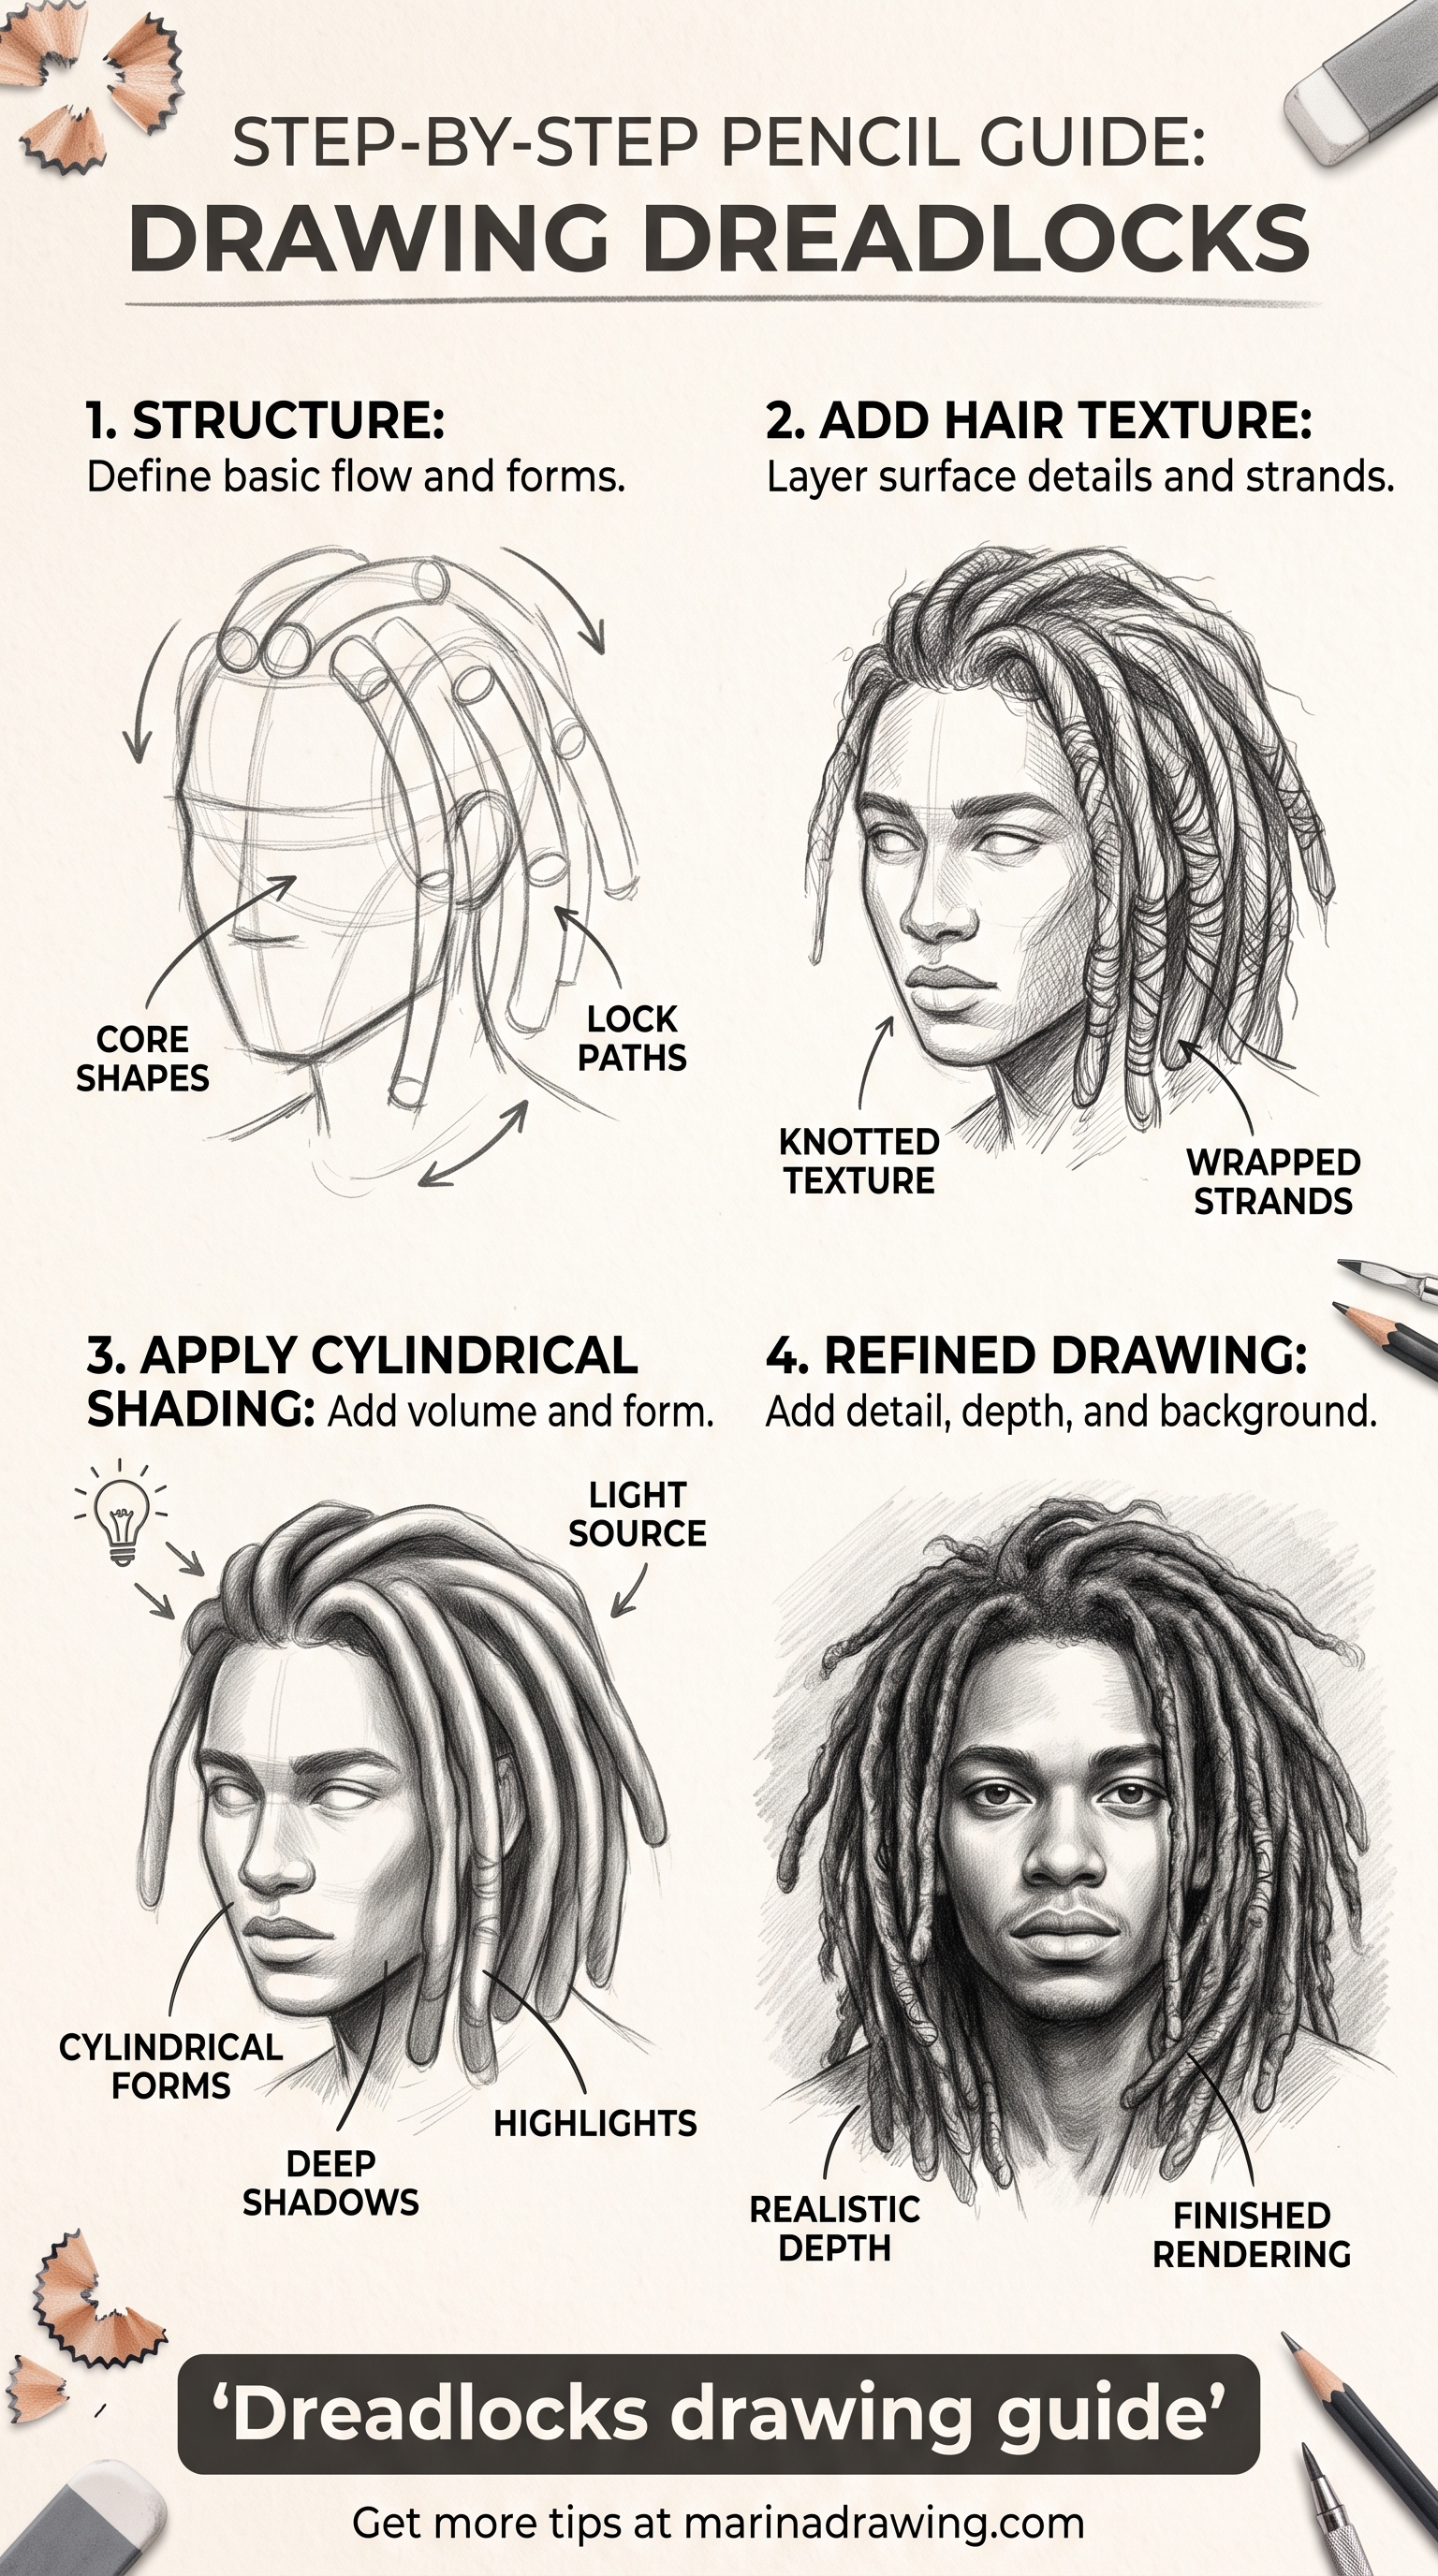
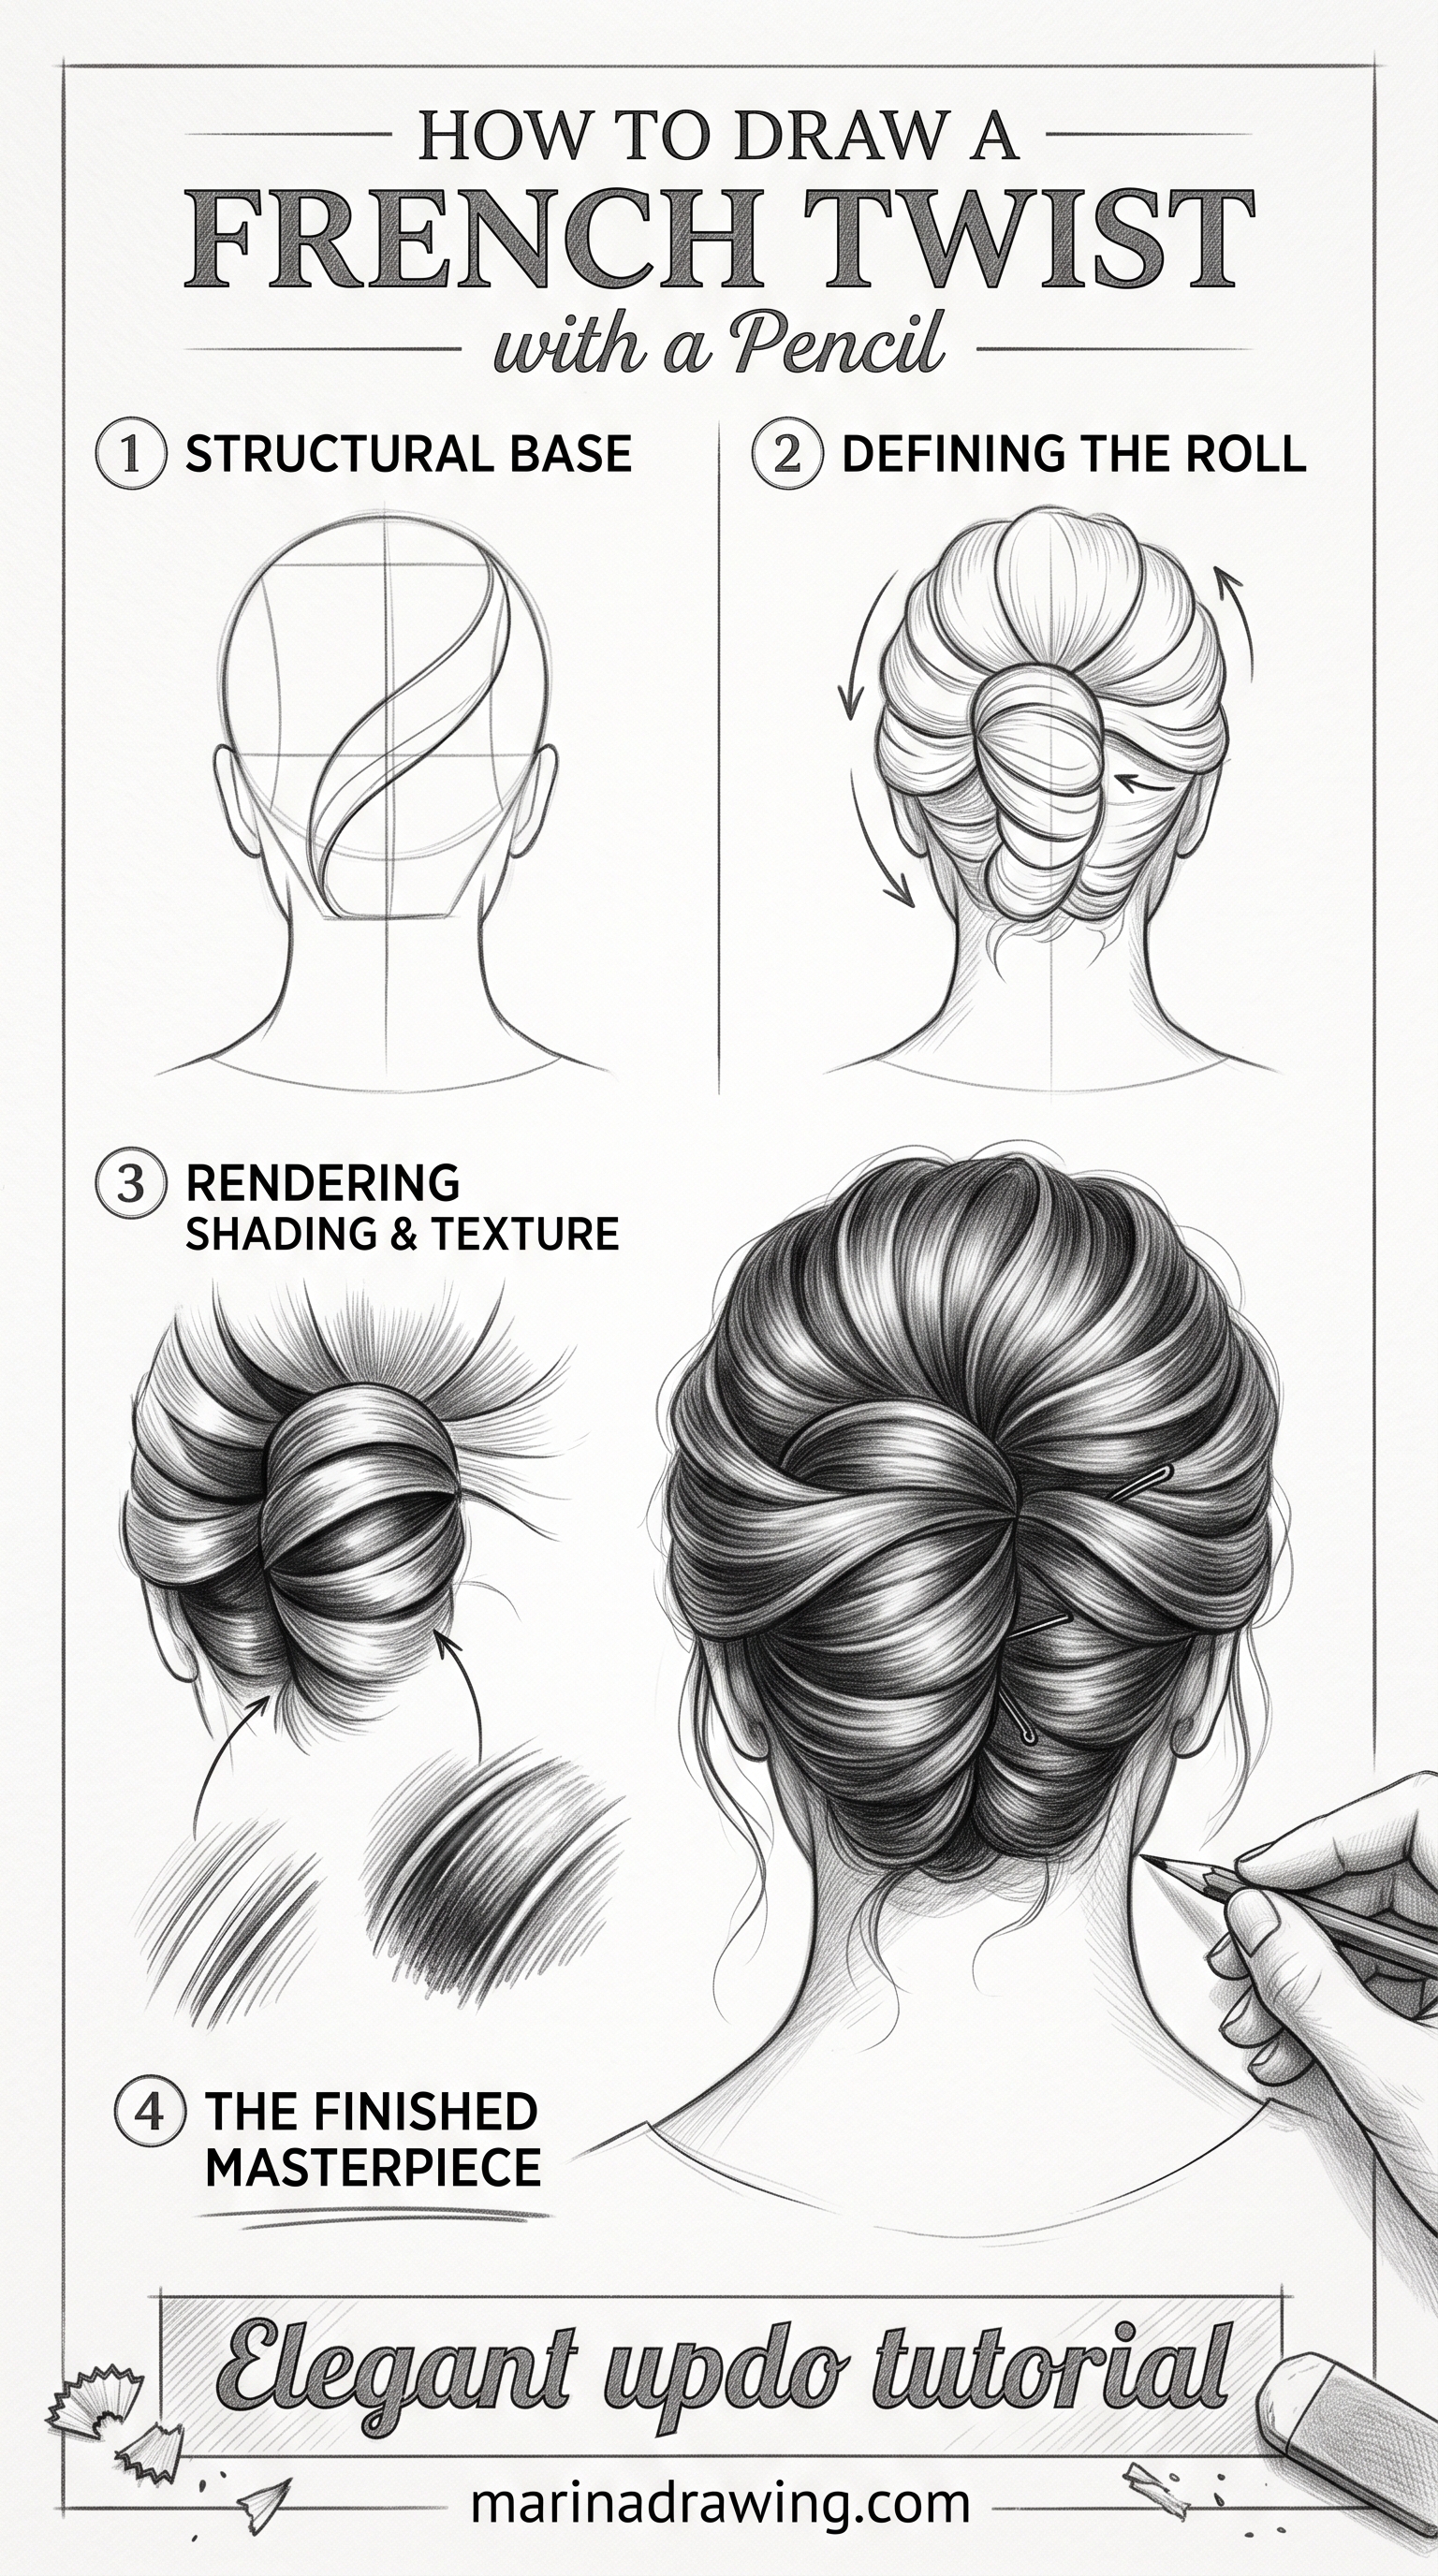
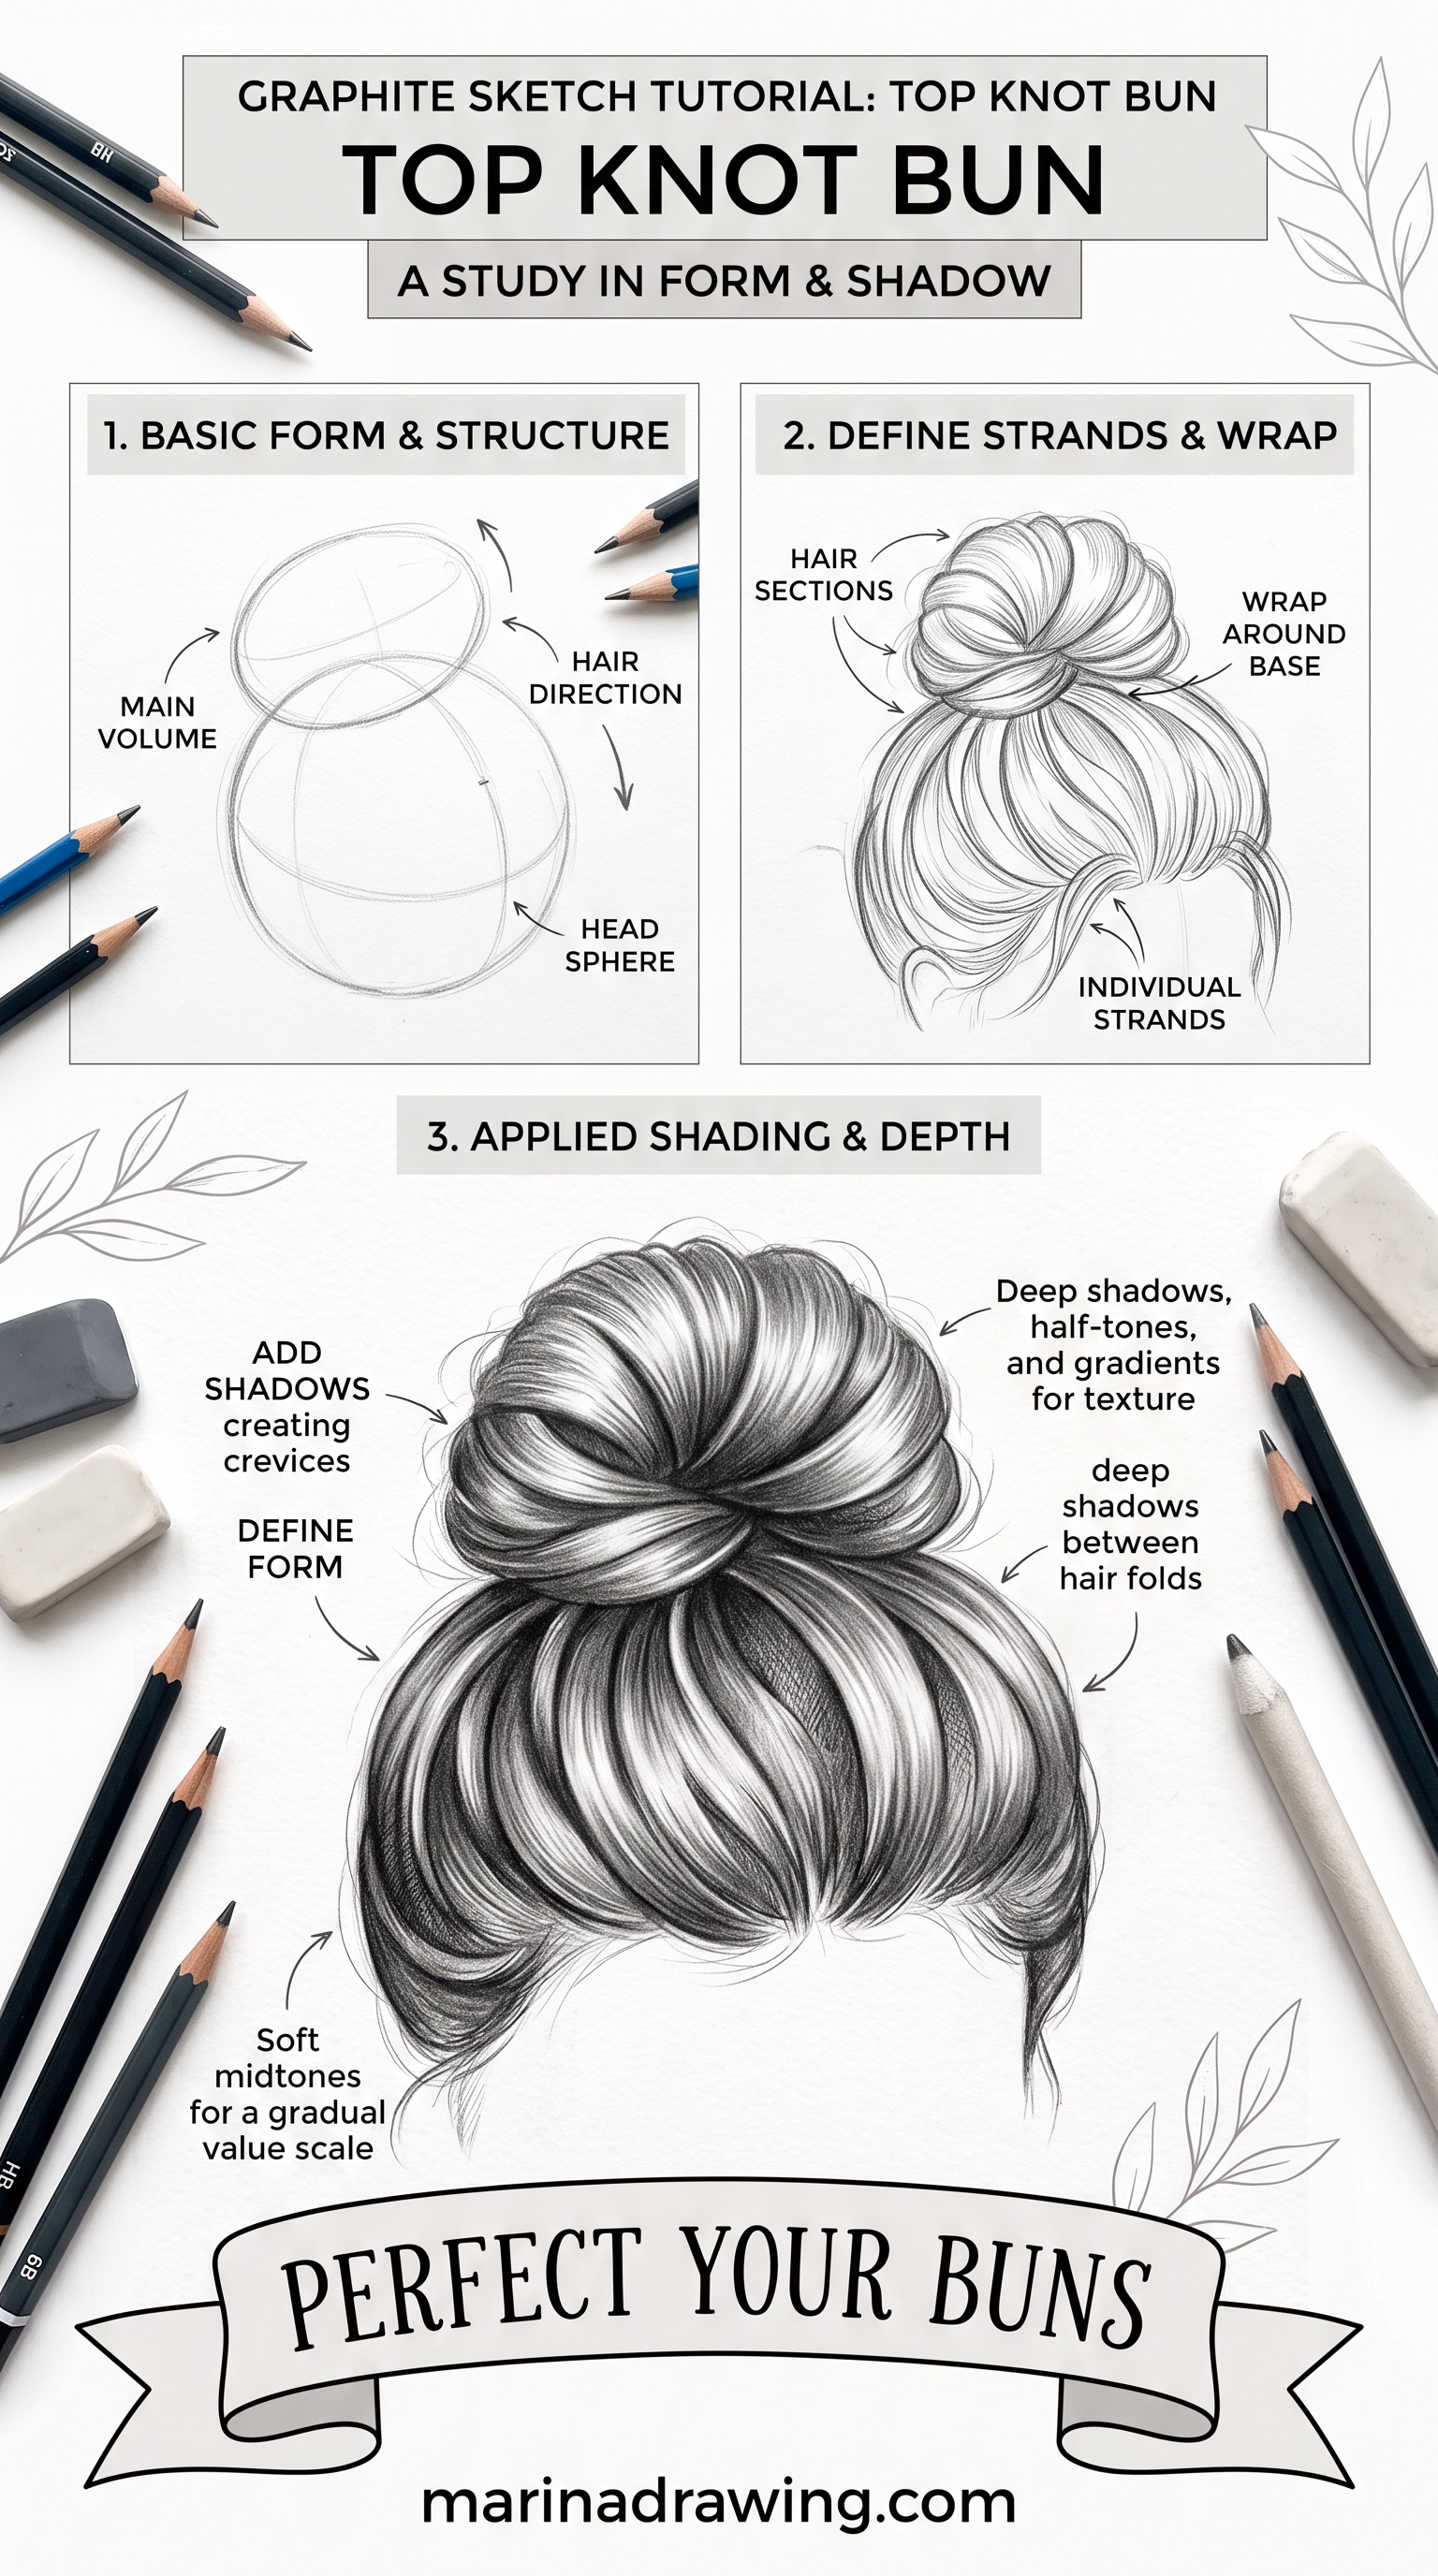
1. Sketch the Skull Shape, Not the Hairstyle
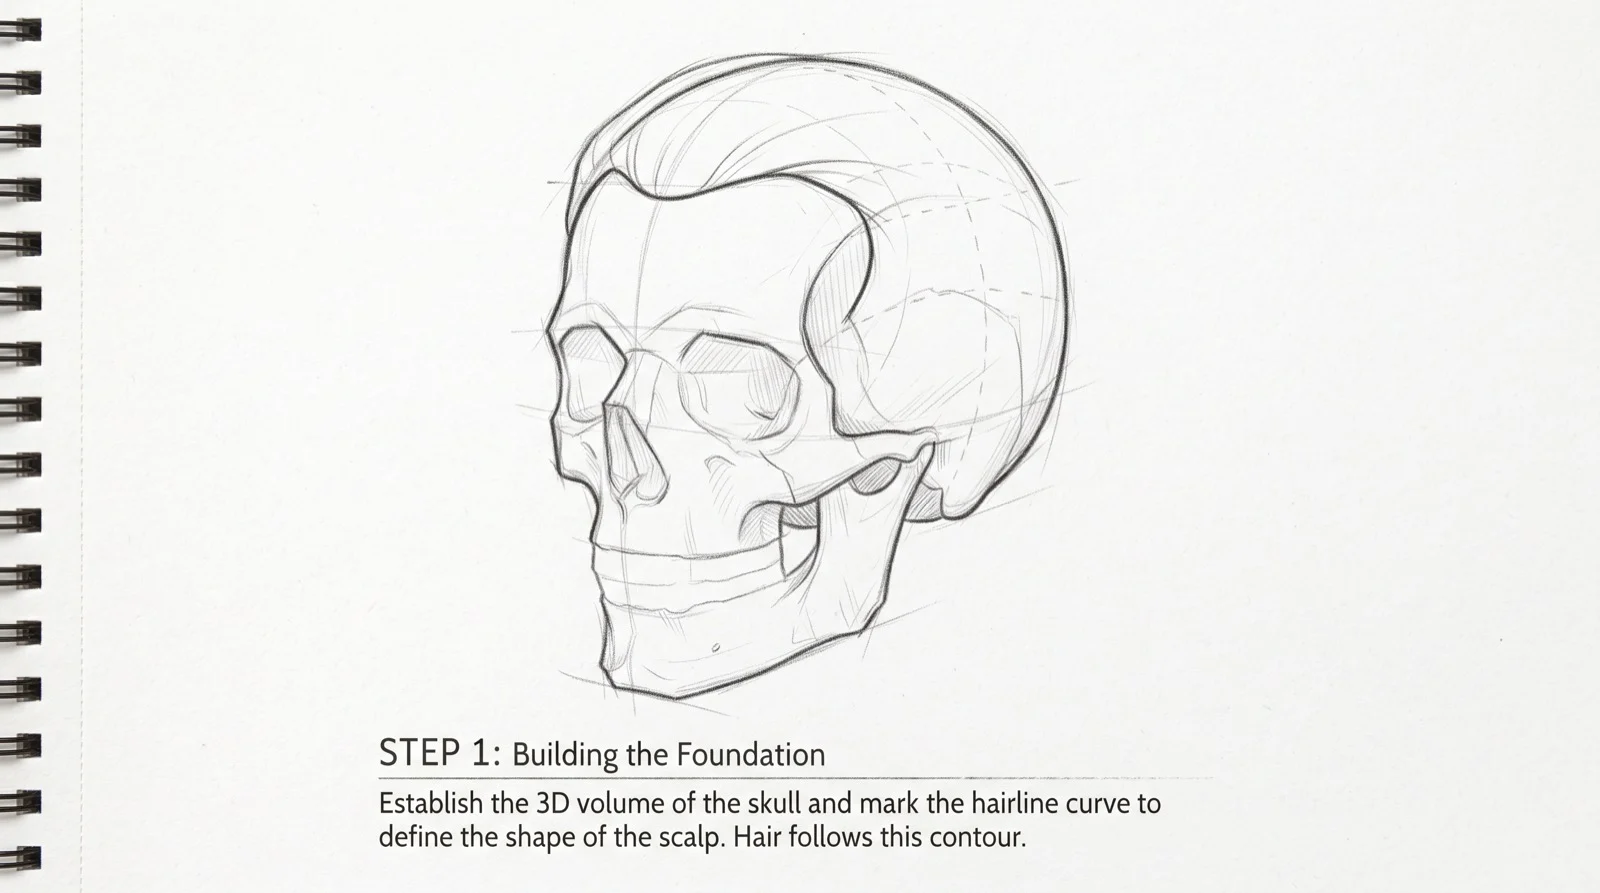
Draw the head as a simple sphere with a jaw attached. Do it before you think about hair at all.
Mark the hairline as a light curved line about a third of the way down the sphere. It must follow the curve of the skull. It should not sit flat like the edge of a cap.
Skip this and every hairstyle looks pasted onto a flat surface. This is the step most tutorials jump past. It is the one that fixes the flat look.
- Keep the lines light so you can erase them later.
- You should draw the sphere larger than the face. Hair adds thickness on top and at the back.
- Mark the parting as a curved line on the sphere, not a straight one.
2. Break the Hair Into 3–5 Large Clusters
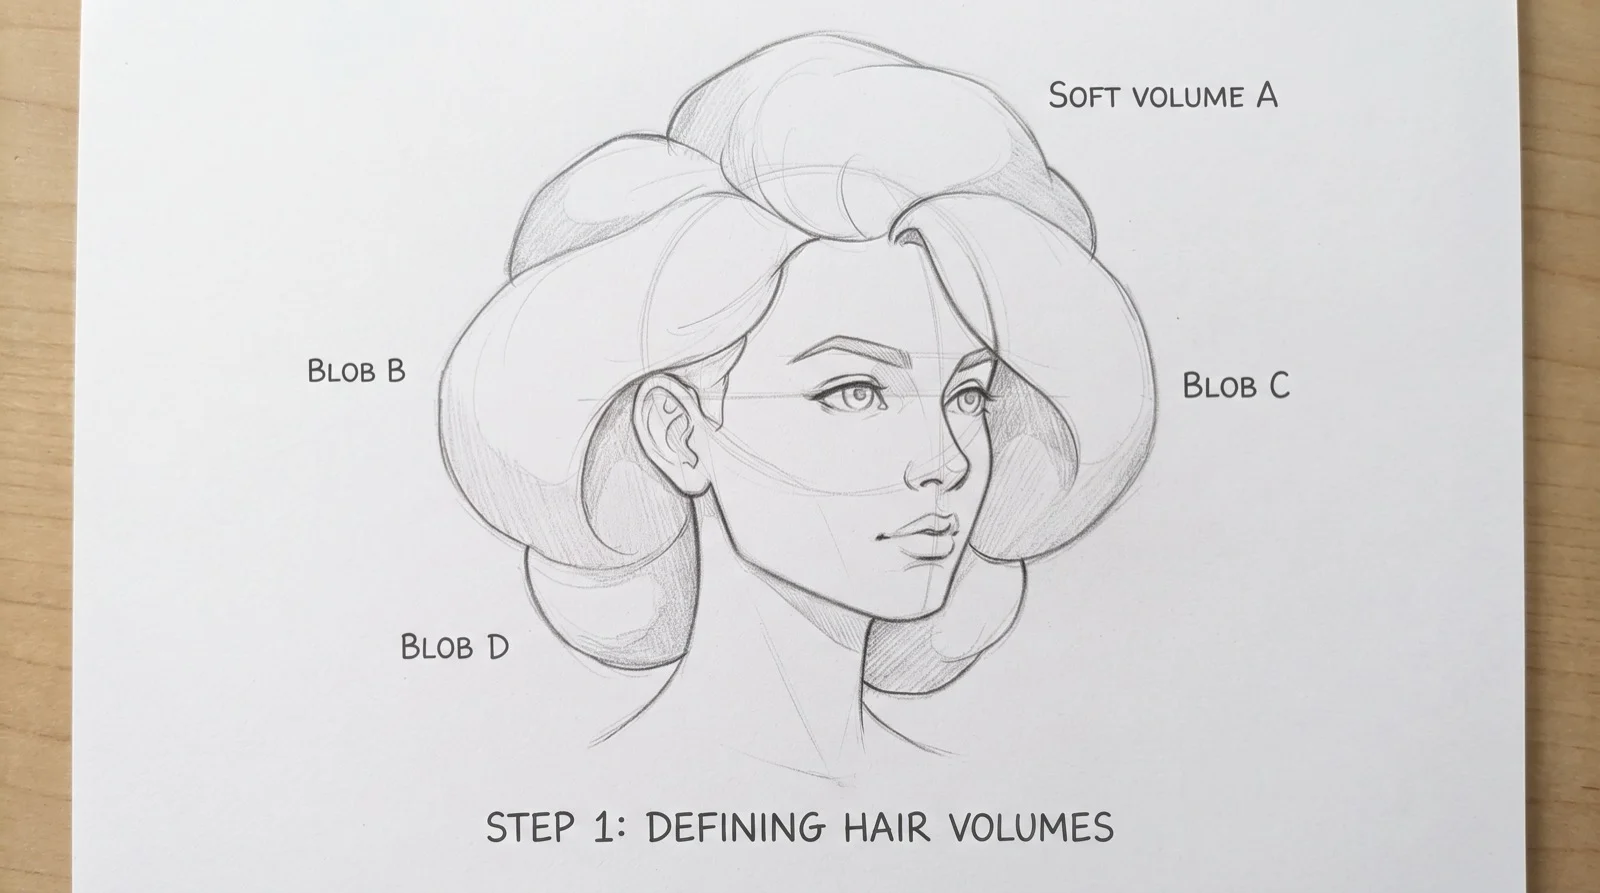
Divide the whole hairstyle into big shapes before you draw a strand. A top mass, two side masses and a back mass is usually enough.
Draw them as soft overlapping blobs. Think of puzzle pieces lying on the skull. Each piece is thicker at the root and tapers at the tip.
The eye does not see hundreds of hairs. It sees a handful of moving shapes. Individual strands at this stage give you the straw look.
- Aim for 3–5 clusters for a normal hairstyle.
- Let the clusters overlap, so one tucks under the next.
- You can squint at your reference. The shapes you still see are your clusters.
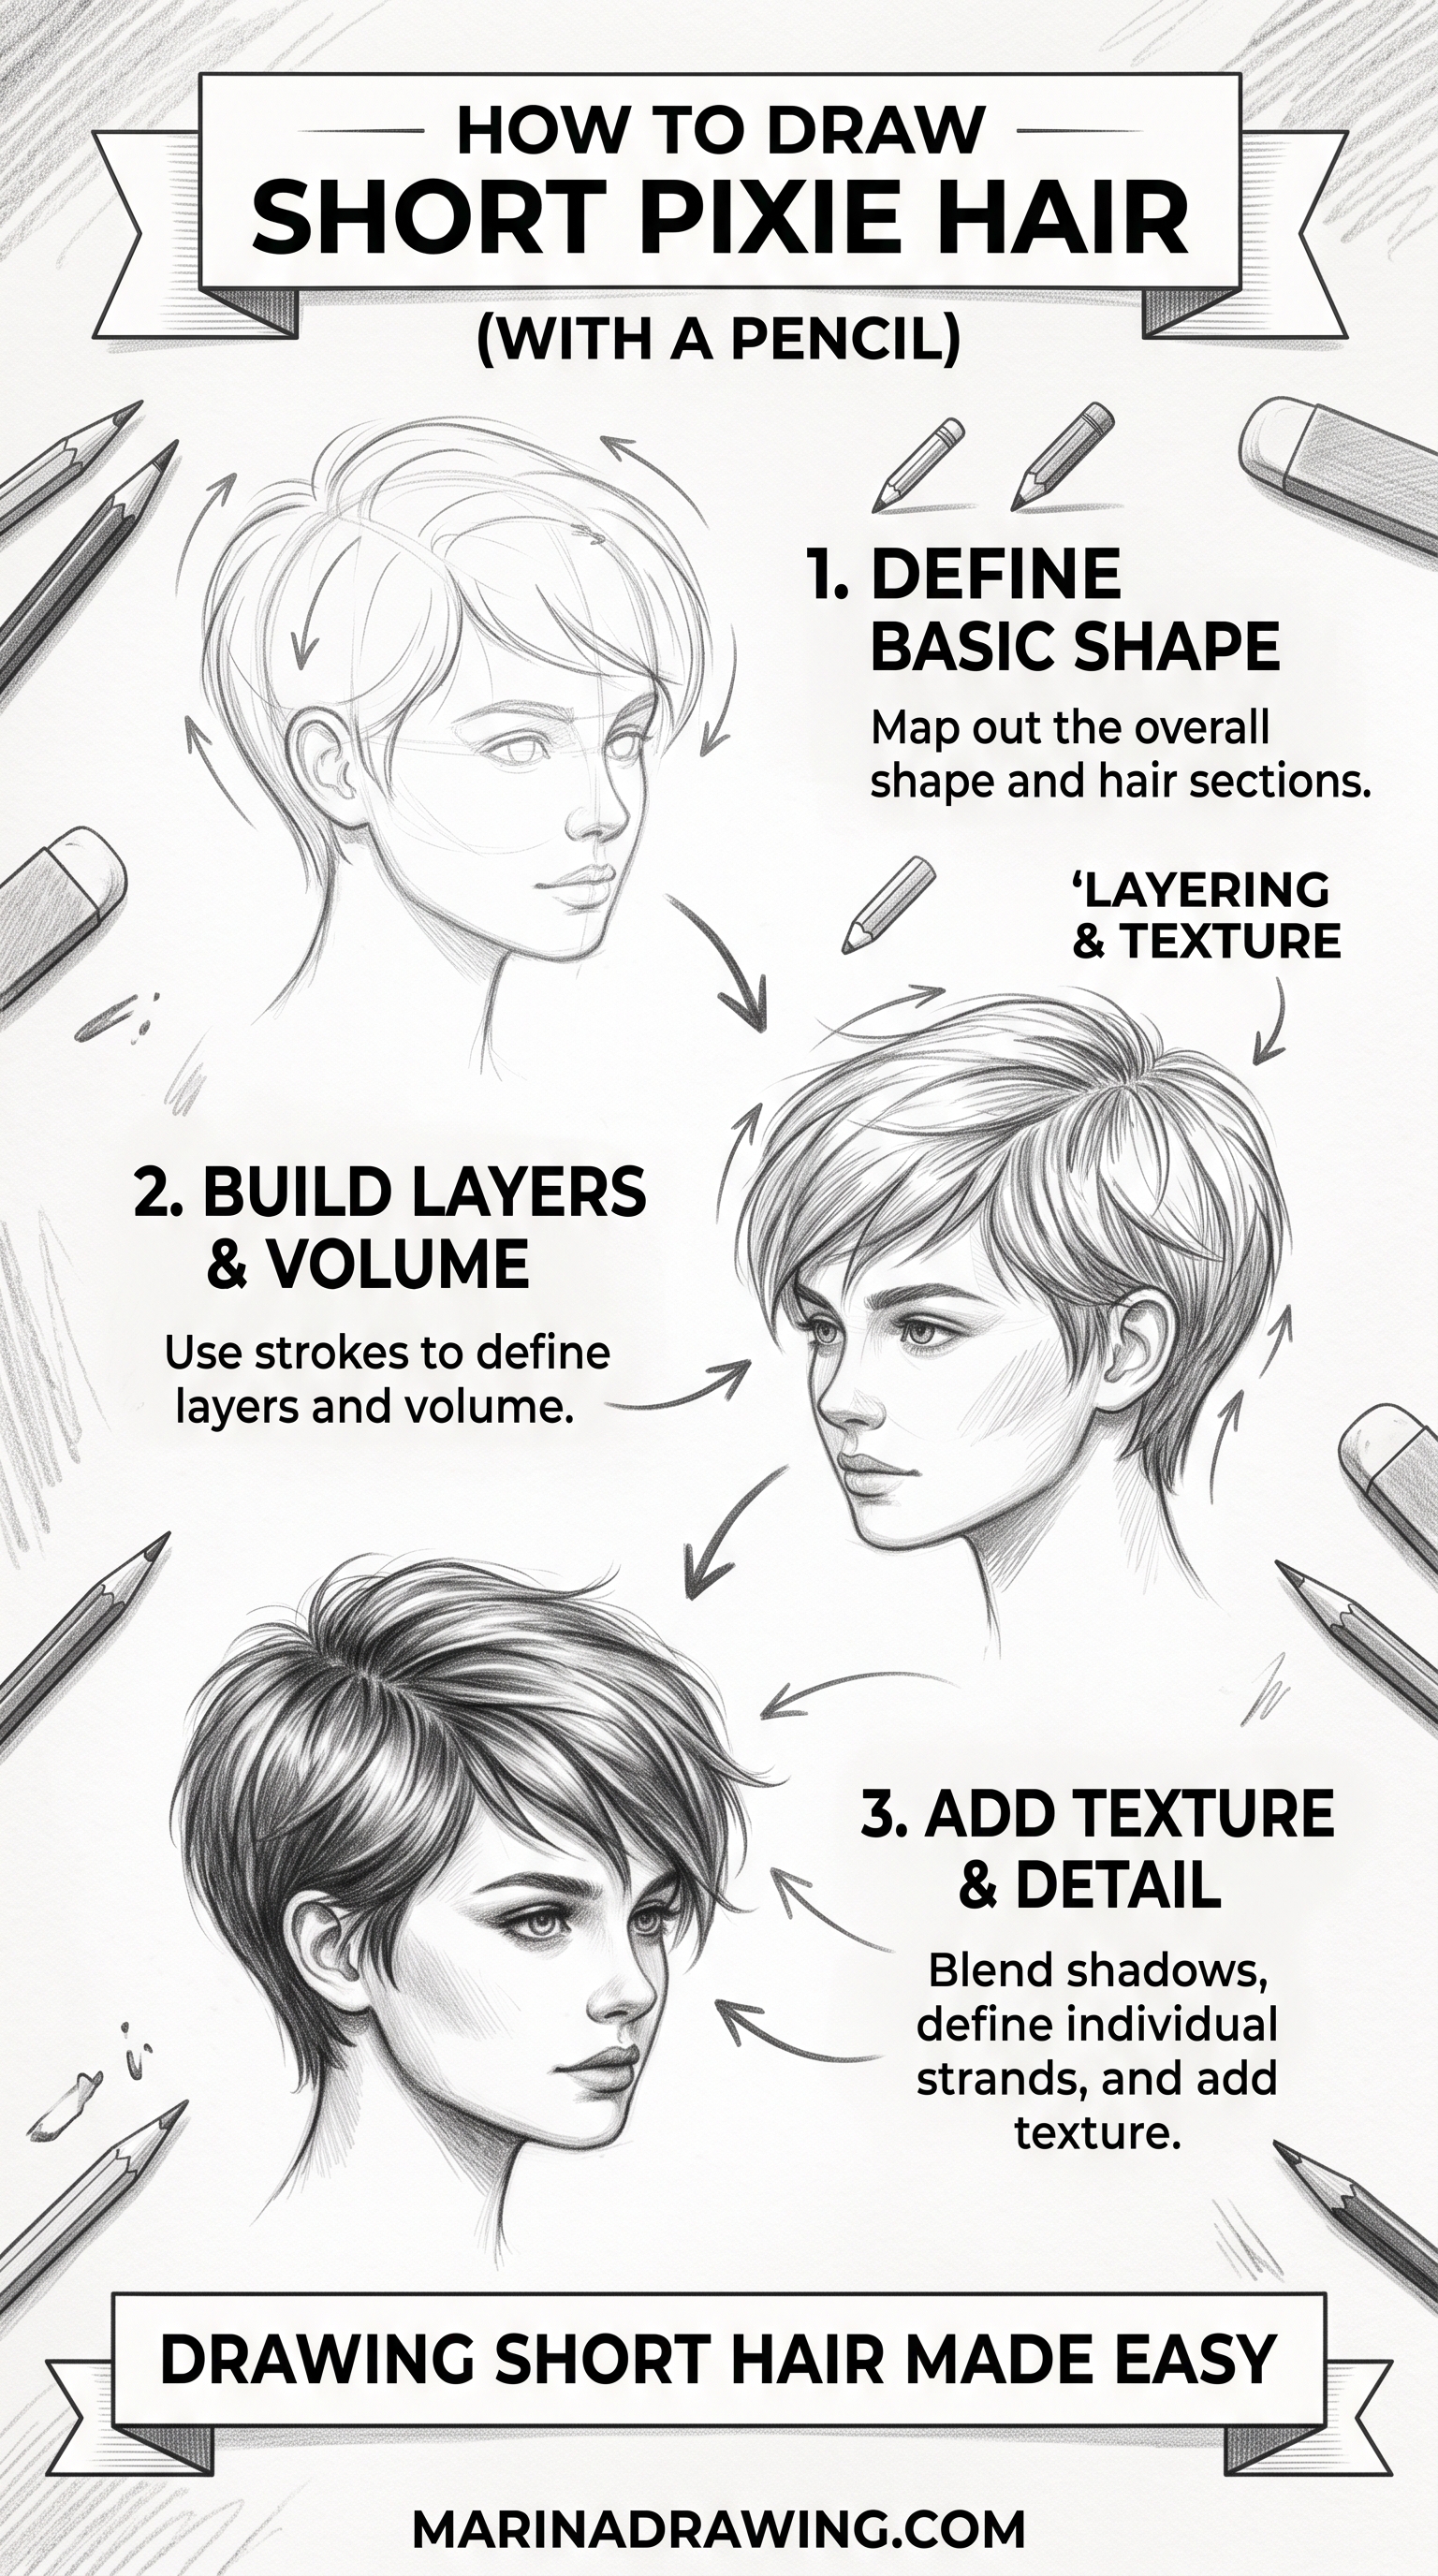
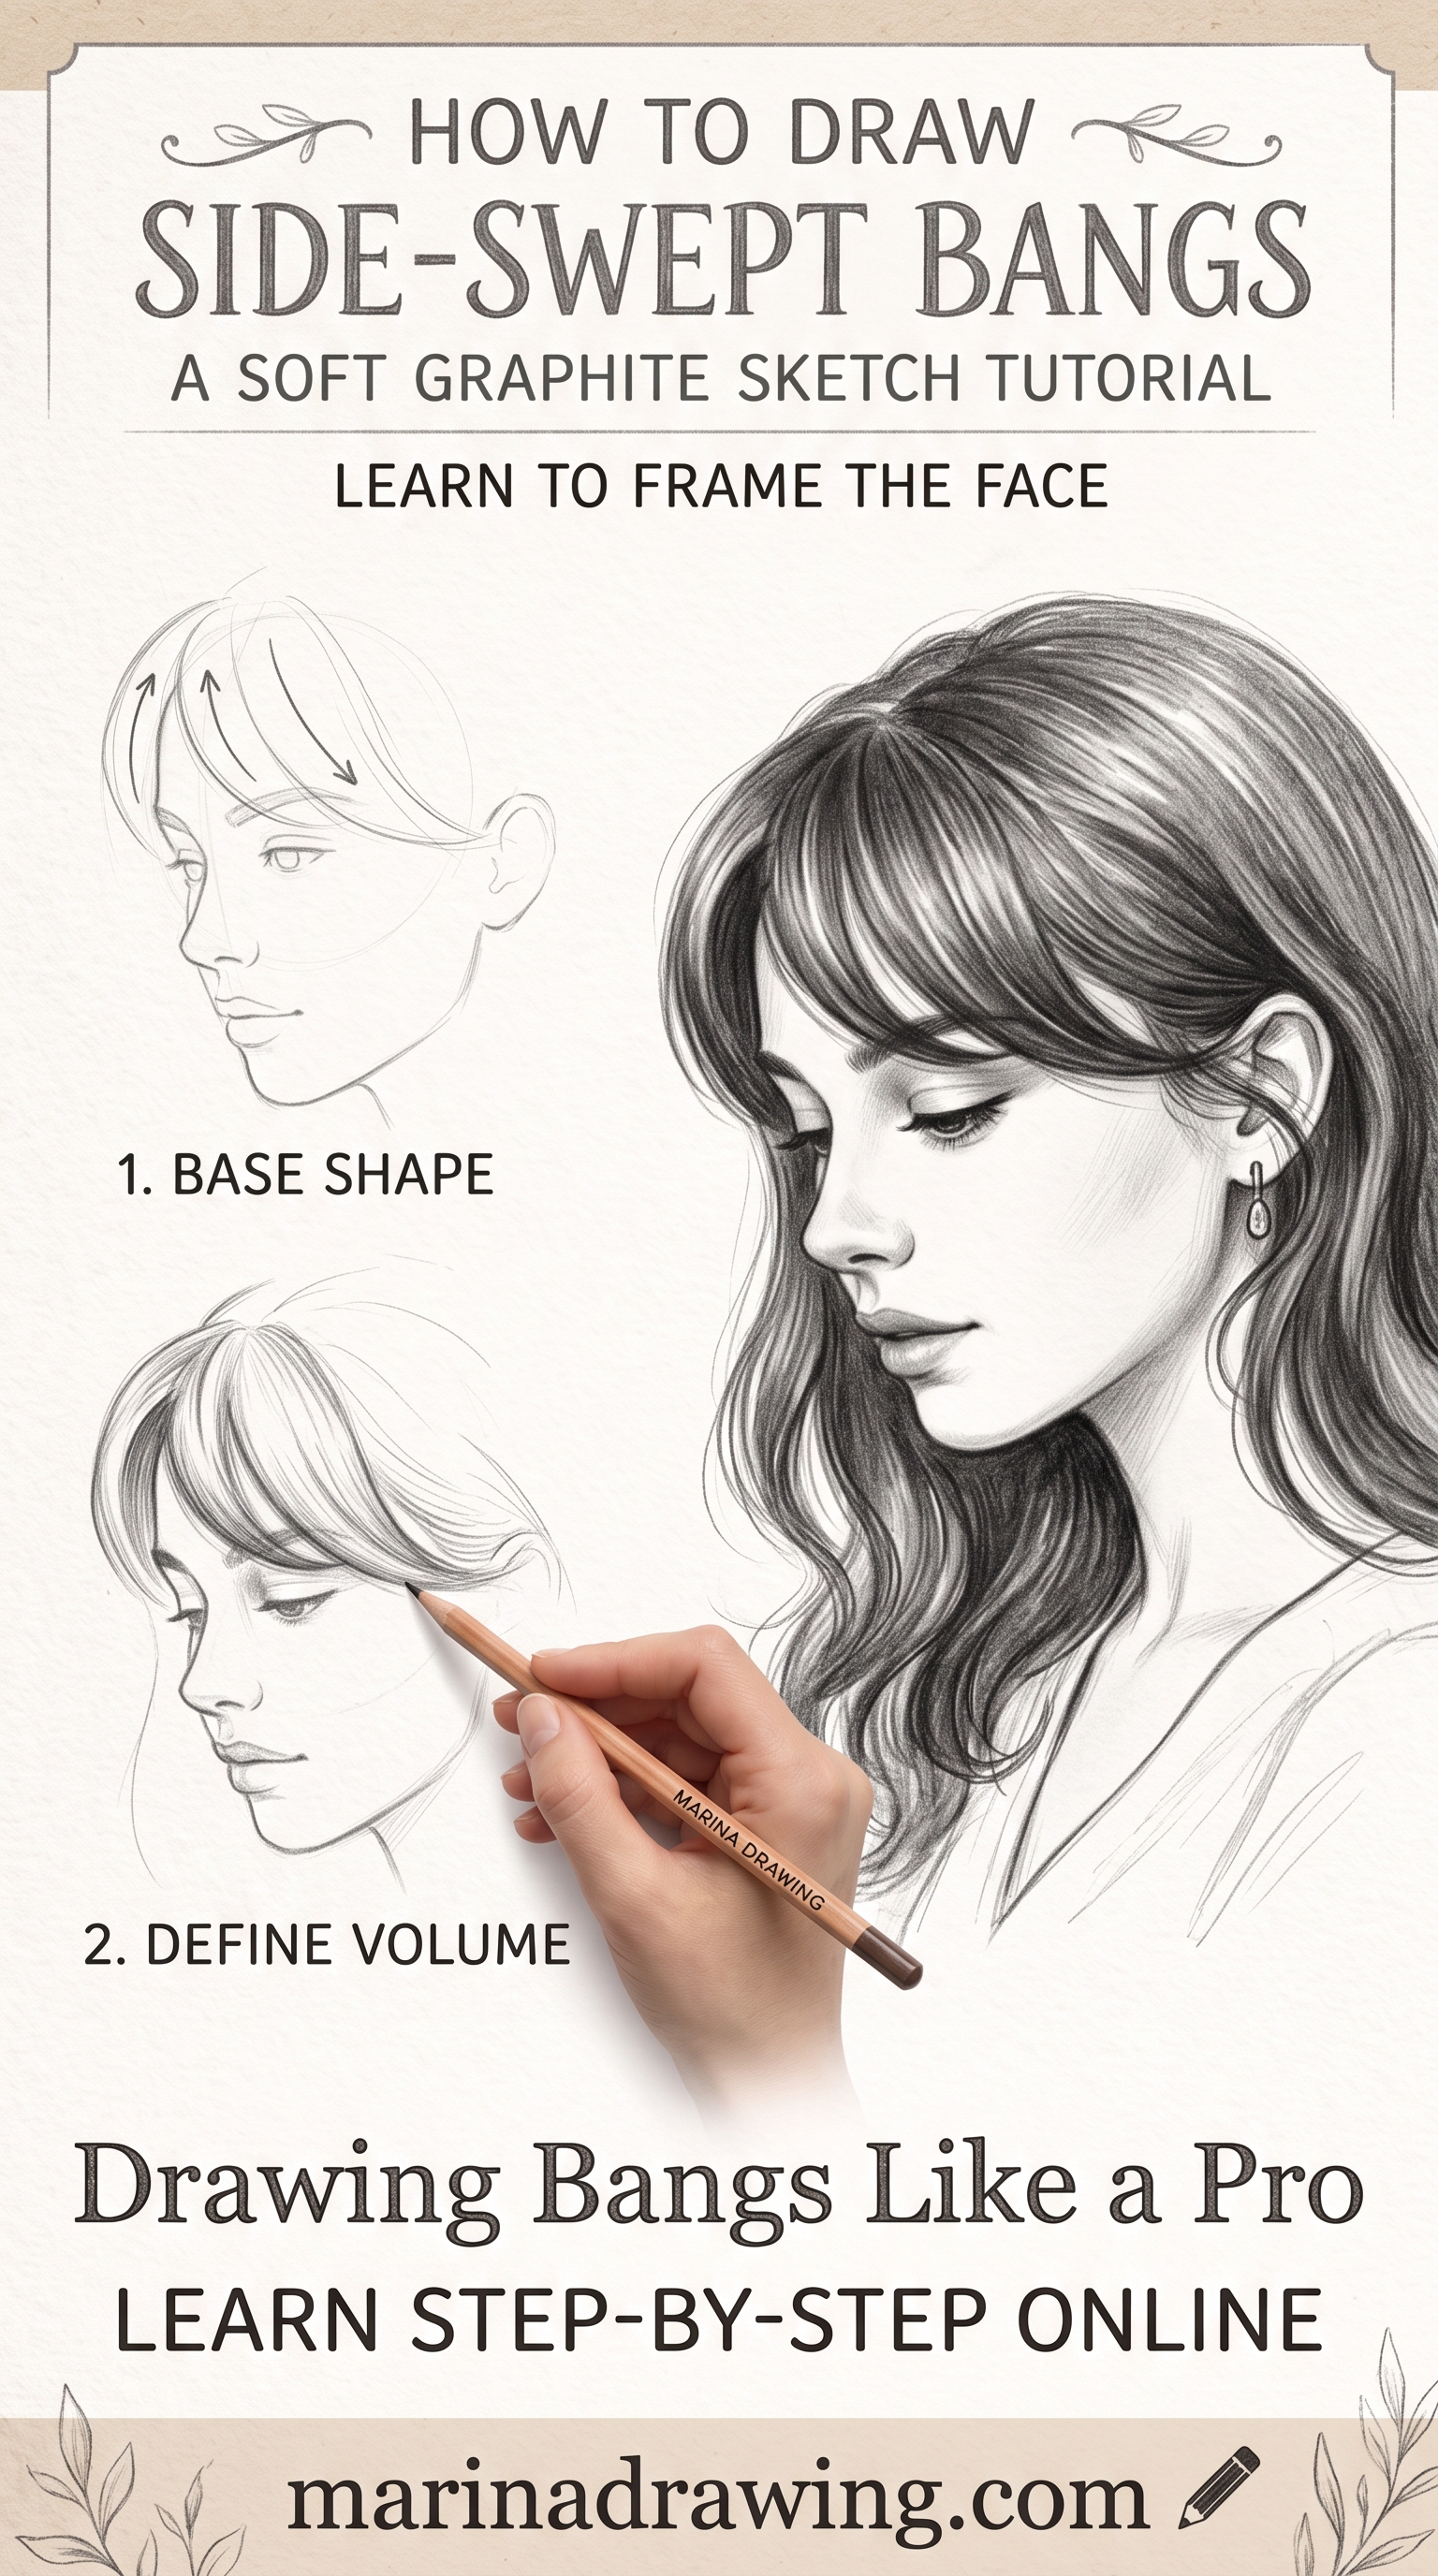
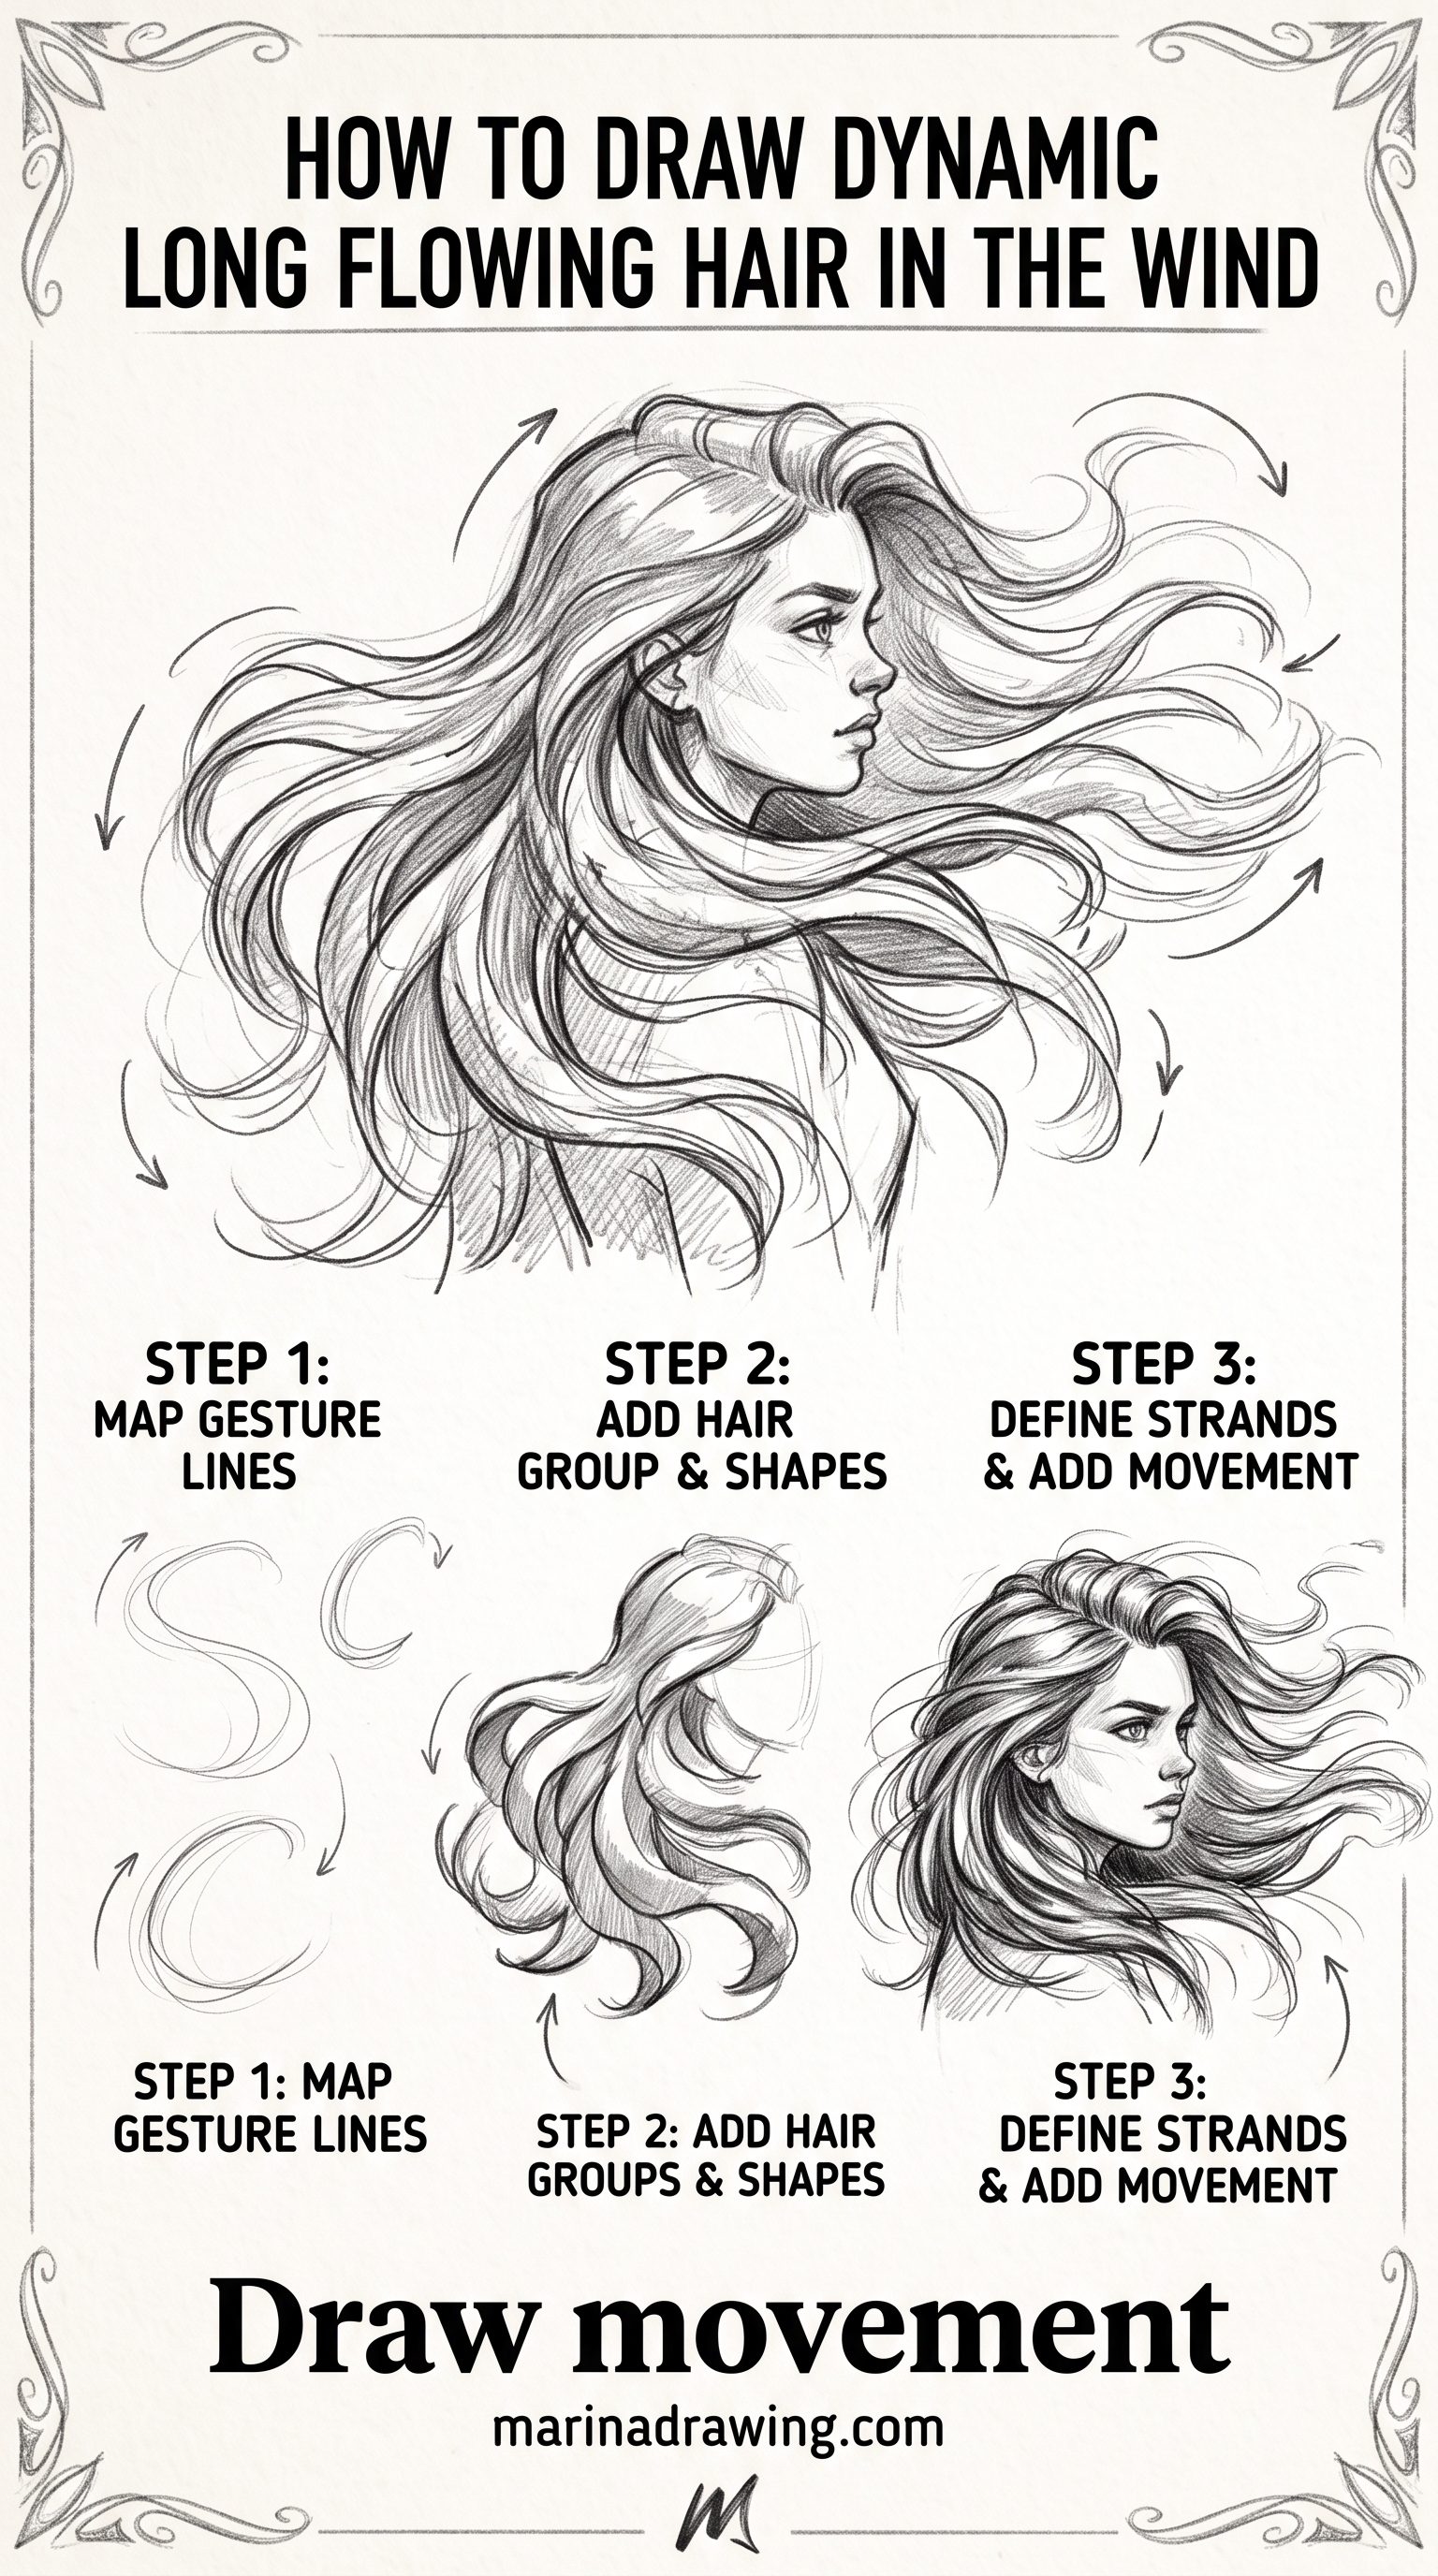
3. Draw Direction Lines Through Each Cluster
Inside each cluster, draw 3–4 long curved lines. They show which way that section of hair flows.
The lines follow gravity and the parting. They are not a straight vertical drop.
Direction is what separates hair from grass. It makes the hair move with the head instead of sticking to it.
- Straight hair: long, mostly parallel curves.
- Wavy hair: gentle S-curves.
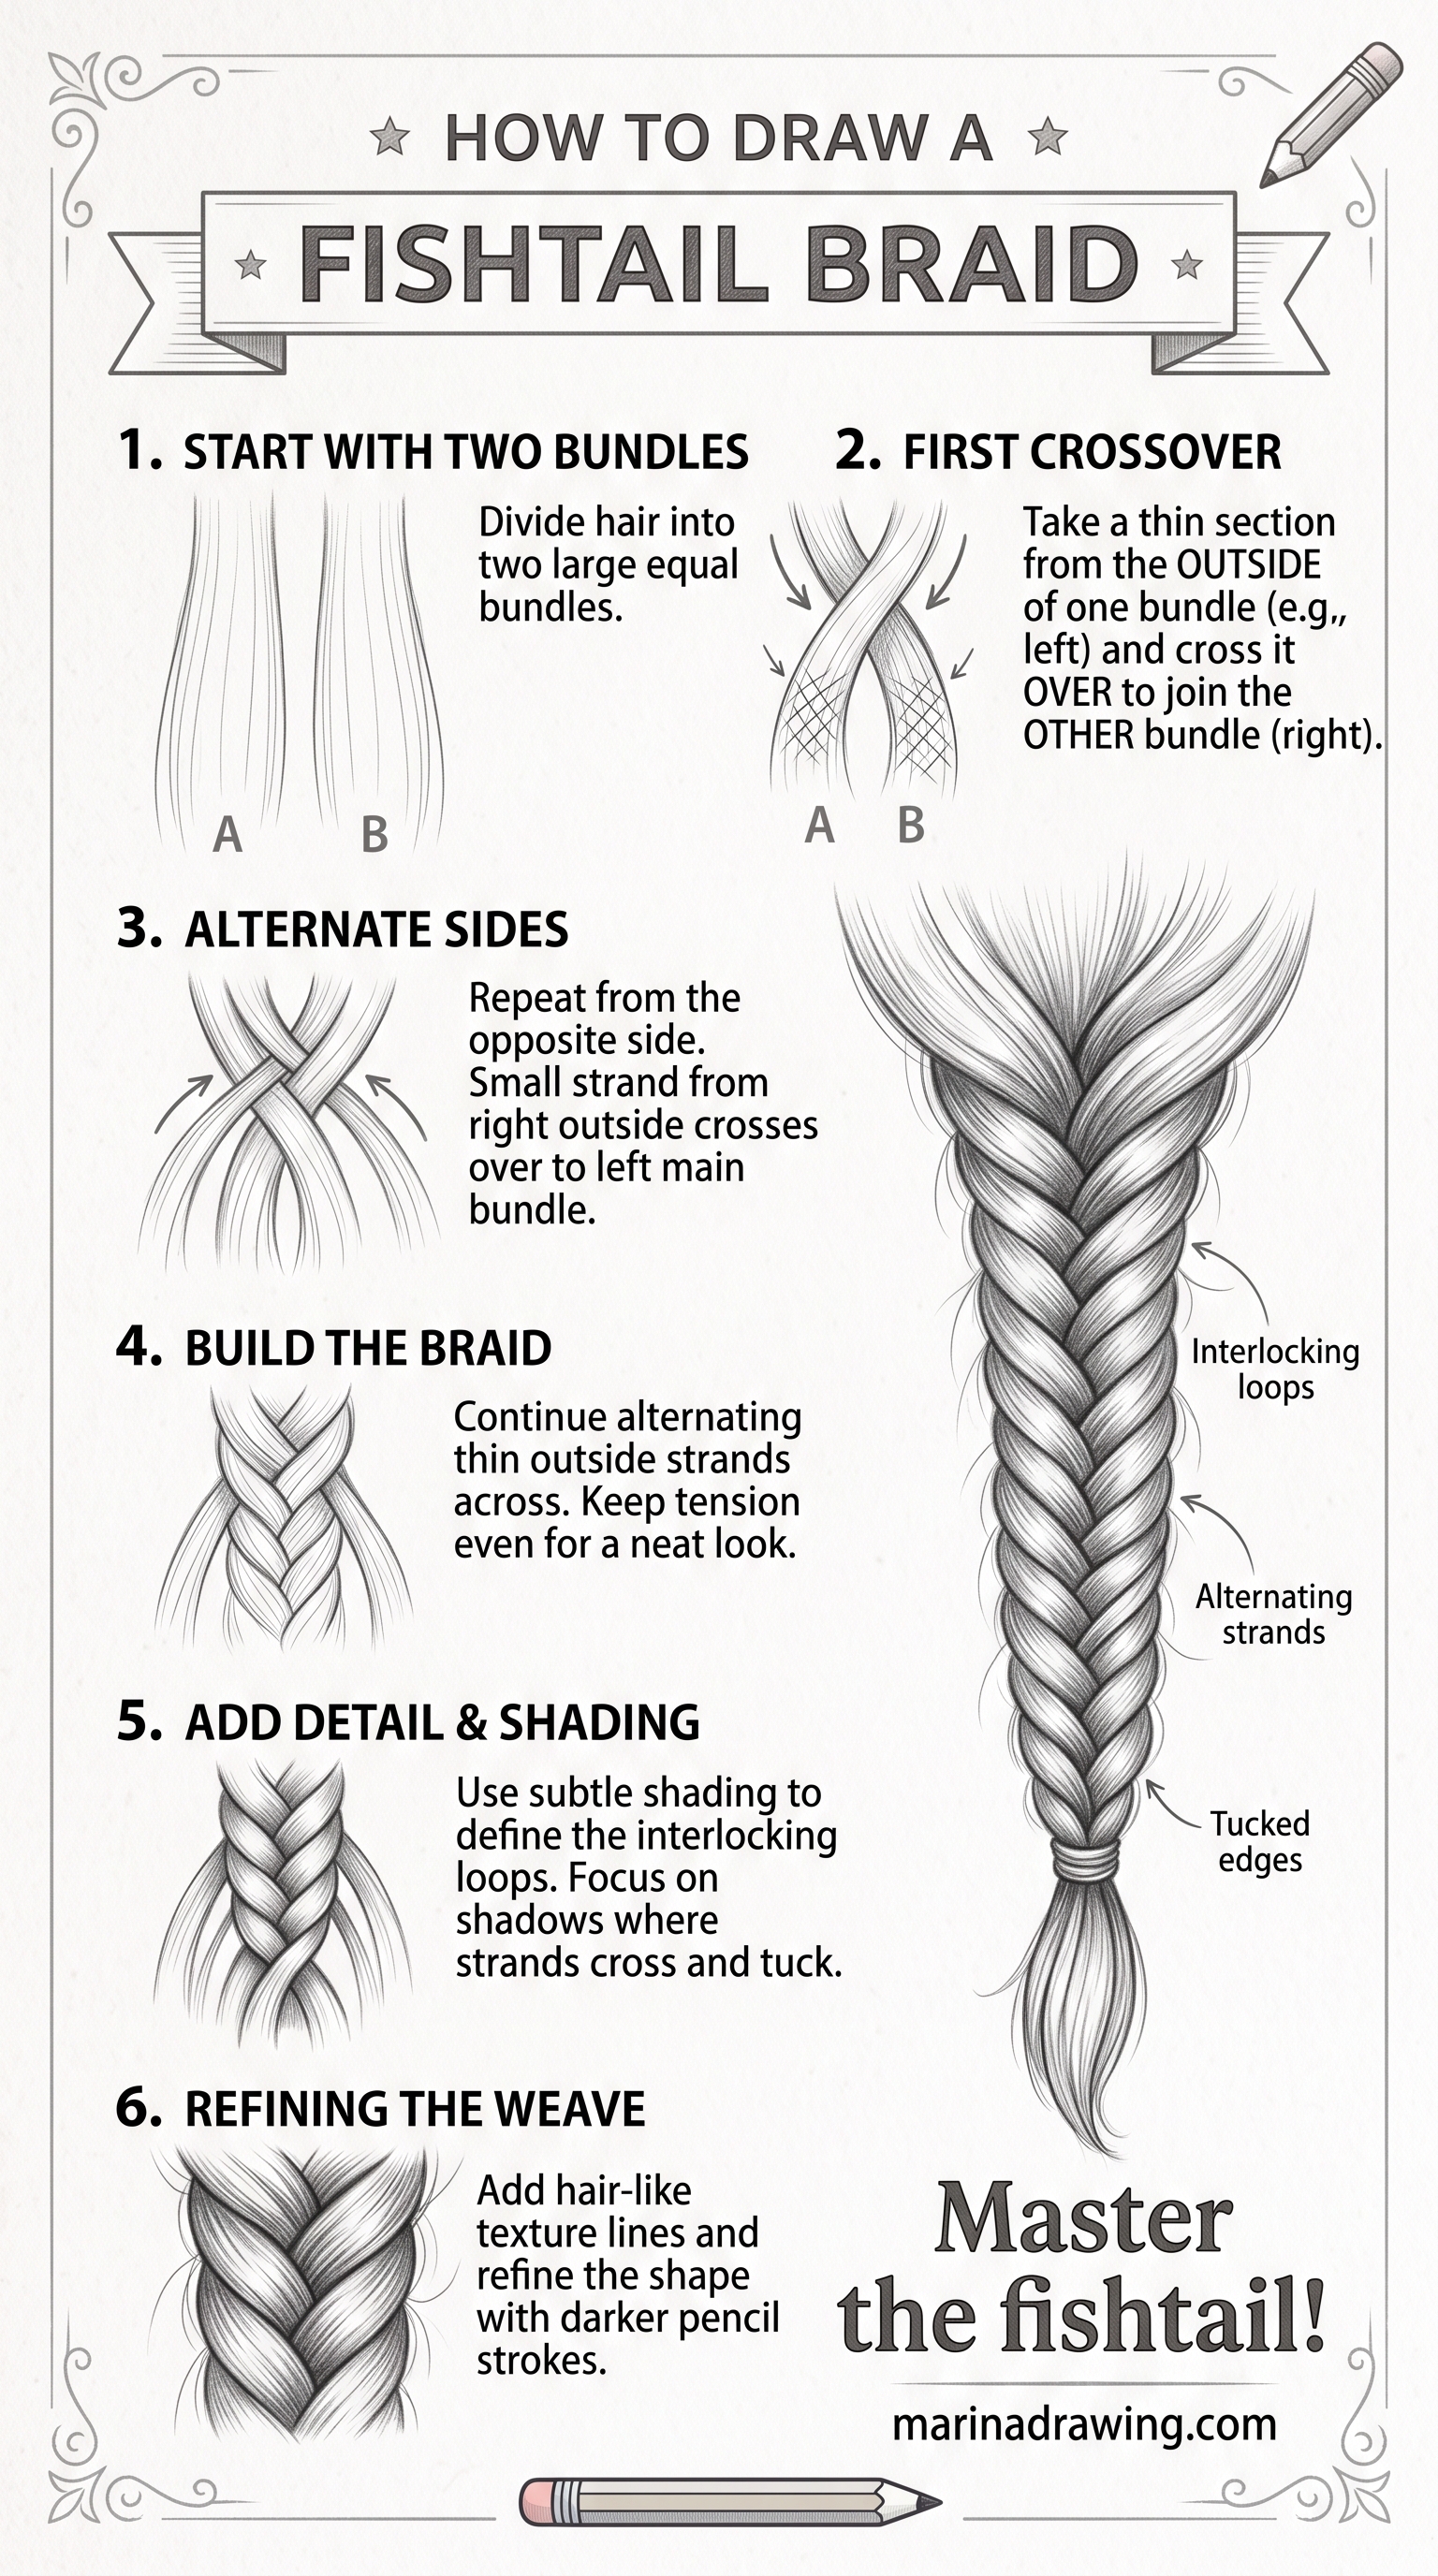
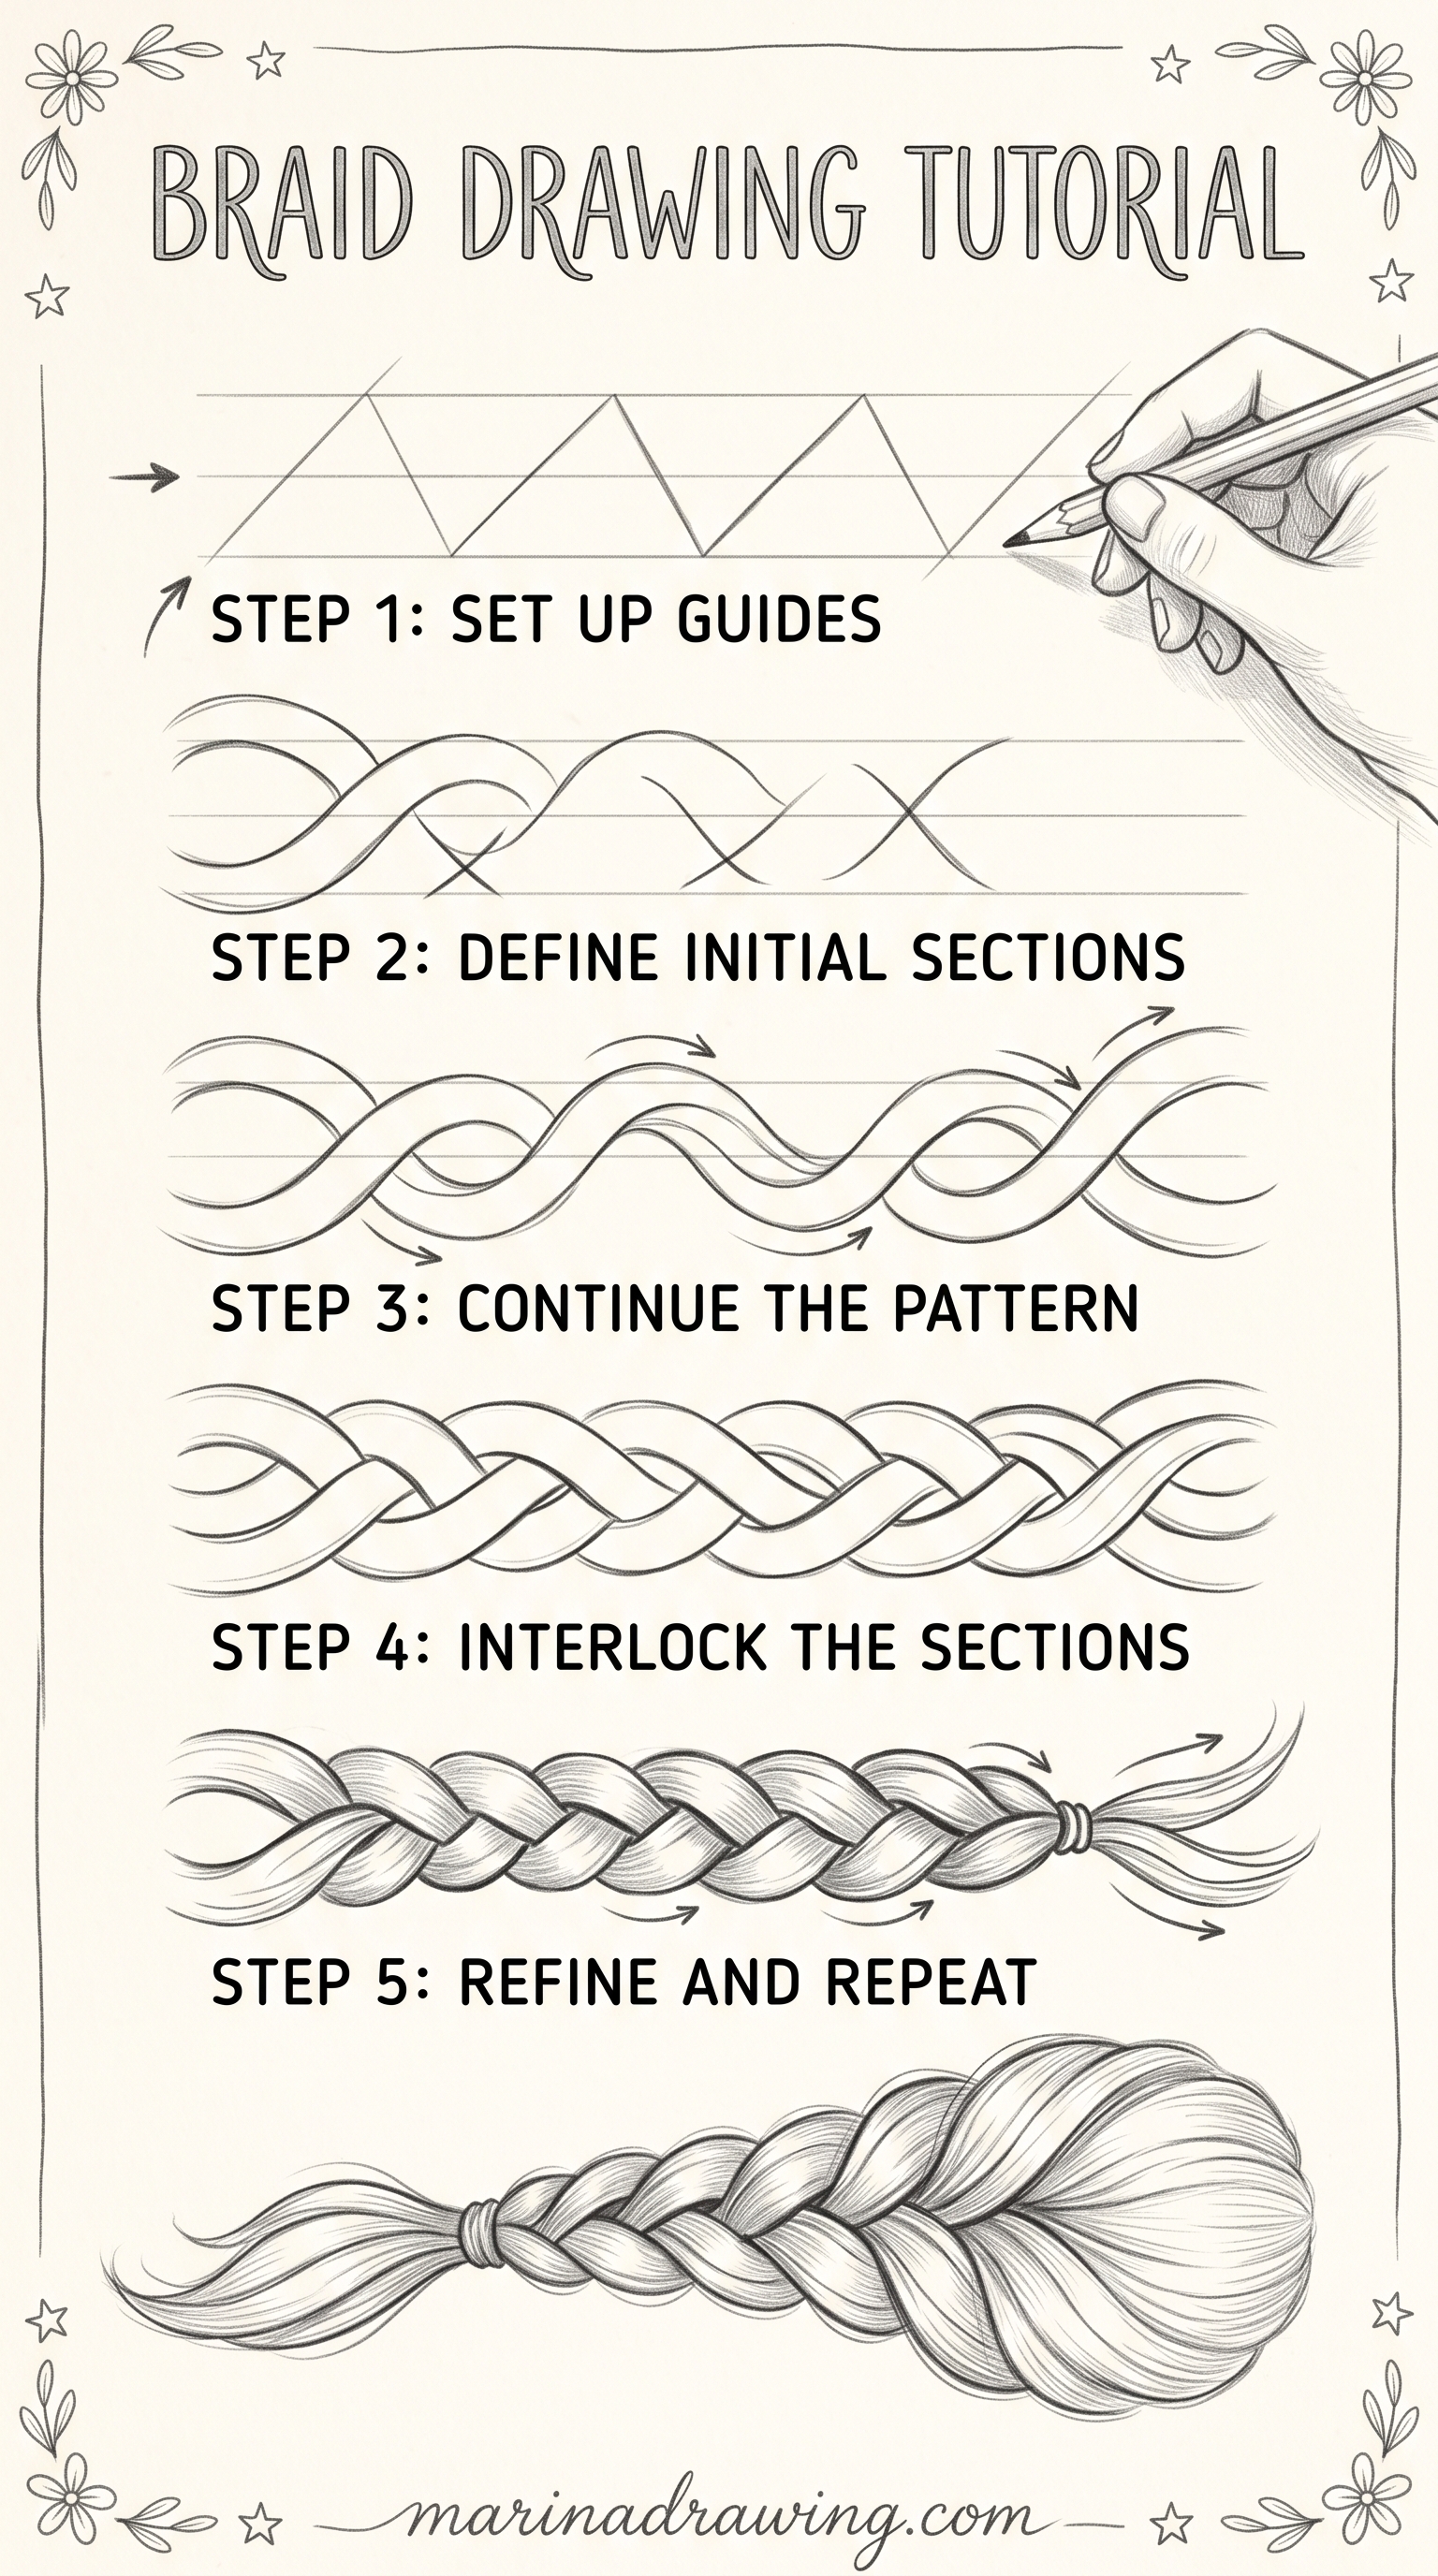
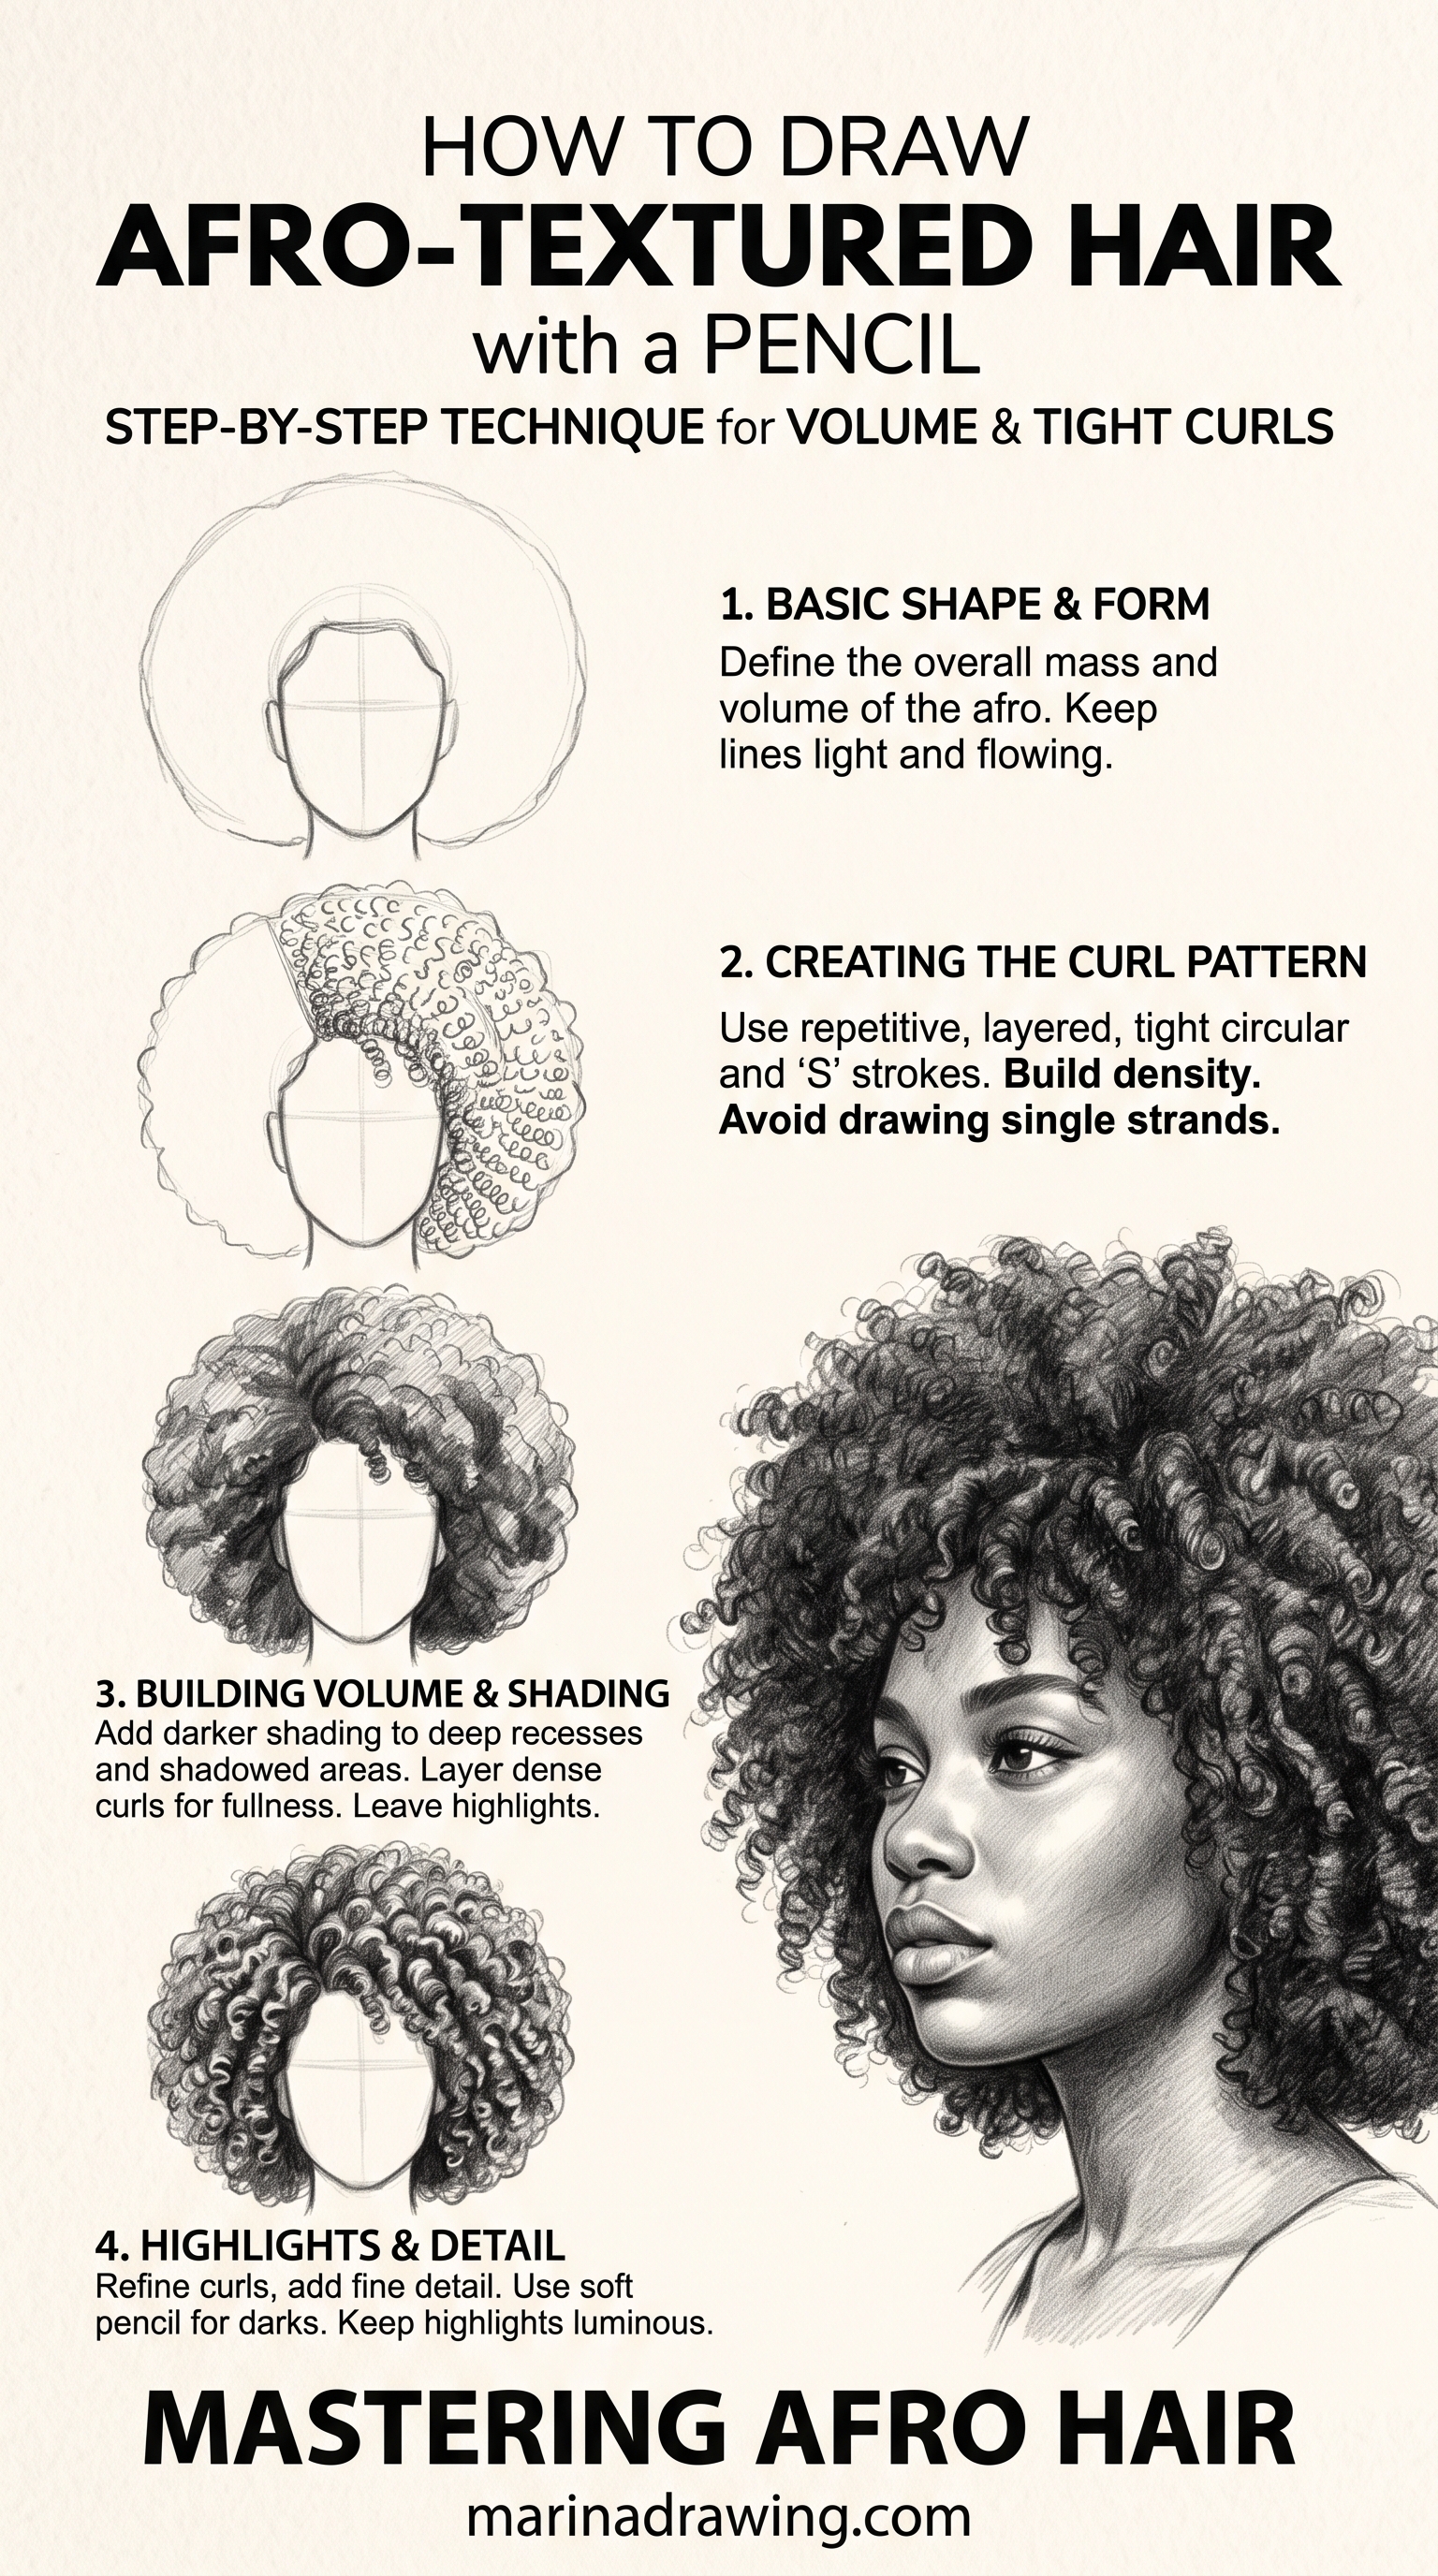
- Curly hair: tight S-curves and loops that repeat.
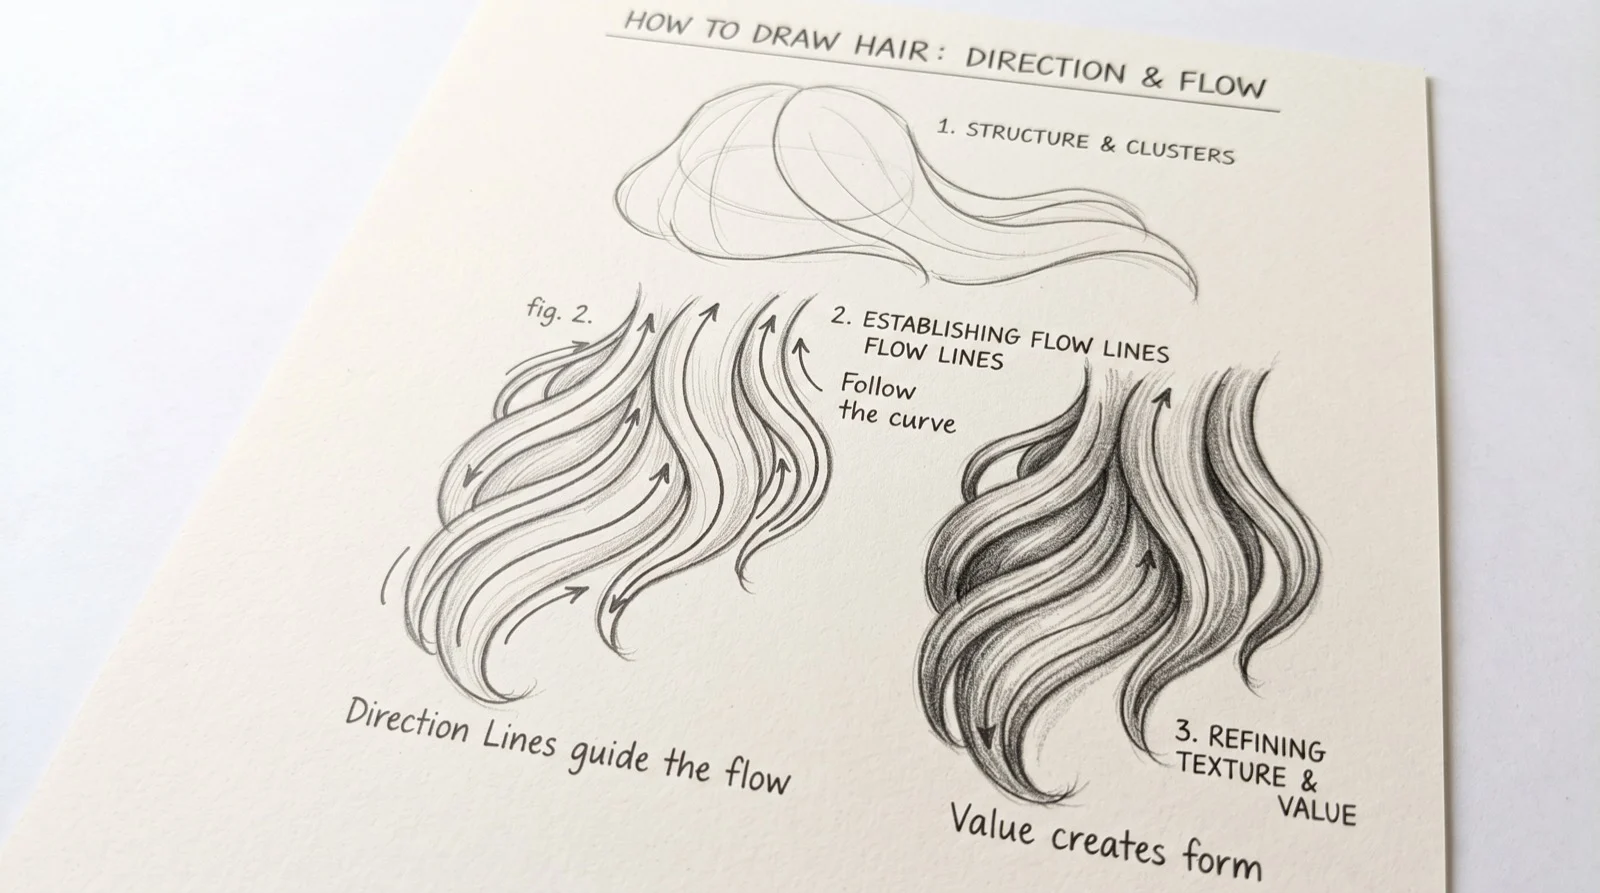
4. Add Strand Groups Along the Direction Lines
Now go back into each cluster and draw small strand groups. Use 2–6 lines per group, running parallel to your direction lines.
Vary the thickness. Let some groups overlap others. That overlap reads as depth. A fan of identical lines reads as flat.
Keep a hard limit to avoid strand soup: no more than 8–10 visible groups per cluster. Past that, the drawing looks busy instead of textured.
- Start the lines at the root and lift the pencil at the tip.
- Leave gaps between groups. Gaps are where the light lives.
- Change pressure. Press harder near the root and lighter at the end.
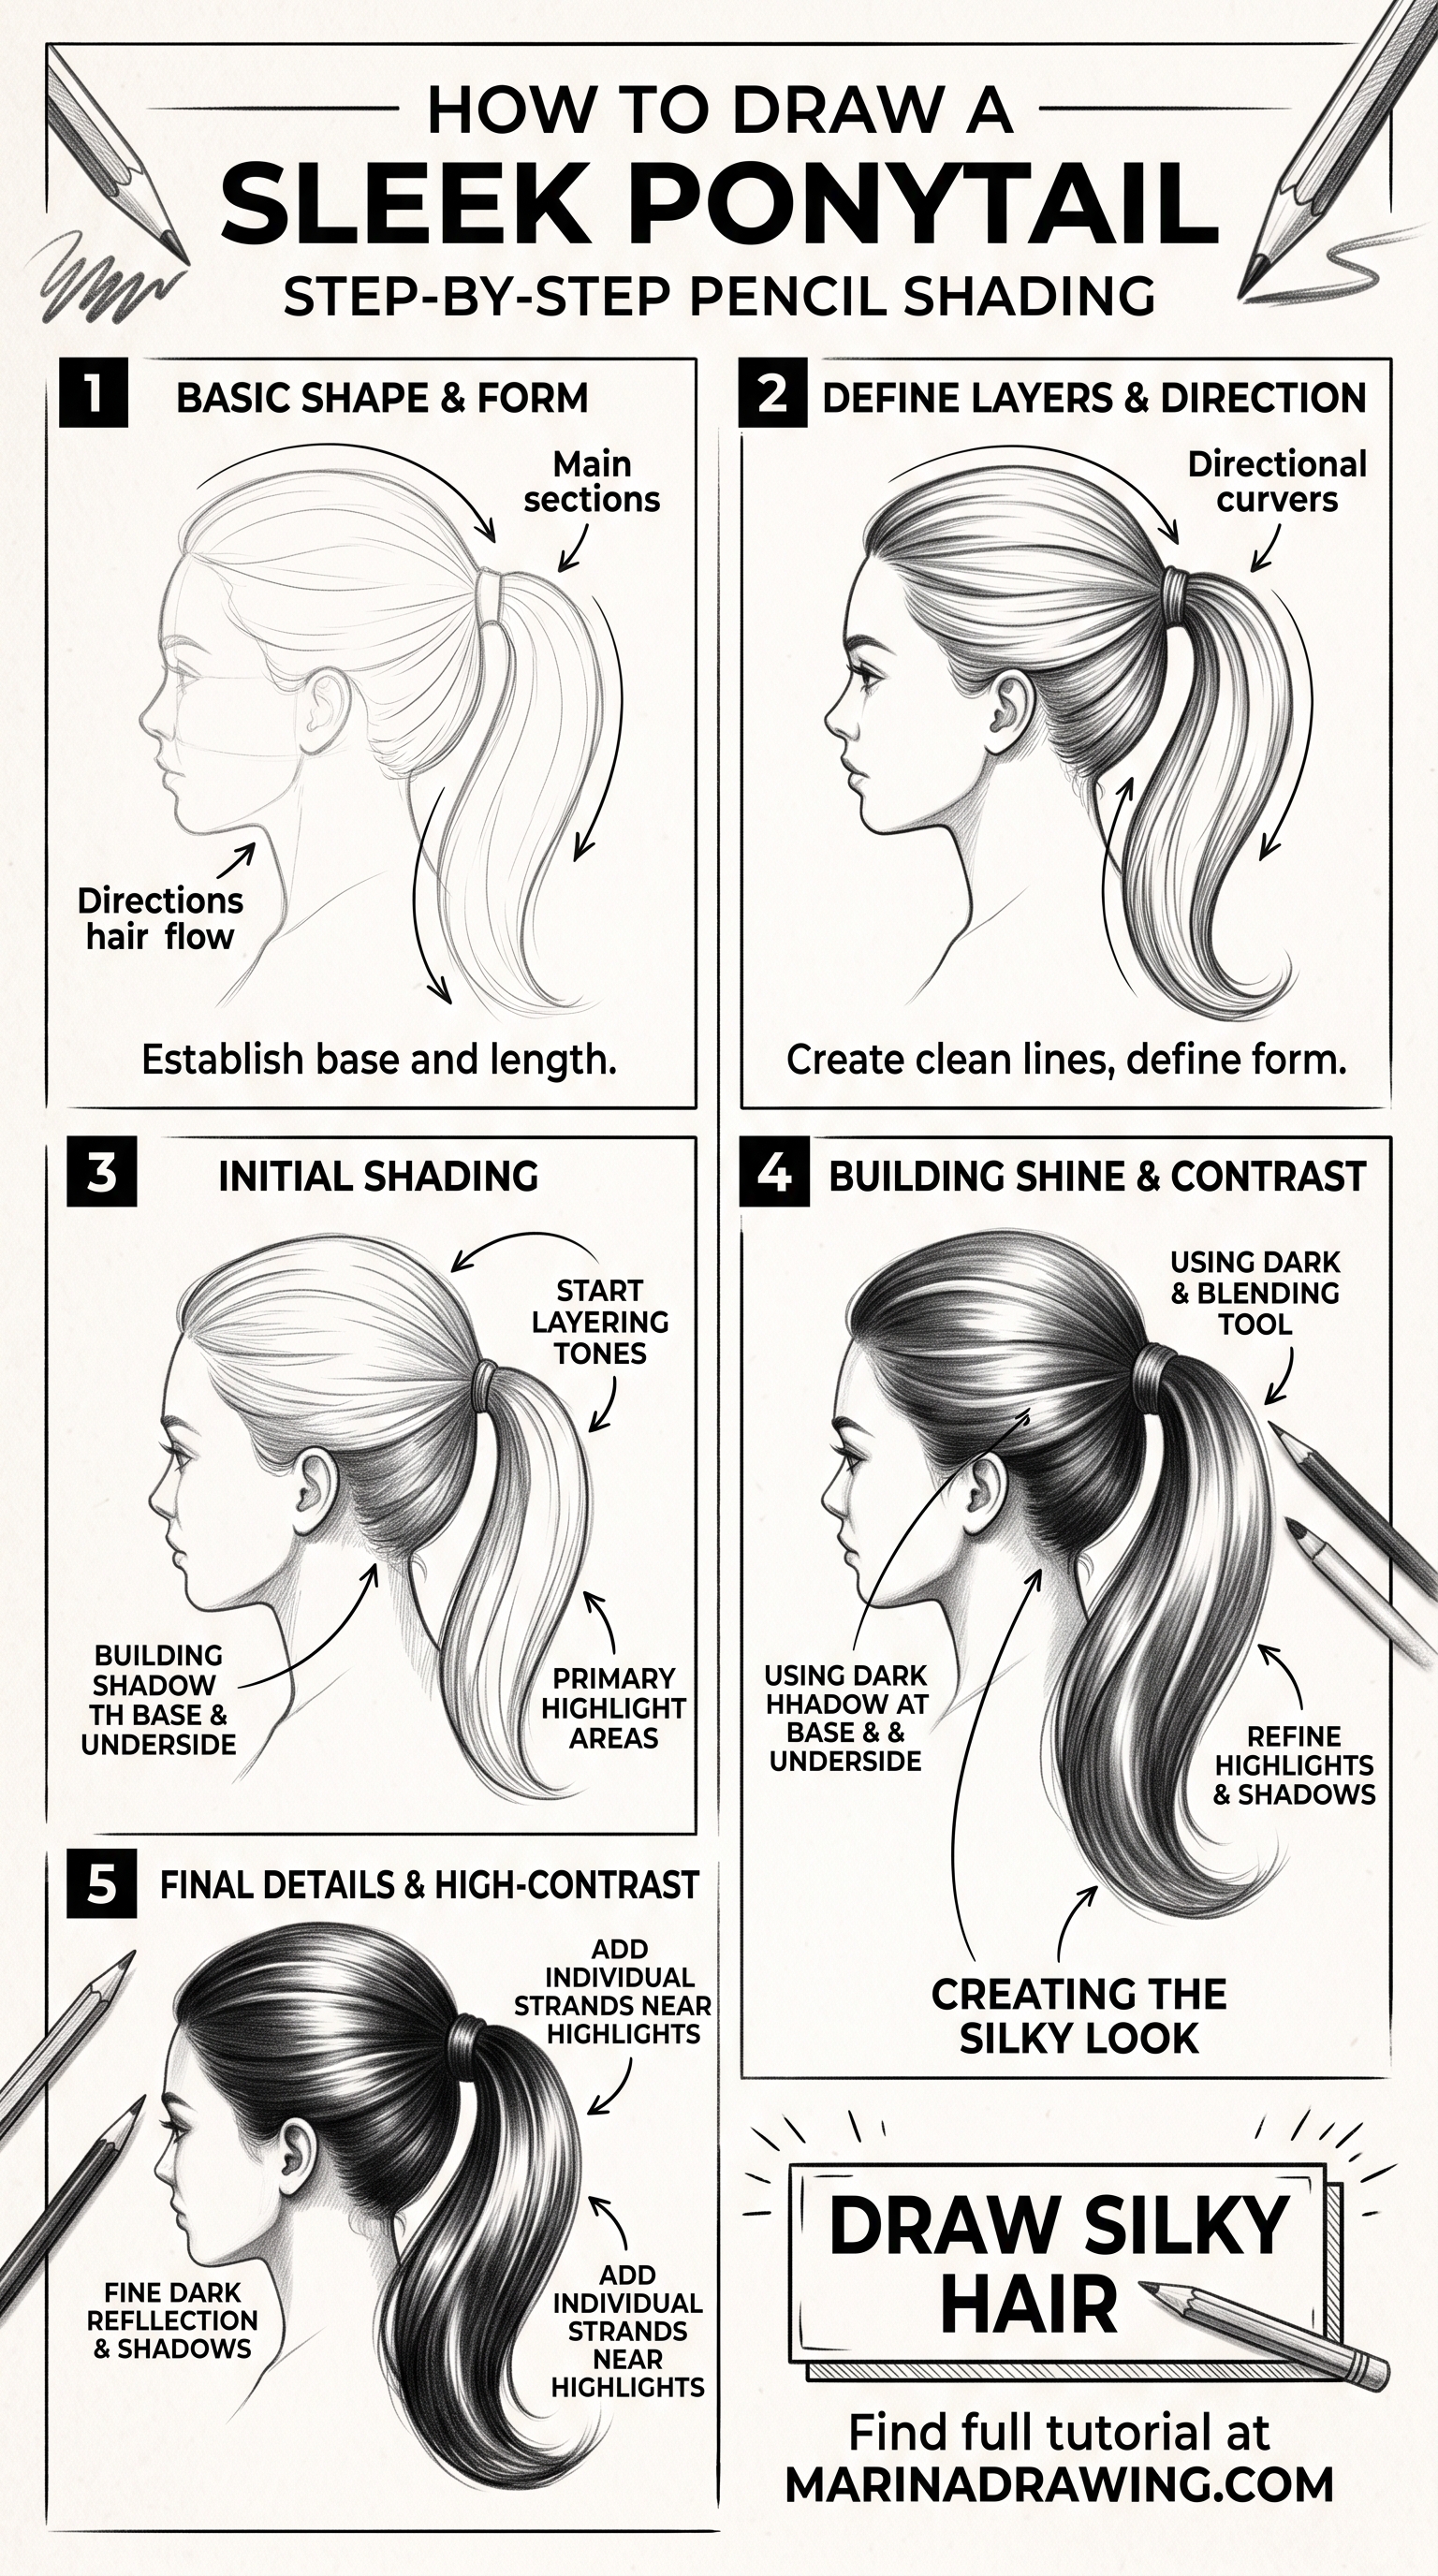
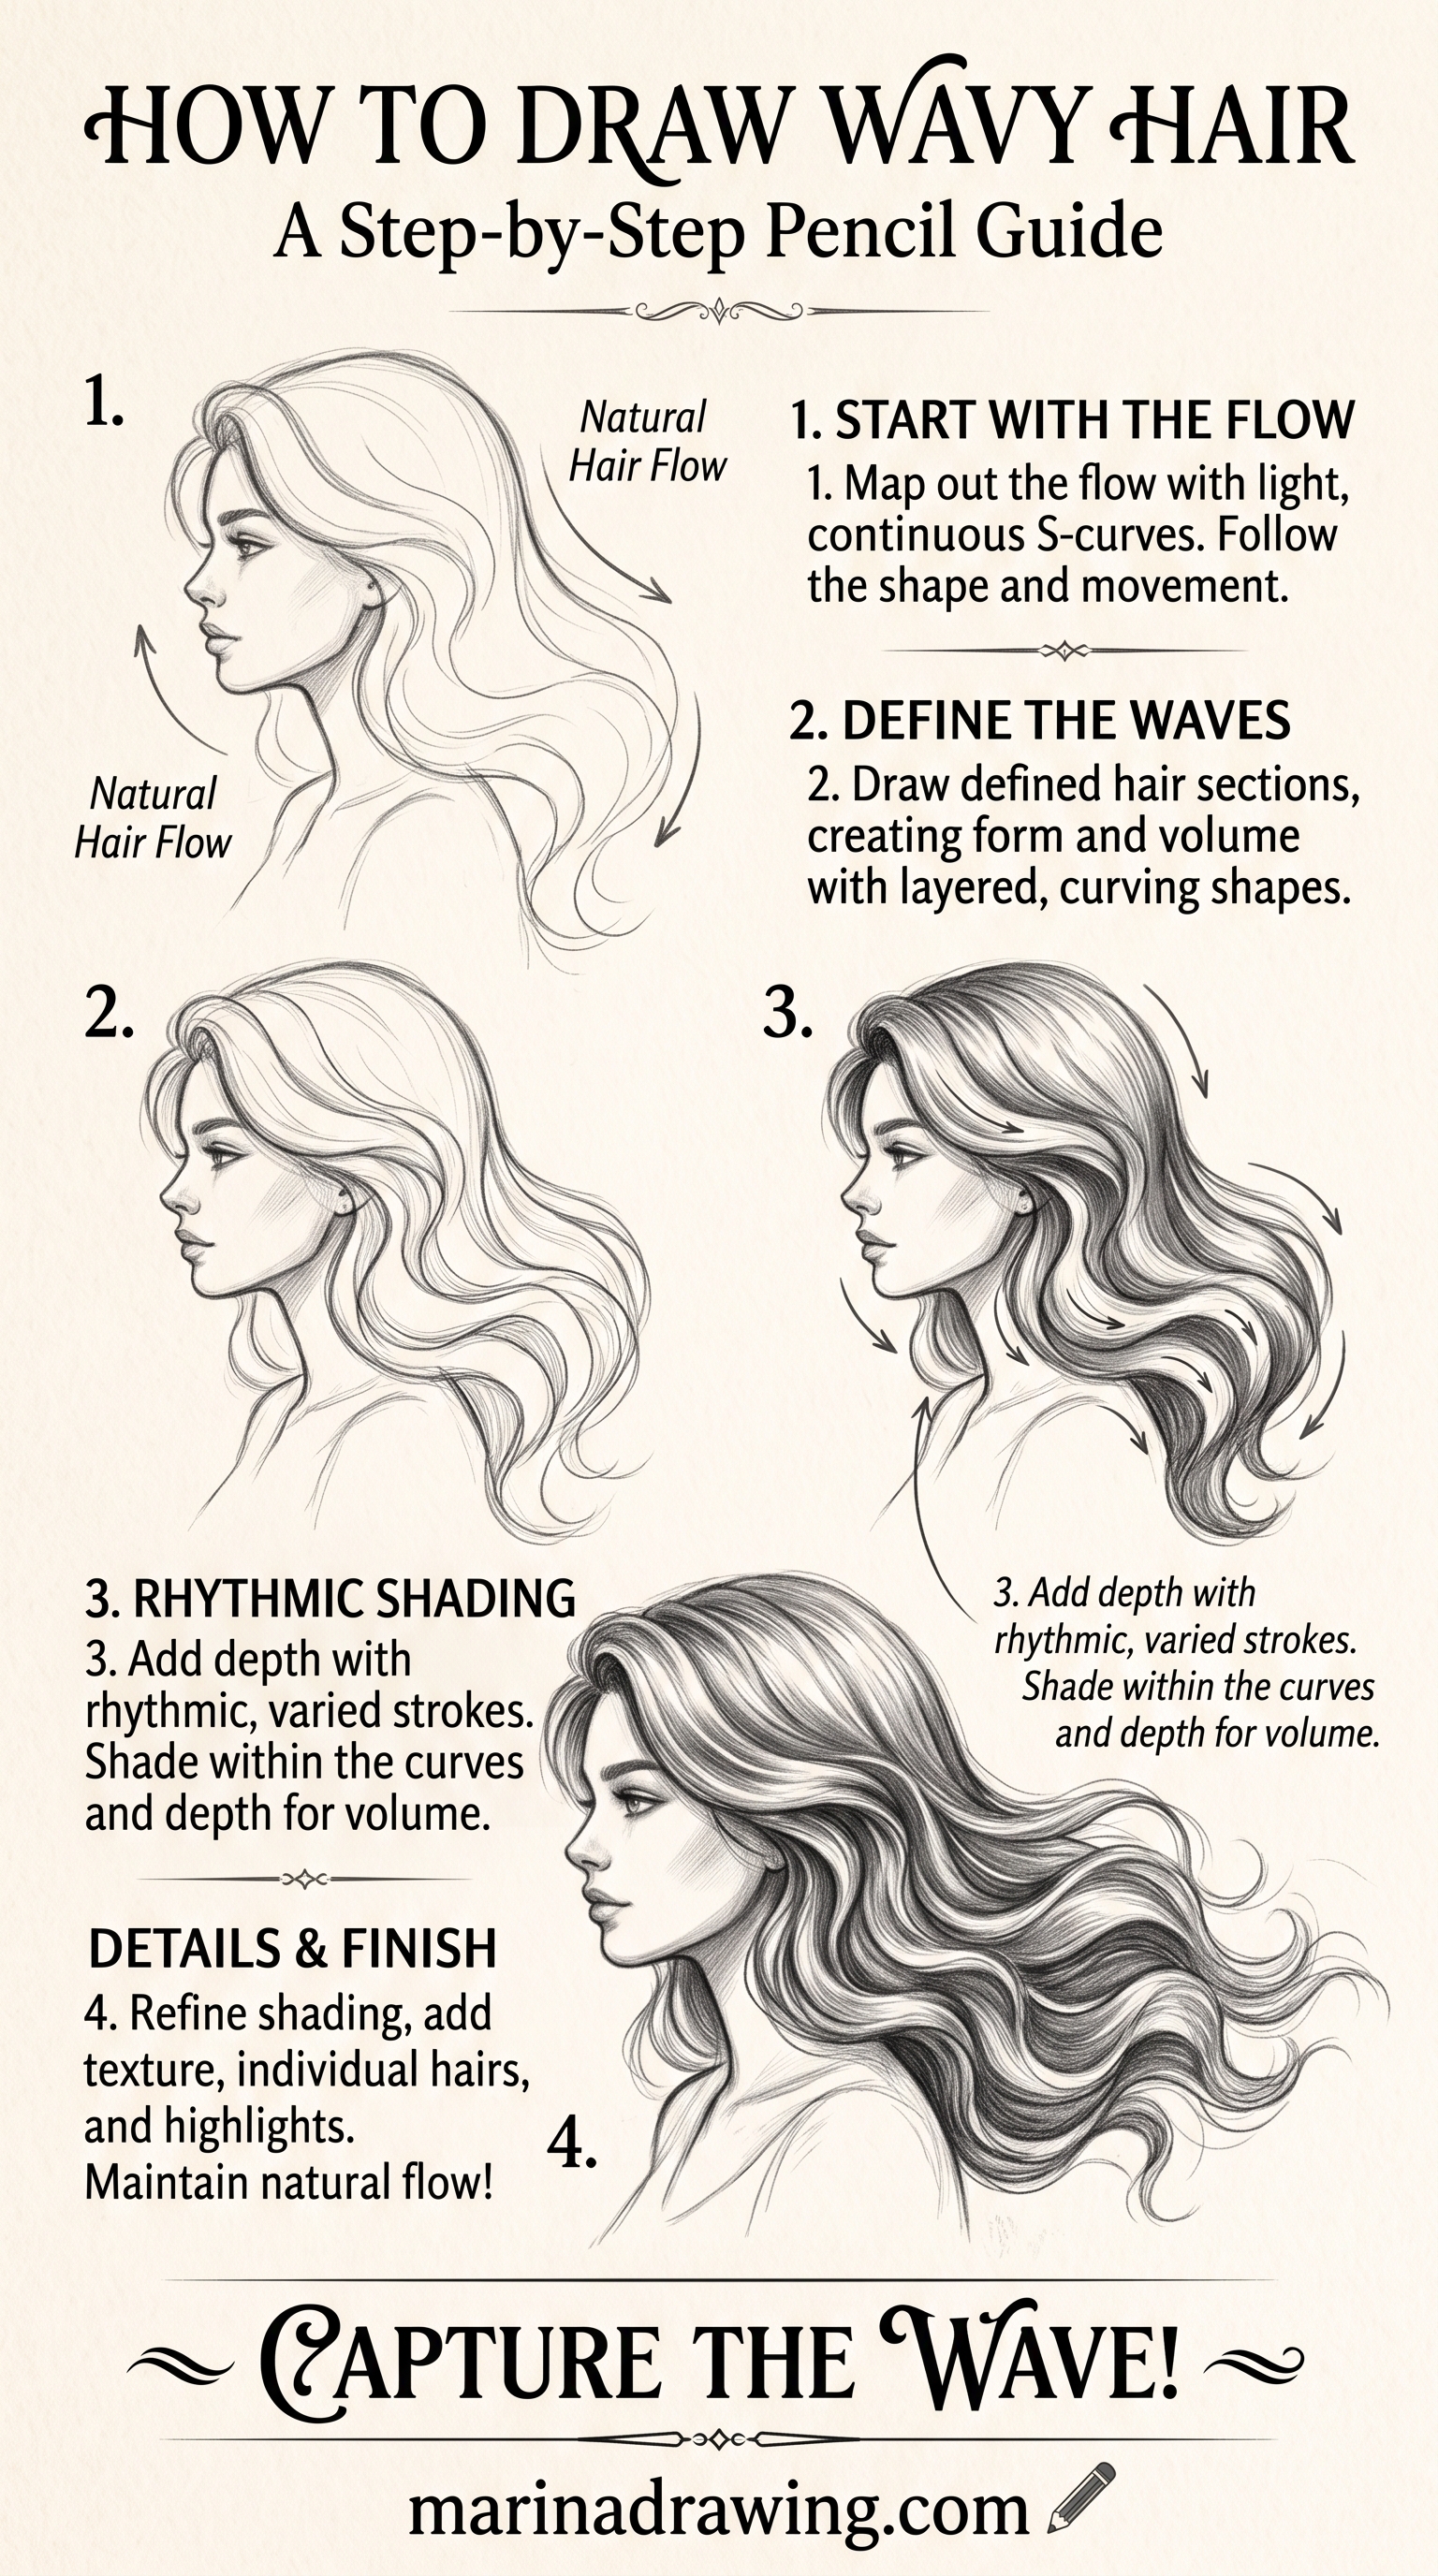
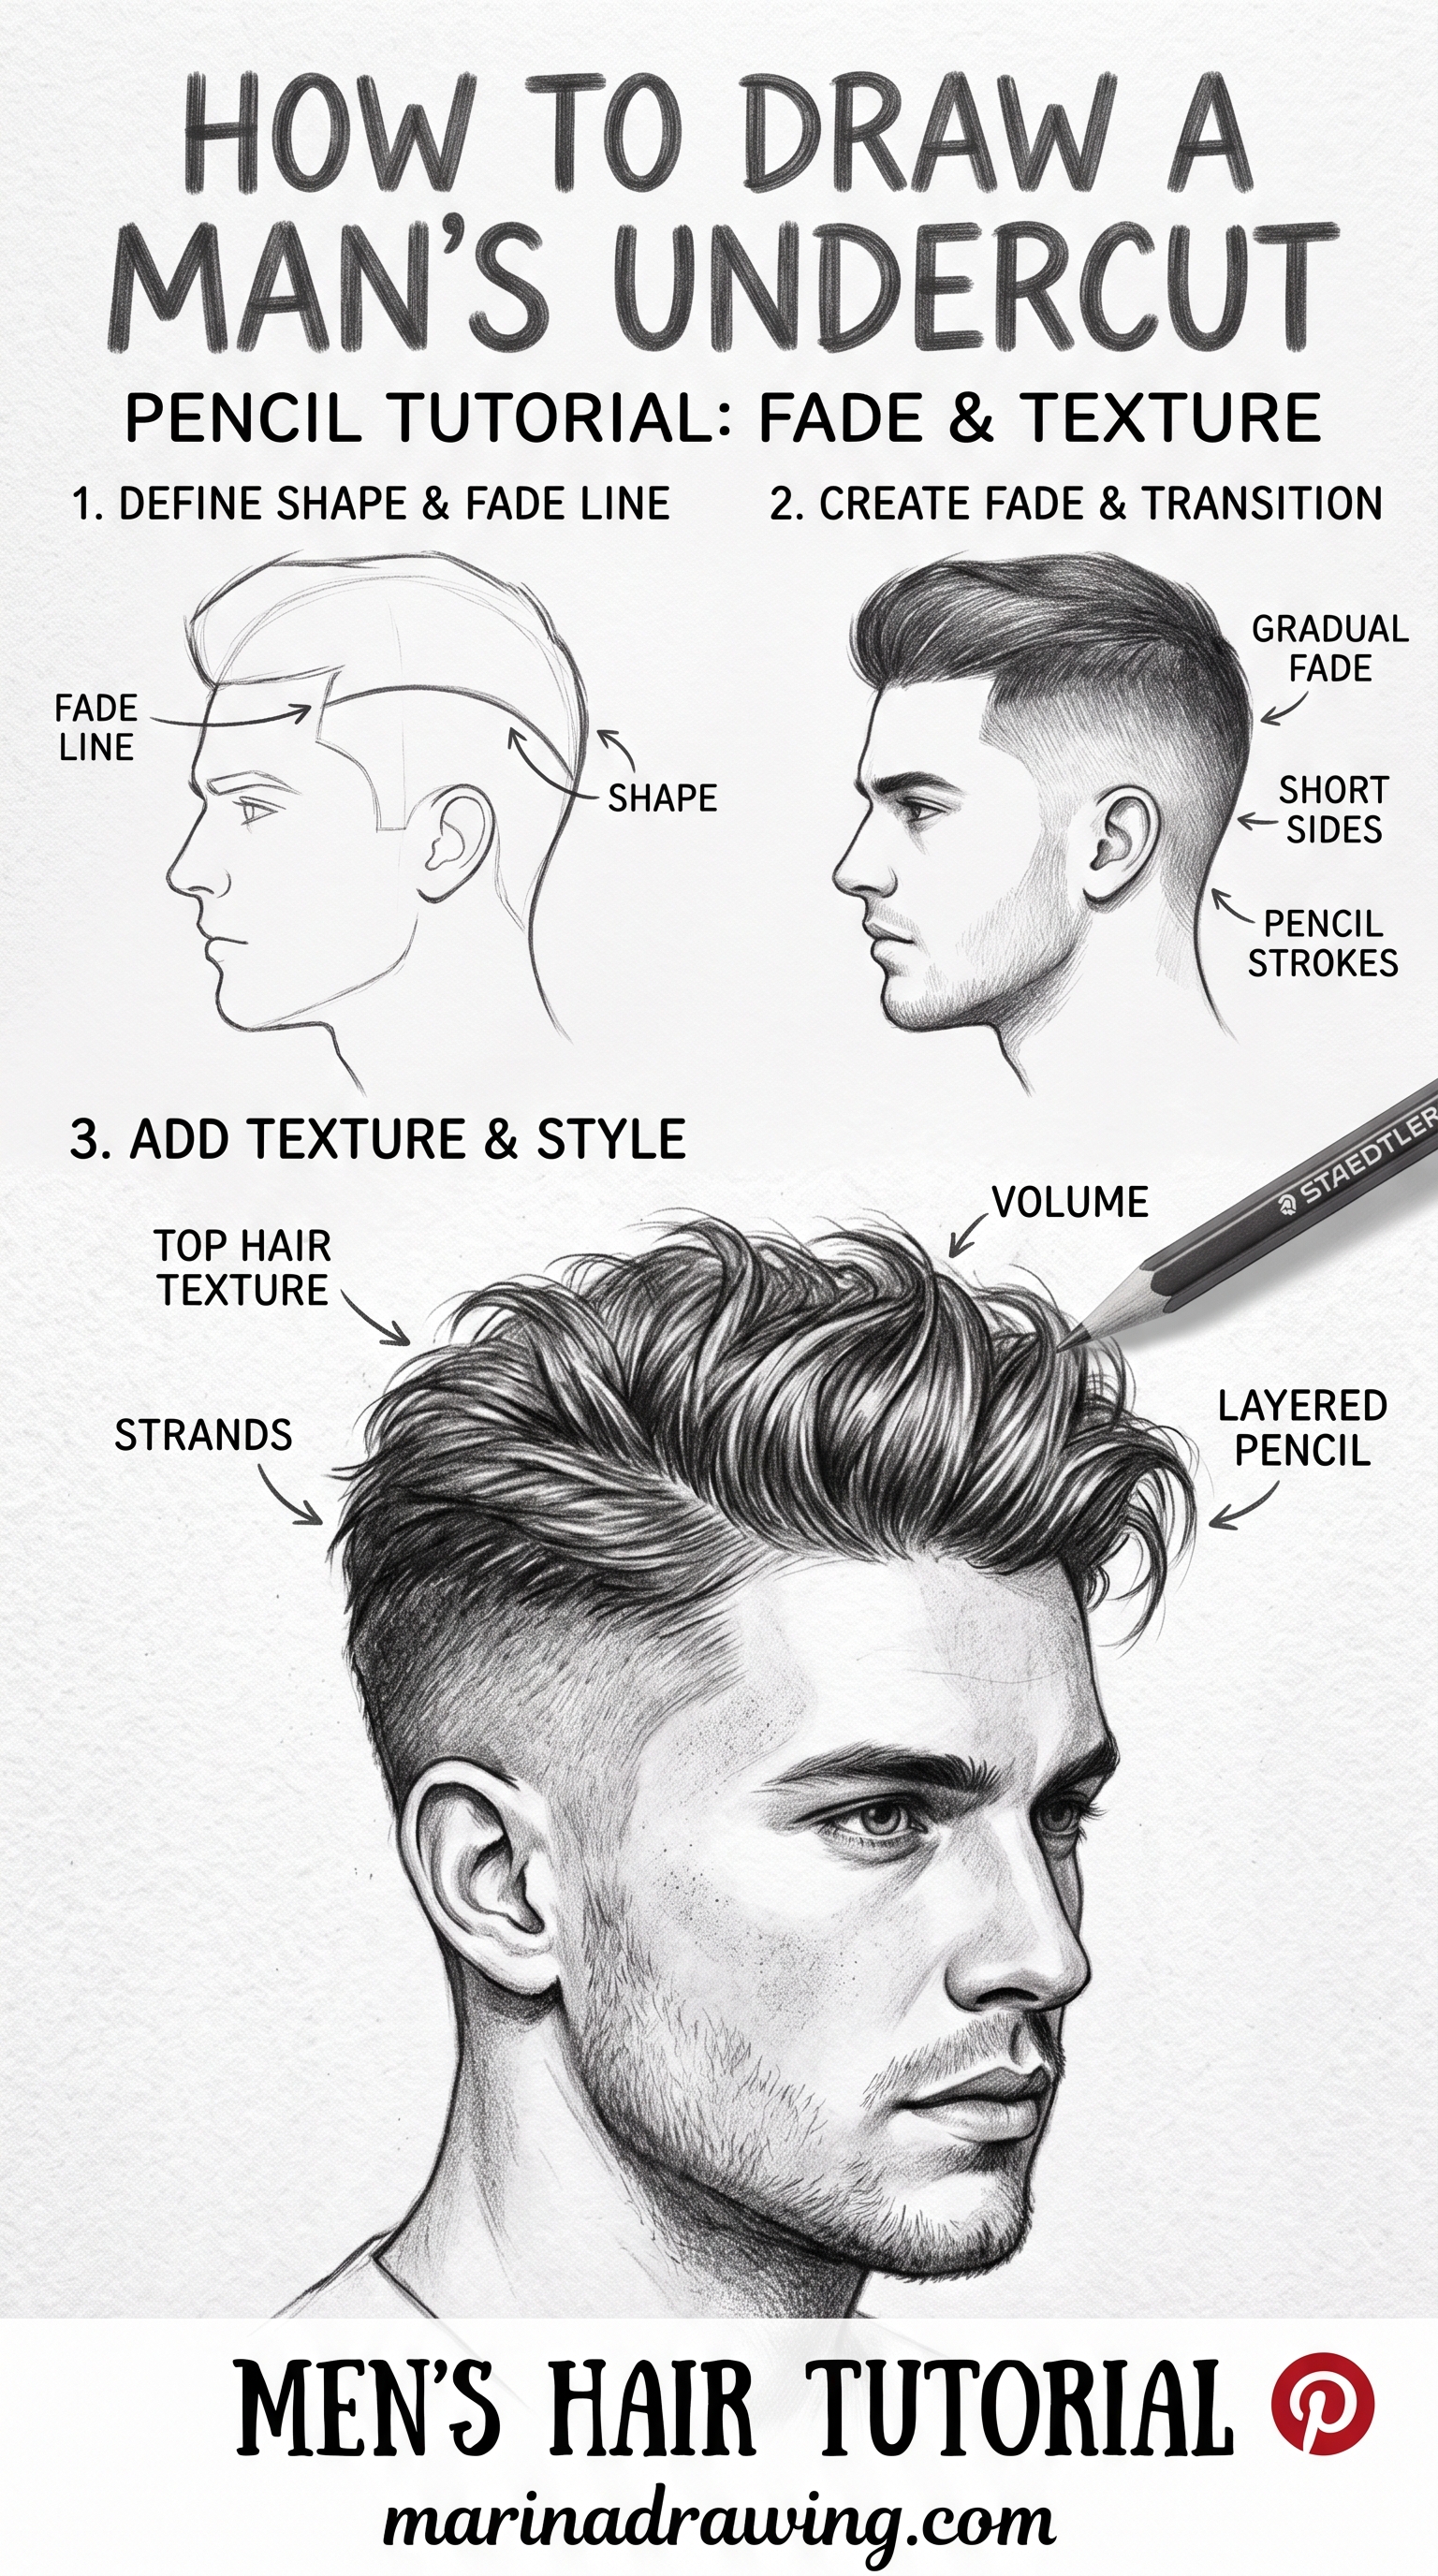
5. Put Volume Where Hair Actually Lifts Off the Skull
Volume is not even across the head. It concentrates at three points: the crown, the parting and the loose ends.
Push your outline out slightly at those points. Keep it close to the skull everywhere else.
A helmet has the same thickness everywhere. Real hair does not. This step is the fix for the helmet look.
- Crown: the outline lifts a little above the skull line.
- Parting: the hair rises on both sides of the line.
- Ends: add 2–3 flyaway strands that break the silhouette.
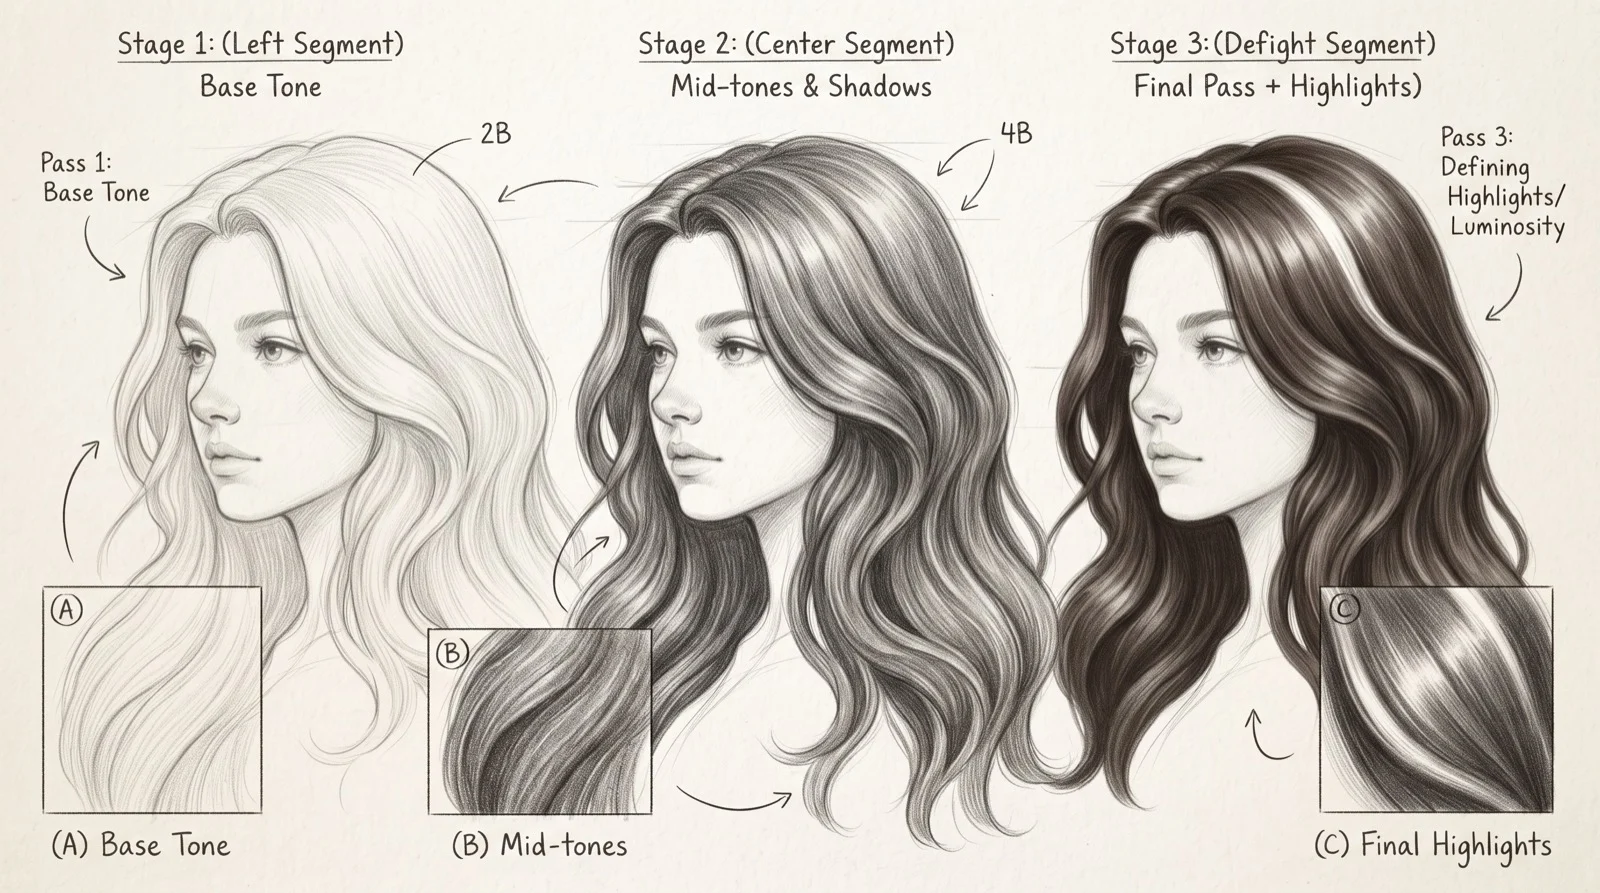
6. Shade in Three Passes: Base, Mid-tone, Highlight
Work in three passes. Each pass uses the direction lines from step 3.
Skip the highlight and hair looks flat and dull, even with good shape work underneath. It is a small step that does most of the finished feeling.
- Pass 1: lay a flat base tone over the whole hair mass.
- Pass 2: add a mid-tone on the shadow side of each cluster. Never shade against the growth.
- Pass 3: lift or add a highlight band along the crown, where the light hits directly.
Keep Practicing
You can also practice eyes next, because a realistic eye teaches the same light and shade control.
Hair only looks convincing on a head that is built in 3D. If the skull and hairline from step 1 feel shaky, fix them first.
If you want the full face first, read our step-by-step portrait guide. It walks through the same skull-and-hairline foundation.
If direction lines and clusters still feel new, practice them on simpler forms. Our beginner animal drawing guide uses the same cluster-and-direction approach on fur.
Frequently Asked Questions
Q: Why does my hair drawing look like a helmet?
Even thickness across the whole head is the cause almost every time. Real hair is thinner near the skull and only puffs out at the crown, the parting, and the ends — go back to Step 5 and push volume out only at those three points.
Q: How many individual strands should I actually draw?
Far fewer than it looks like in reference photos. Aim for 3–5 clusters, each with 2–6 strand groups (Step 4) — that’s roughly 15–25 line groups total for a full head, not hundreds of single hairs.
Q: How is drawing curly hair different from straight hair?
The clusters and volume rules from Steps 1, 2, and 5 stay the same. What changes is Step 3: direction lines become tight S-curves or zigzags instead of long smooth curves, and clusters read as rounder, more compact shapes instead of long tapered ones.
Q: What’s different about drawing anime-style hair?
Anime hair pushes Step 2 further — clusters become fewer and much larger, often just 3–4 for a whole head, with sharper, more angular tips instead of soft tapers. The skull-first rule from Step 1 still applies underneath, even for exaggerated spiky styles.
Q: Pencil or digital — does the method change?
No. The six steps here are medium-independent. In a drawing app, working on a separate layer for the direction lines (Step 3) makes it easy to adjust flow before committing to strand groups — that’s the one digital-specific shortcut worth using.
Q: I’ve been drawing for a while and my hair still looks off — what am I missing?
Almost always it’s Step 1 or Step 3 being skipped, not a lack of detail. Drawing straight into strands without a skull shape or direction lines underneath is the single most common reason experienced self-taught artists still get “something looks off” on hair specifically.
Q: How long does it take to get hair looking right?
There’s no fixed timeline, and anyone promising one in a day is skipping steps. What actually moves the needle is repetition of Steps 1–3 on the same reference a few times in a row, since that’s where most of the “off” feeling originates — not more hours spent on shading detail.