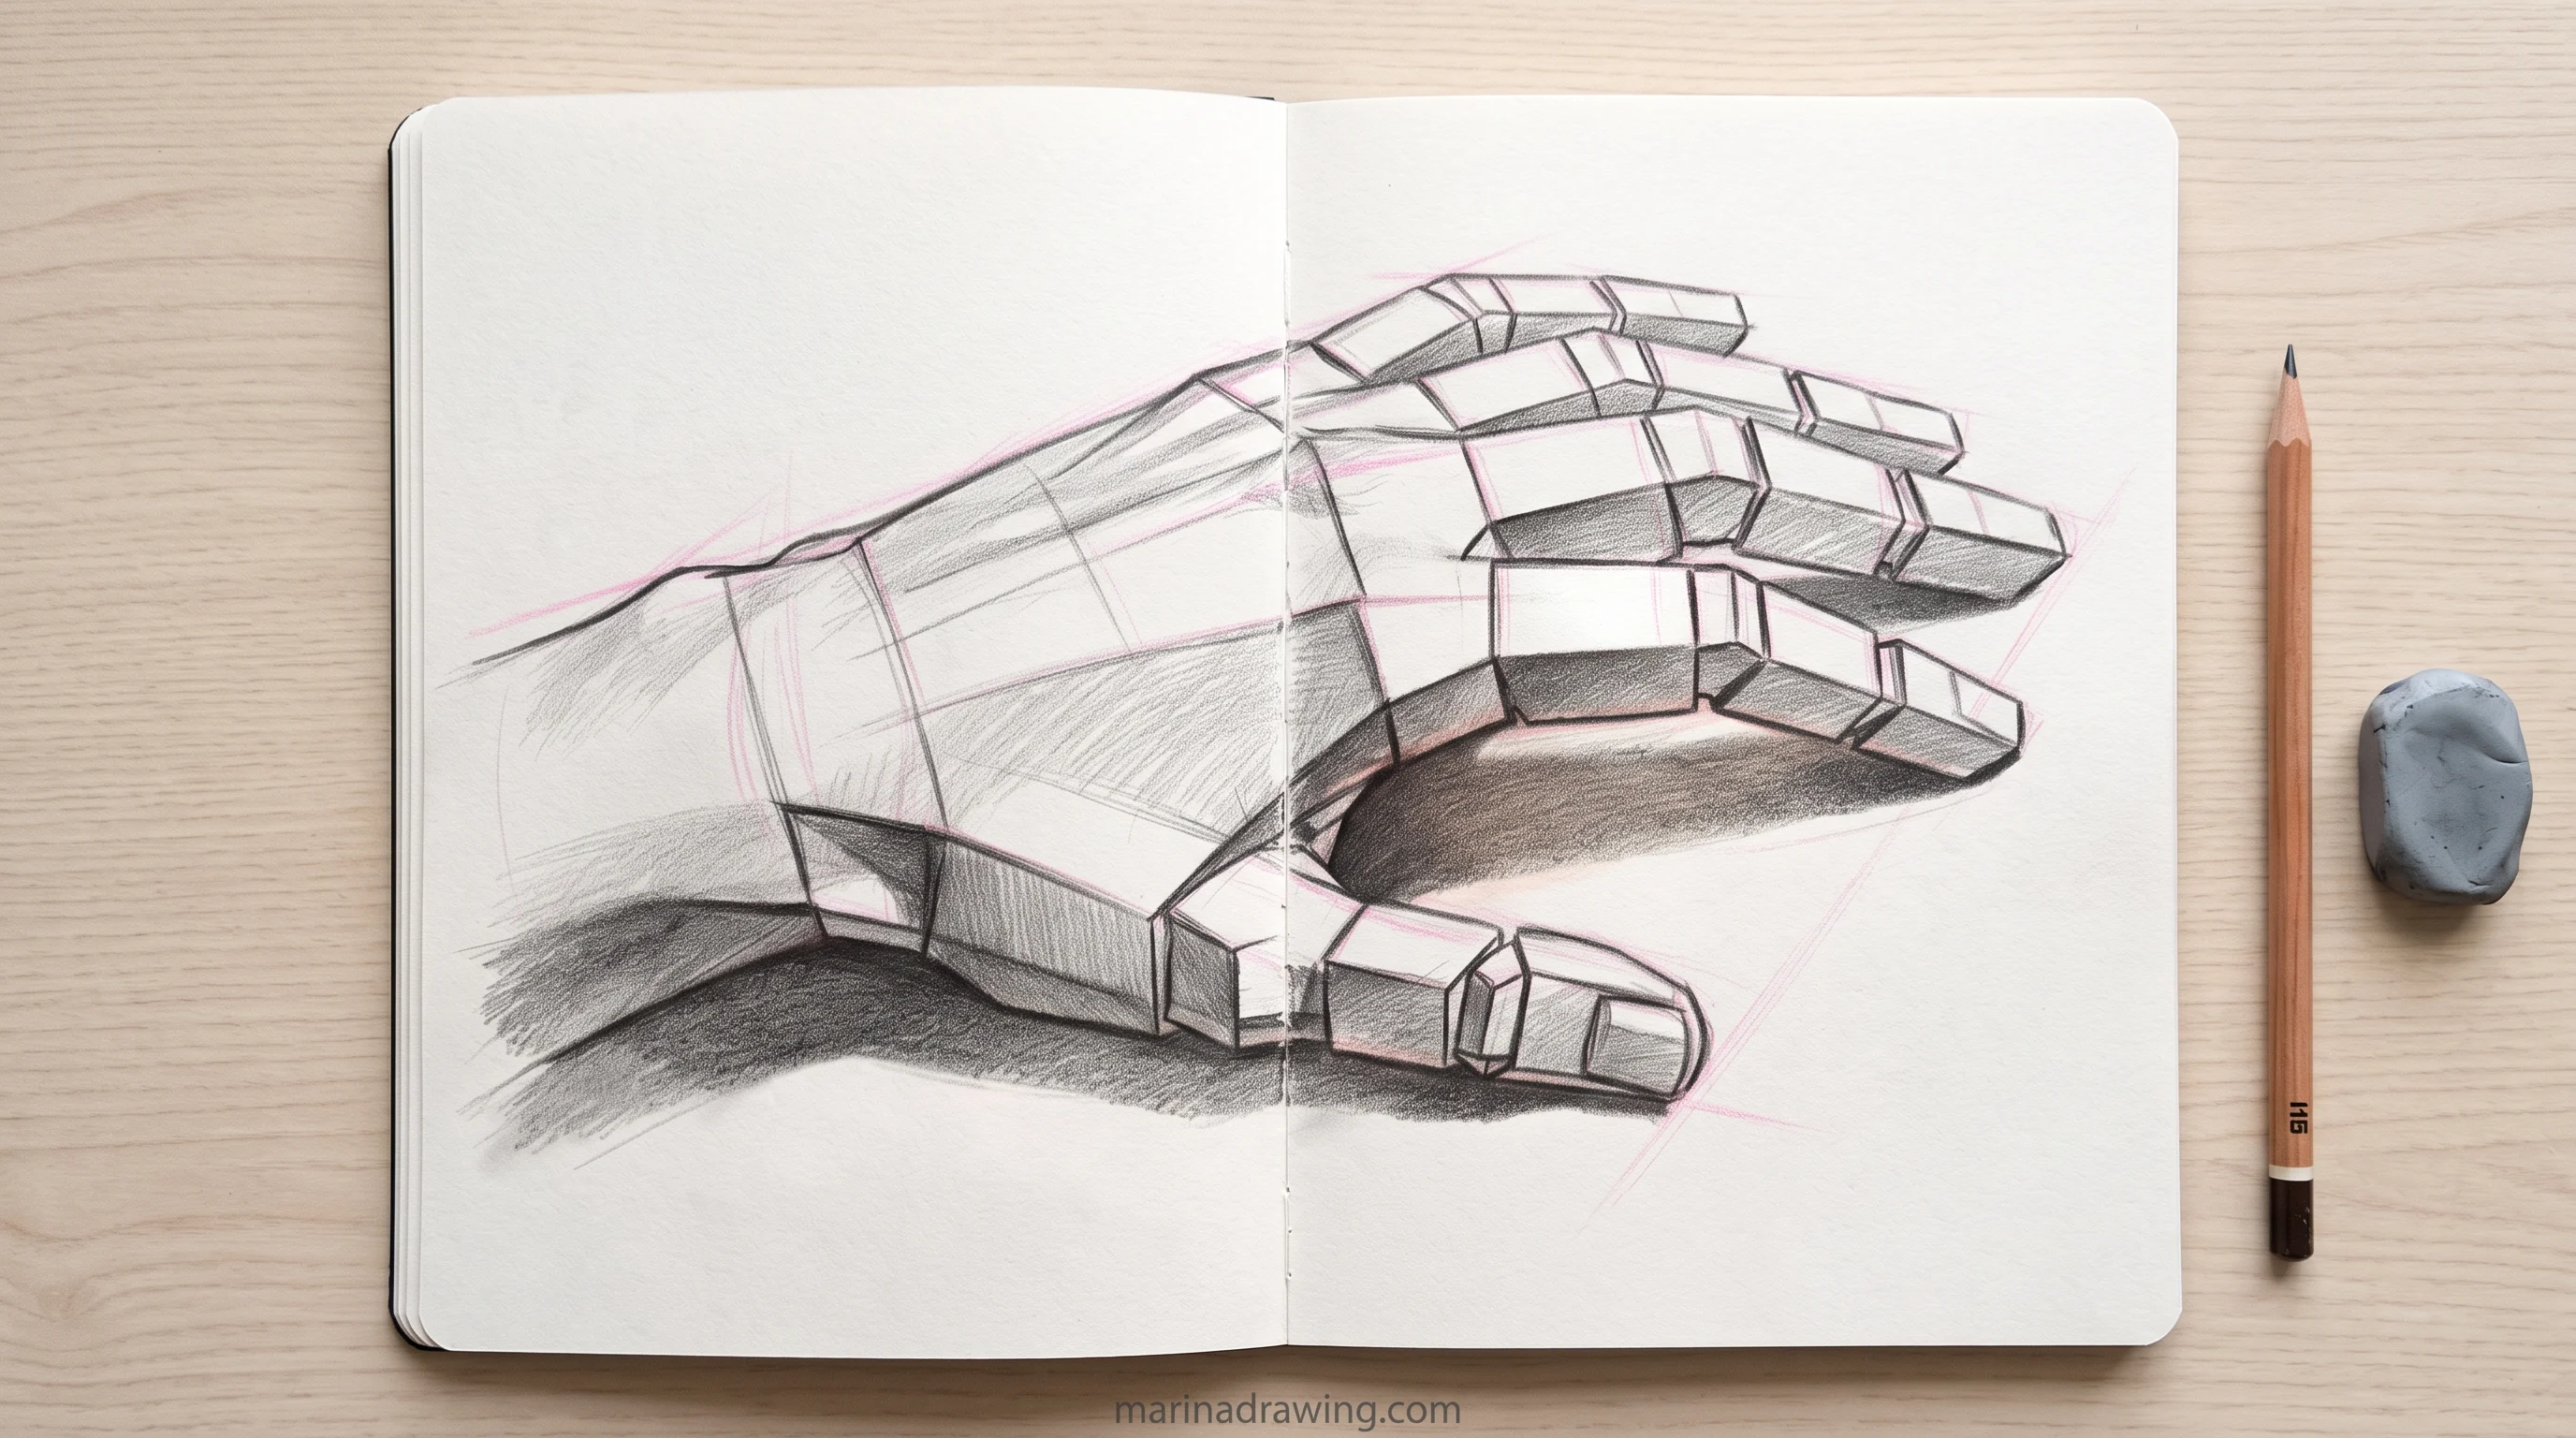
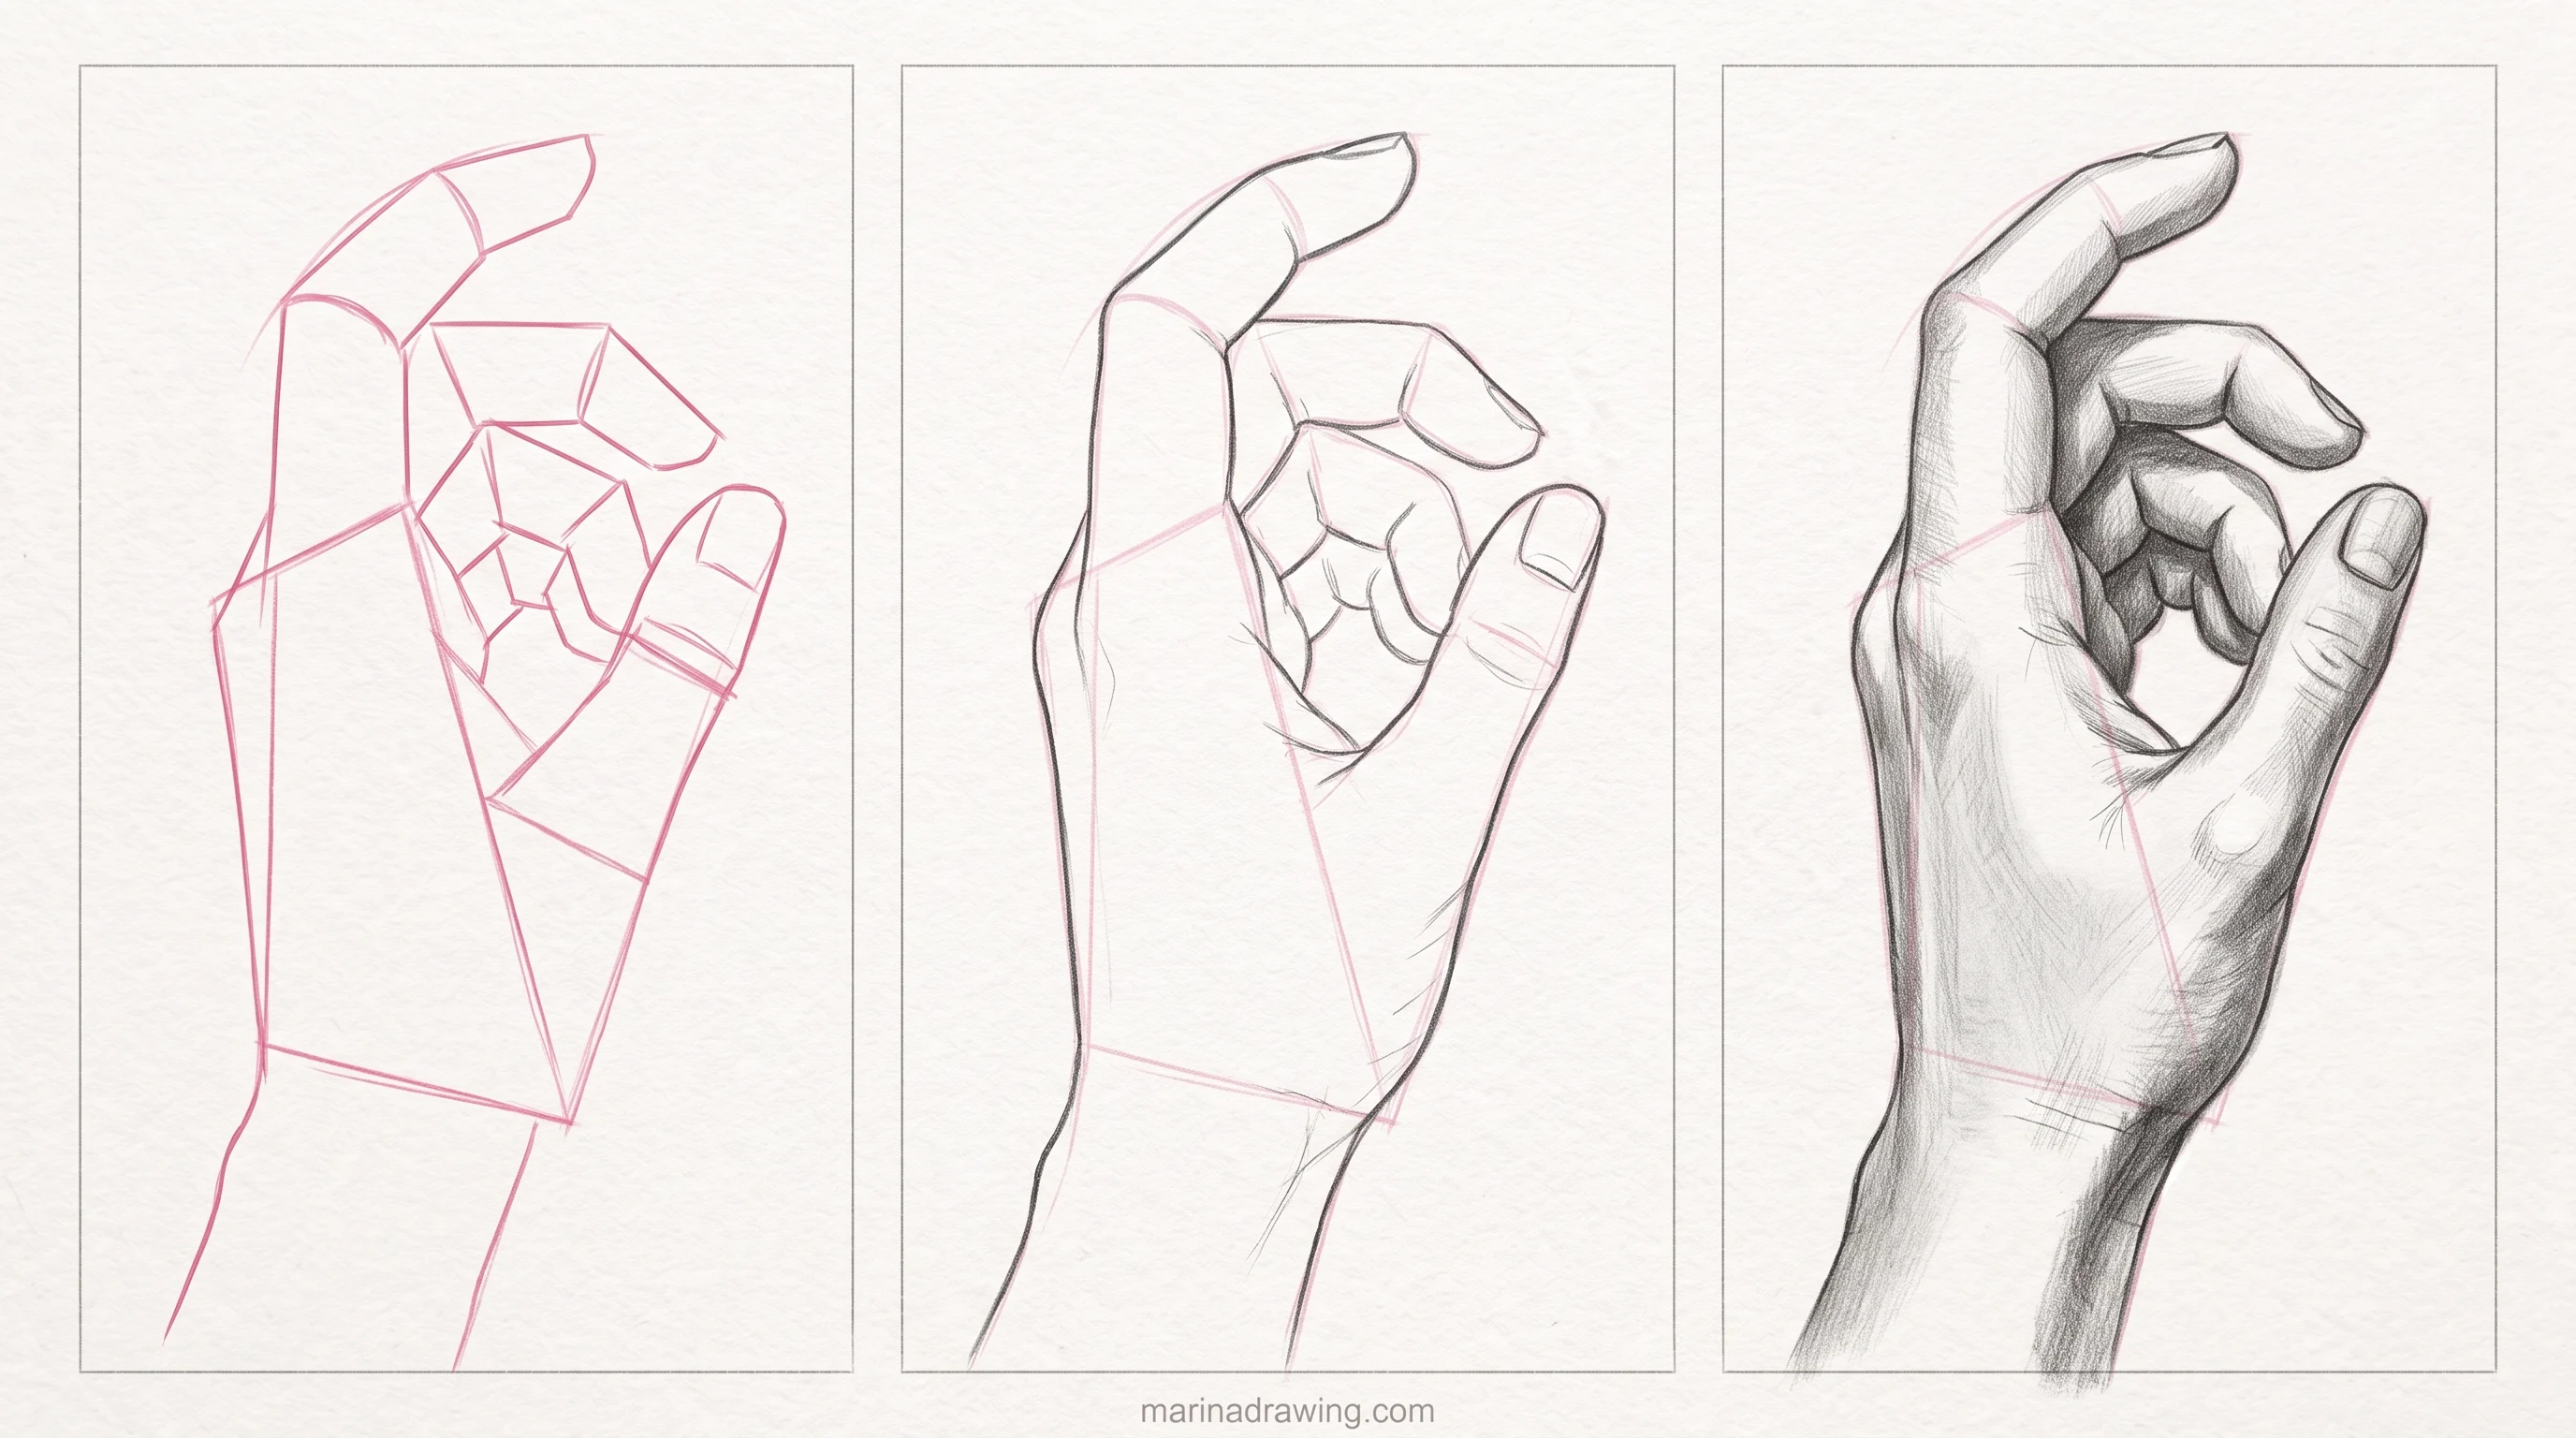
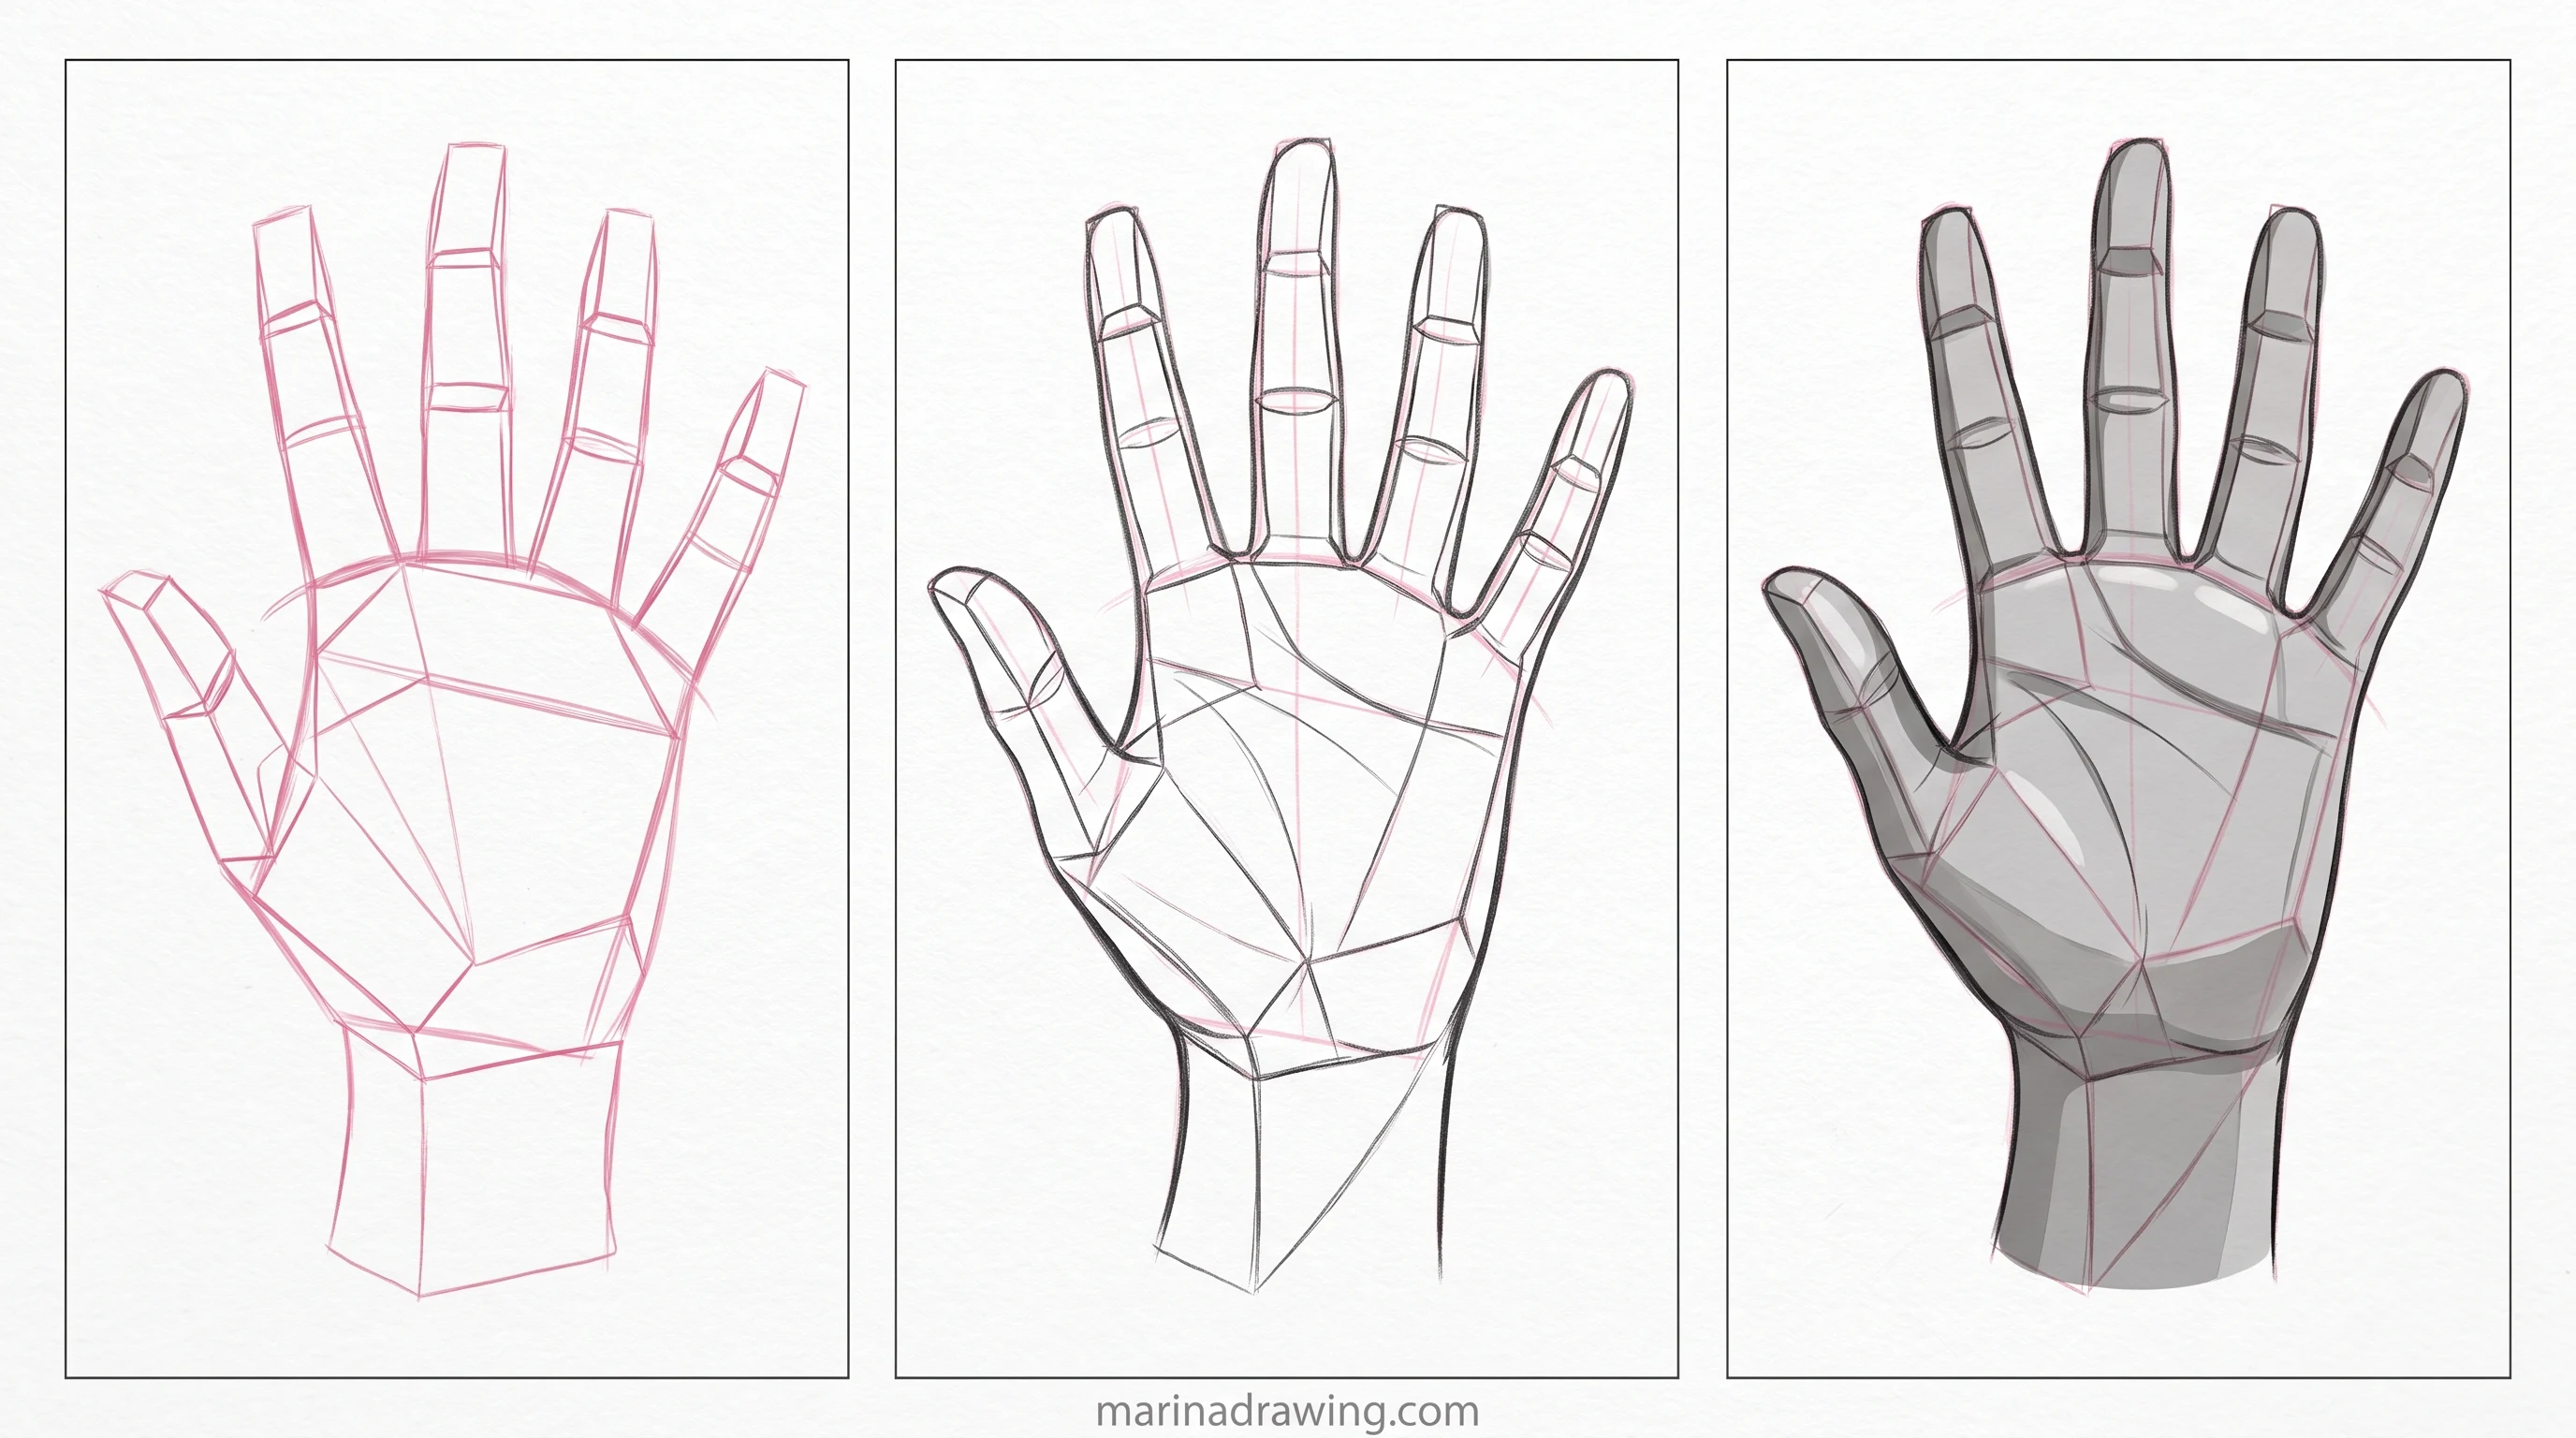
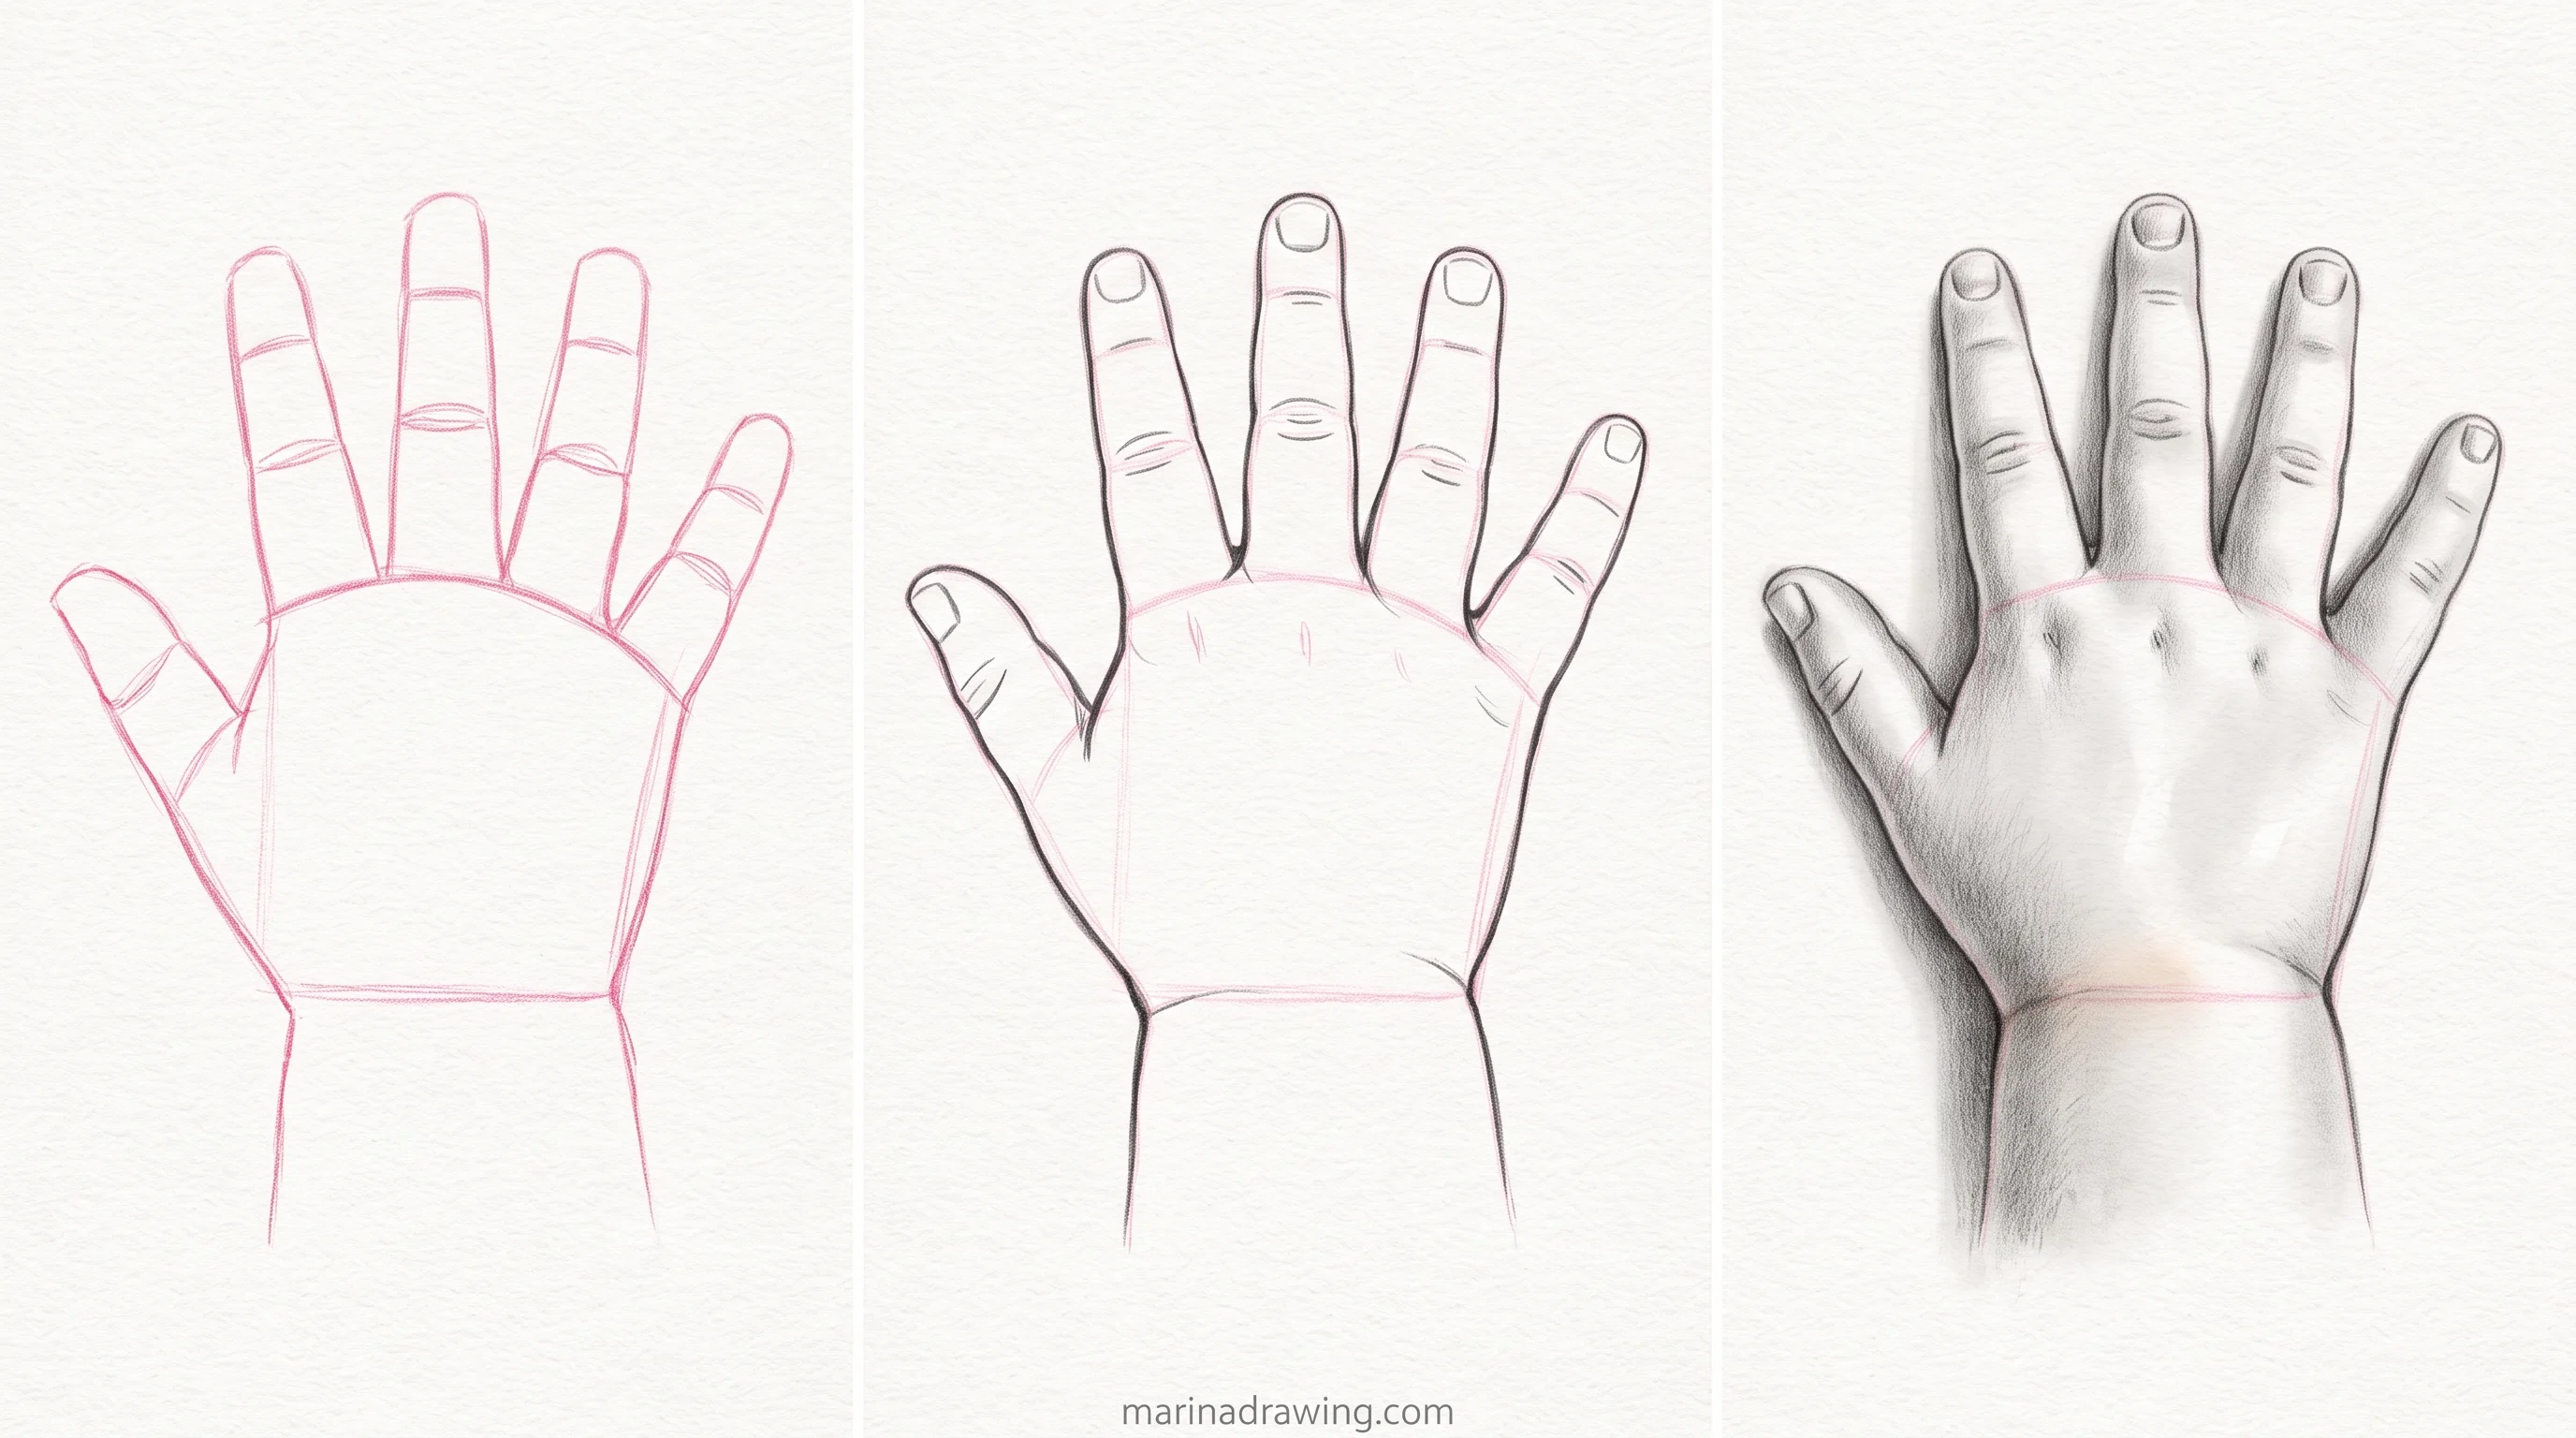
Draw the palm first, and draw it as a wedge with thickness and tilt, not as a flat mitten. Then mark the knuckle arc where the four fingers attach. Then place the thumb low on the side, on its own joint. Only then build the fingers as short stacks of boxes, and only after that let a contour line touch the page.
The fingers were never the problem. The shape under them was.
Below you get the build order step by step, the box method in plain words, three checks that catch a wrong angle while the line is still erasable, and the poses people search for most: hands holding something, hands on hips, hands behind the back, anime hands, cartoon and chibi hands, and a short version for kids.
A hand is a box with a wedge for a thumb. Fingers come last, not first.
Hands get postponed more than they get practised. In this site’s tally of 6,641 text posts by self-taught artists across four drawing forums, collected 1 April to 27 August 2026, hands come up in 351 posts. In 104 of them the word sitting right next to them is hard, struggle, avoid, scared or difficult. That is 30 percent. The build order below exists because the part being avoided is the palm.
Watching the palm box built in real time
Forty-two hours of graphite lessons, hands included. You see the construction stage happen on screen, instead of guessing what went on between a blank page and a finished photo.
Why the Hand Goes Wrong at the Palm, Not the Fingers
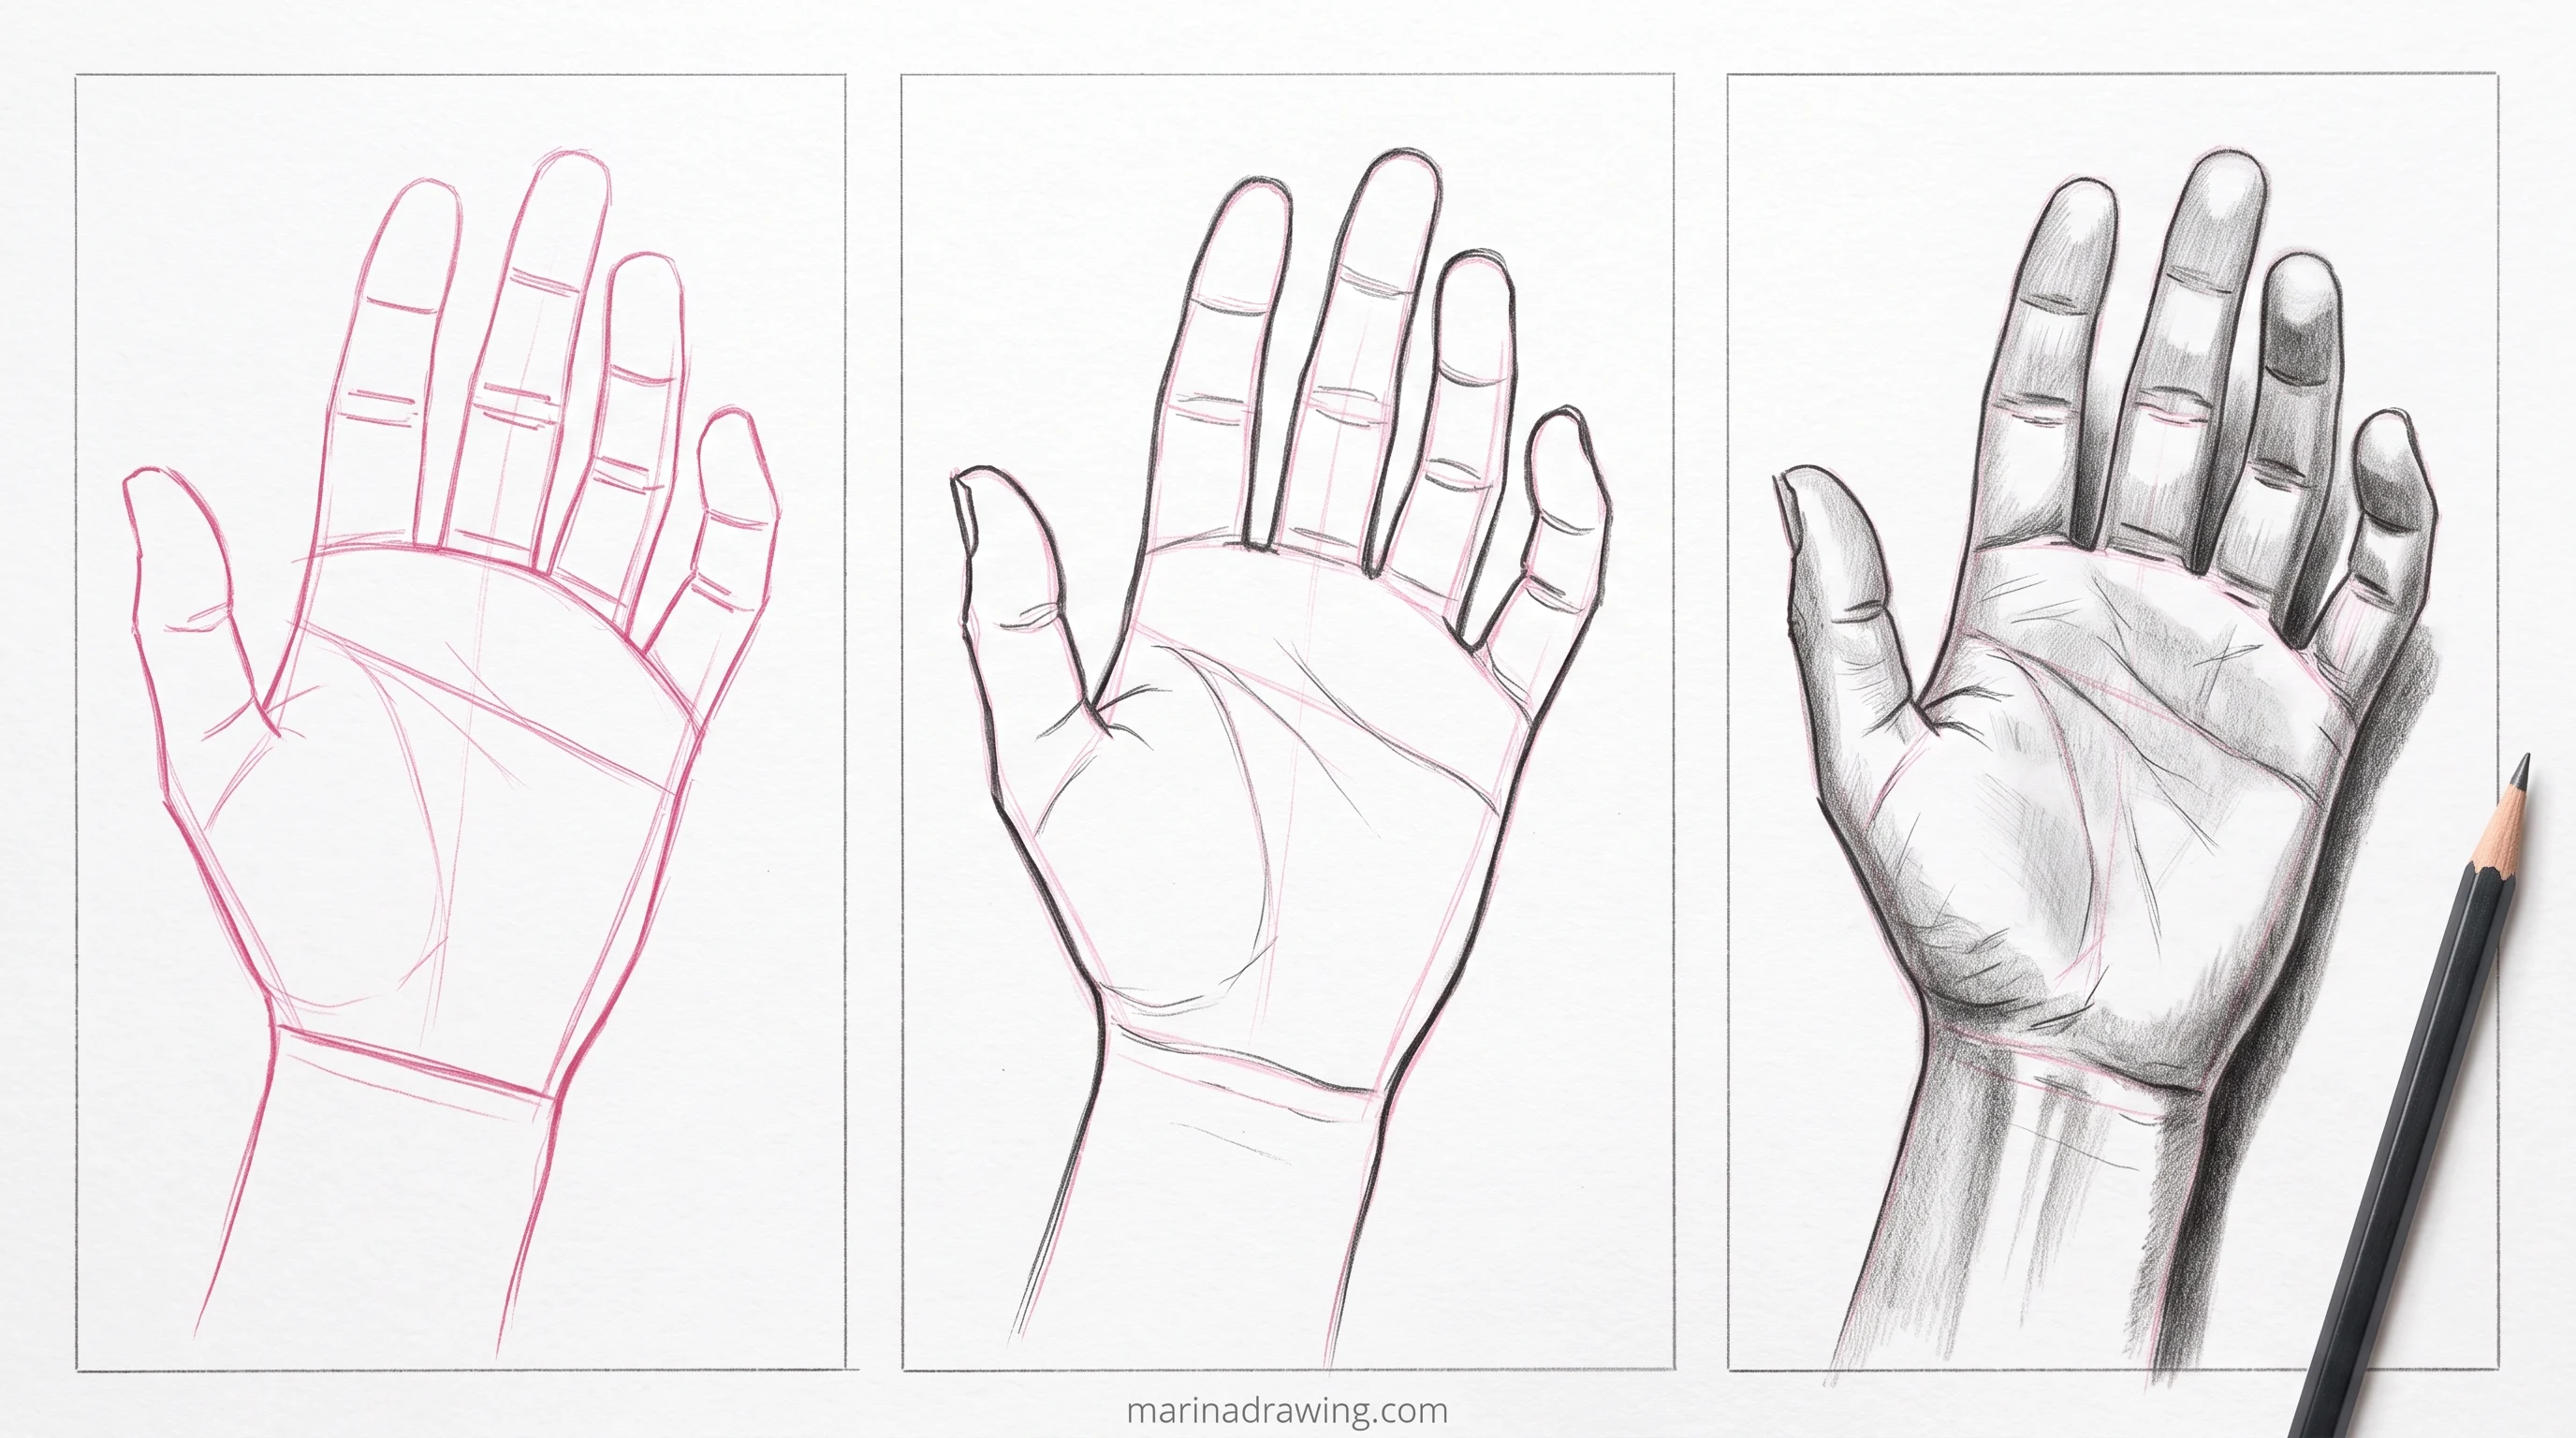
Your hand drawing does not go wrong at the fingers. It goes wrong one step earlier, and the fingers only show the damage.
Here is the usual route. You outline the palm as a flat mitten. Then you attach five fingers to the top edge like teeth on a comb. Then you redraw the fingers, because they look off.
They look off because that palm cannot hold them. Your real palm is a wedge: thicker at the wrist, thinner where the fingers start, and turned in space, so the near edge and the far edge are never the same length on paper. A flat mitten has no near edge and no far edge. Every finger you hang on it starts at the same angle as its neighbour, and the whole thing reads like a glove lying on a table.
I spent two years redrawing fingers before anyone told me this. The wedge takes about eight seconds. The fingers took me an evening each.
There is a second piece, and it saves you even more work. The palm has a knuckle line, the curved row where your four fingers meet it. That line is not straight. It bows up through the middle knuckles and drops toward the pinky.
Once the arc is on your page, the direction of every finger is already decided. Each one points outward along the curve at its own spot. A straight top edge gives all four the same angle, and that is the second reason your glued-on fingers look wrong before a single joint is drawn.
| What you draw first | What it decides | What breaks if you skip it |
|---|---|---|
| Palm as a wedge | Thickness and tilt of the whole hand | Flat glove, every finger at the same angle |
| Knuckle arc | Direction each finger points | Fingers like teeth on a comb |
| Thumb on its own joint | Whether the hand can grip or point | Thumb looks glued to the side |
| Finger boxes | Which way each segment faces | Tubes that read flat however you shade them |
So the two shapes that decide your drawing are the wedge and the arc. Both take you seconds. Both get skipped. If you want somebody walking you through that stage out loud, the graphite course I keep open on the desk builds hands the same way.
What You Need Before the First Line
Very little. You have a proportion problem here, not a materials problem.
- One HB pencil for construction, one 2B for the contour pass.
- A kneaded eraser, so the wedge can be lifted without tearing the paper.
- Any sketchbook you do not feel precious about.
- Your own free hand. It is the best reference in the room and it is free.
That is your whole list. A tablet works too, and you get the digital version in its own section further down.

How to Draw Hands Step by Step: the Build Order
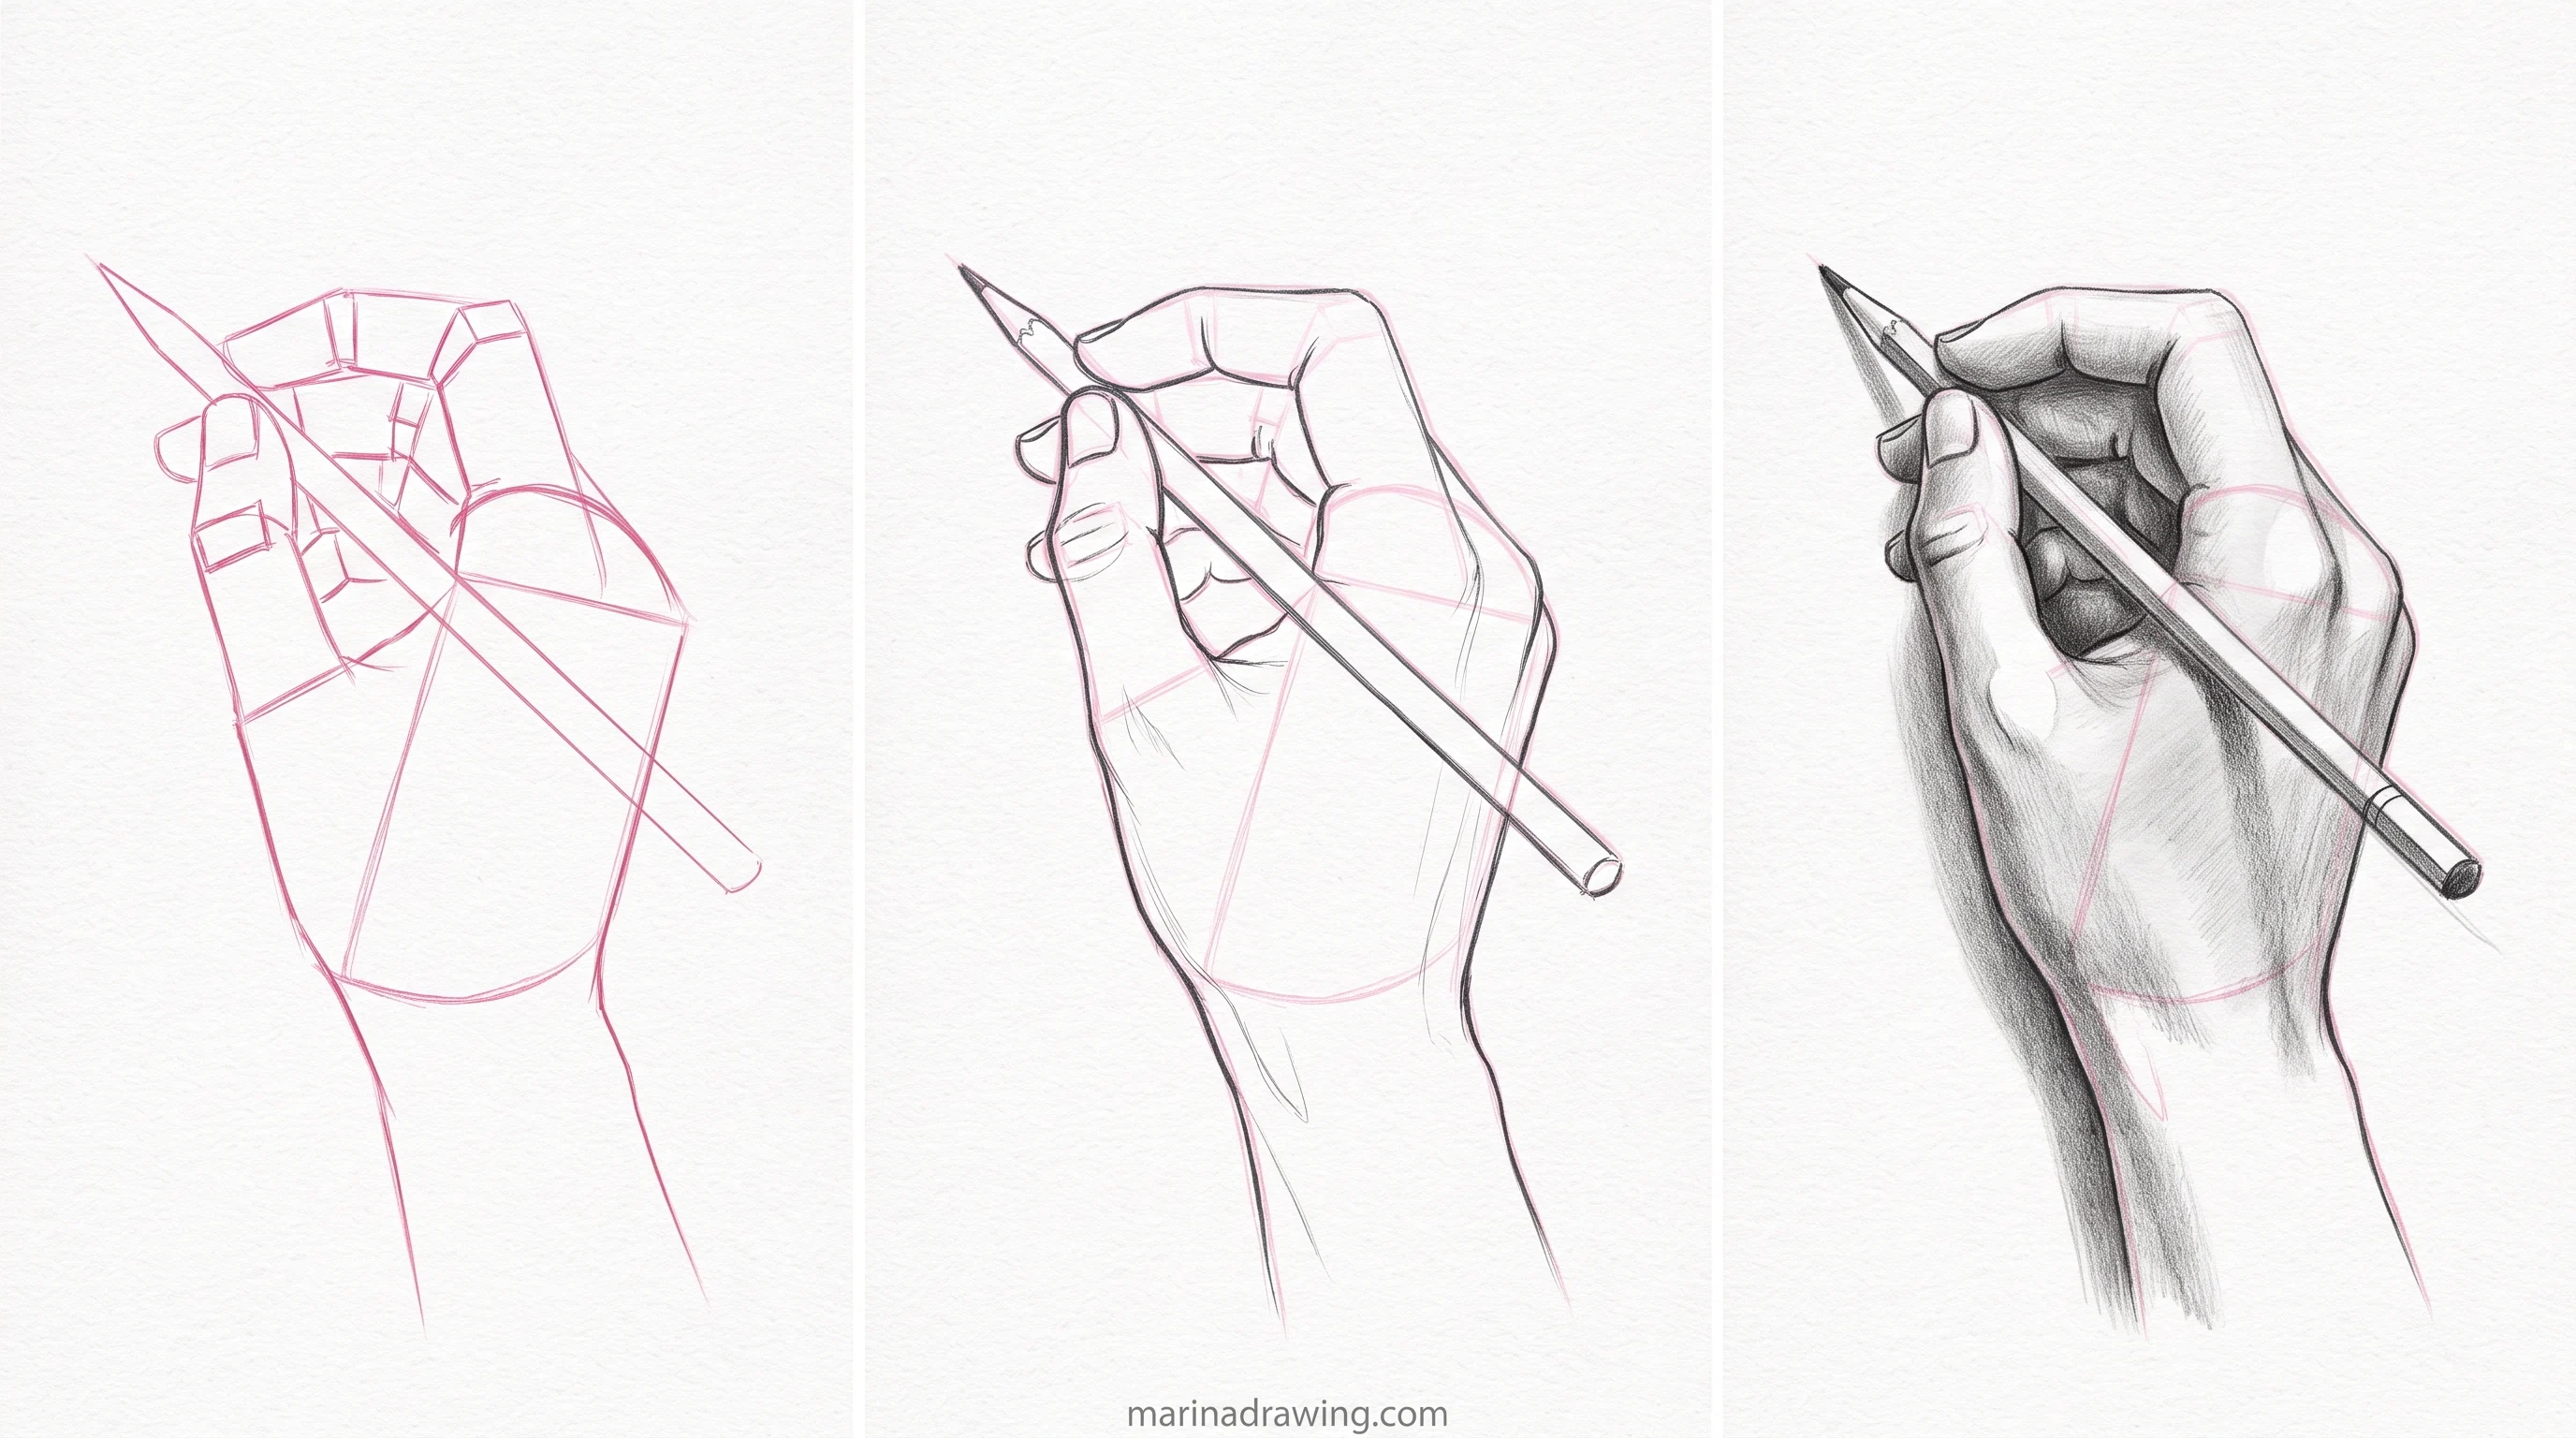
Work in this order. Do not jump to contour before your earlier steps exist on paper.
Grids for the proportion checks
Grid overlays for your canvas, so the palm-to-finger ratio gets measured instead of eyeballed.
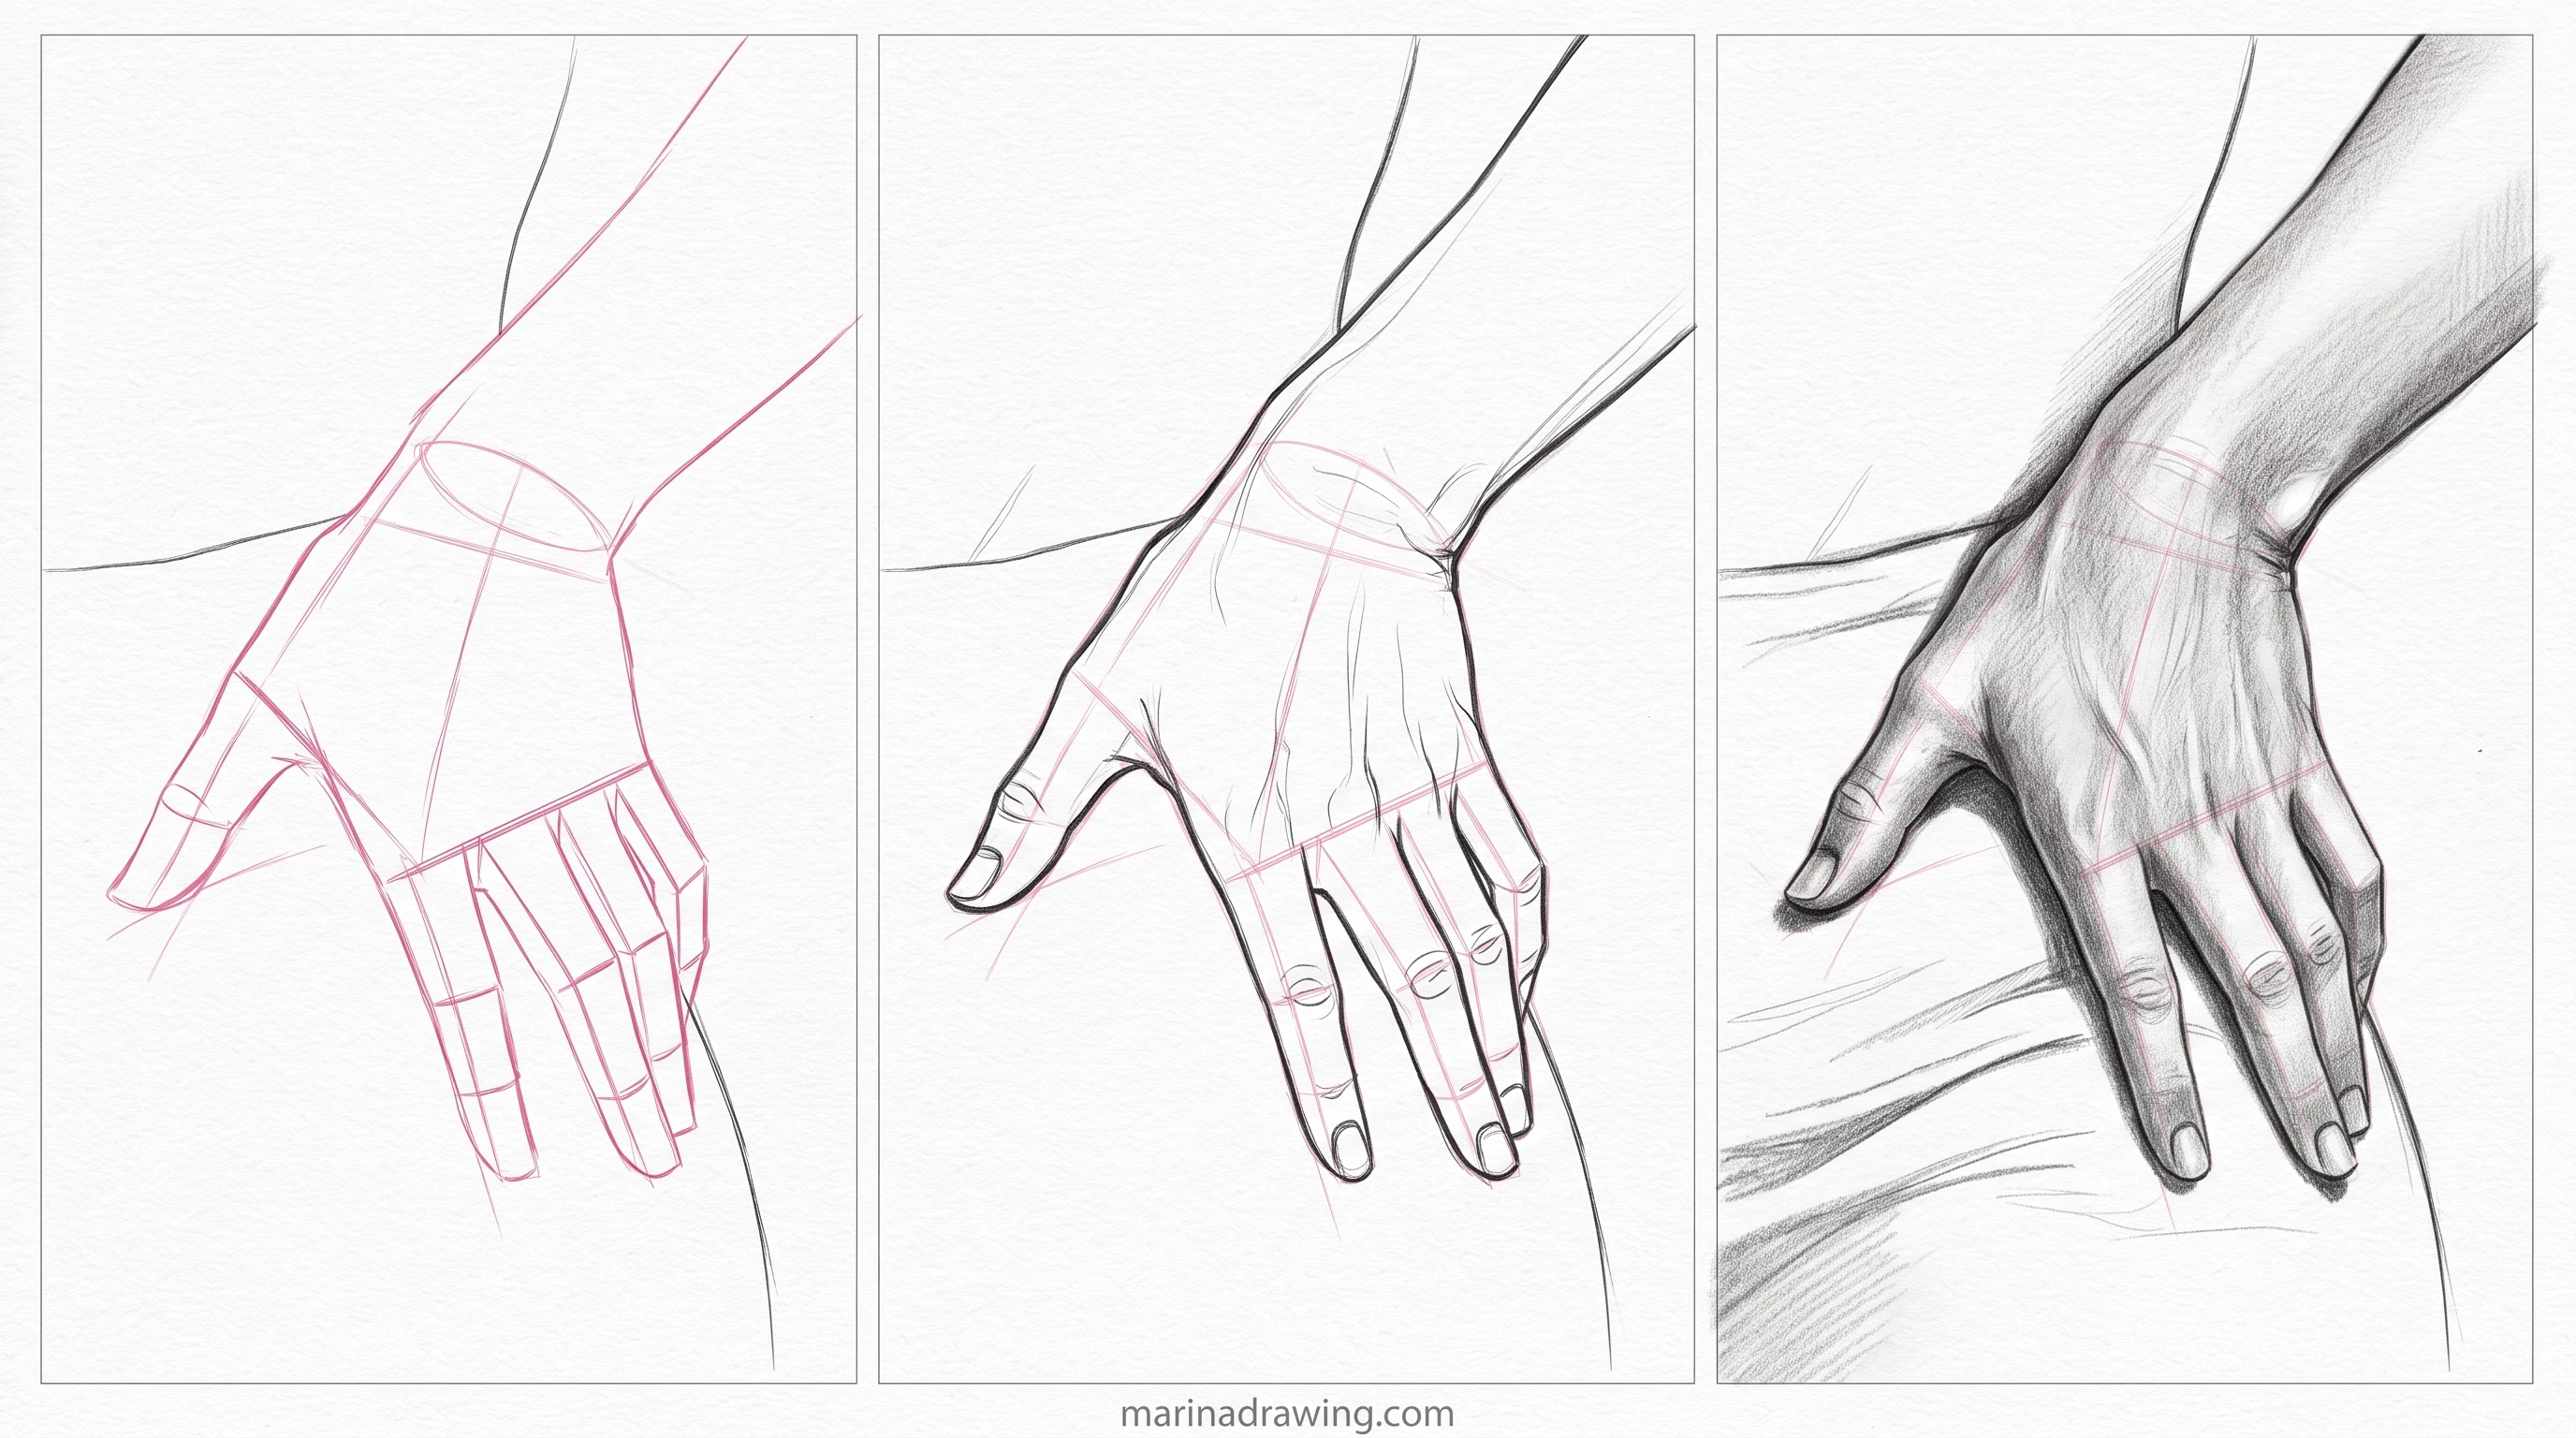
- Block the palm as a wedge. A trapezoid with real thickness. Wider and thicker at the wrist, narrower where the fingers will start. Decide the tilt now: which edge is near you, which is far. Nothing else is on the page yet.
- Mark the knuckle arc. One curved line across the top of the wedge. Not straight, not a half circle. It bows up through the middle two knuckles and drops toward the pinky. This line hands every finger its base point and its angle.
- Place the thumb as its own unit. The thumb is not on the arc. It attaches low on the side of the palm, nearer the wrist, on a joint that lets it swing across. Block it as a short wedge of its own, at its own angle.
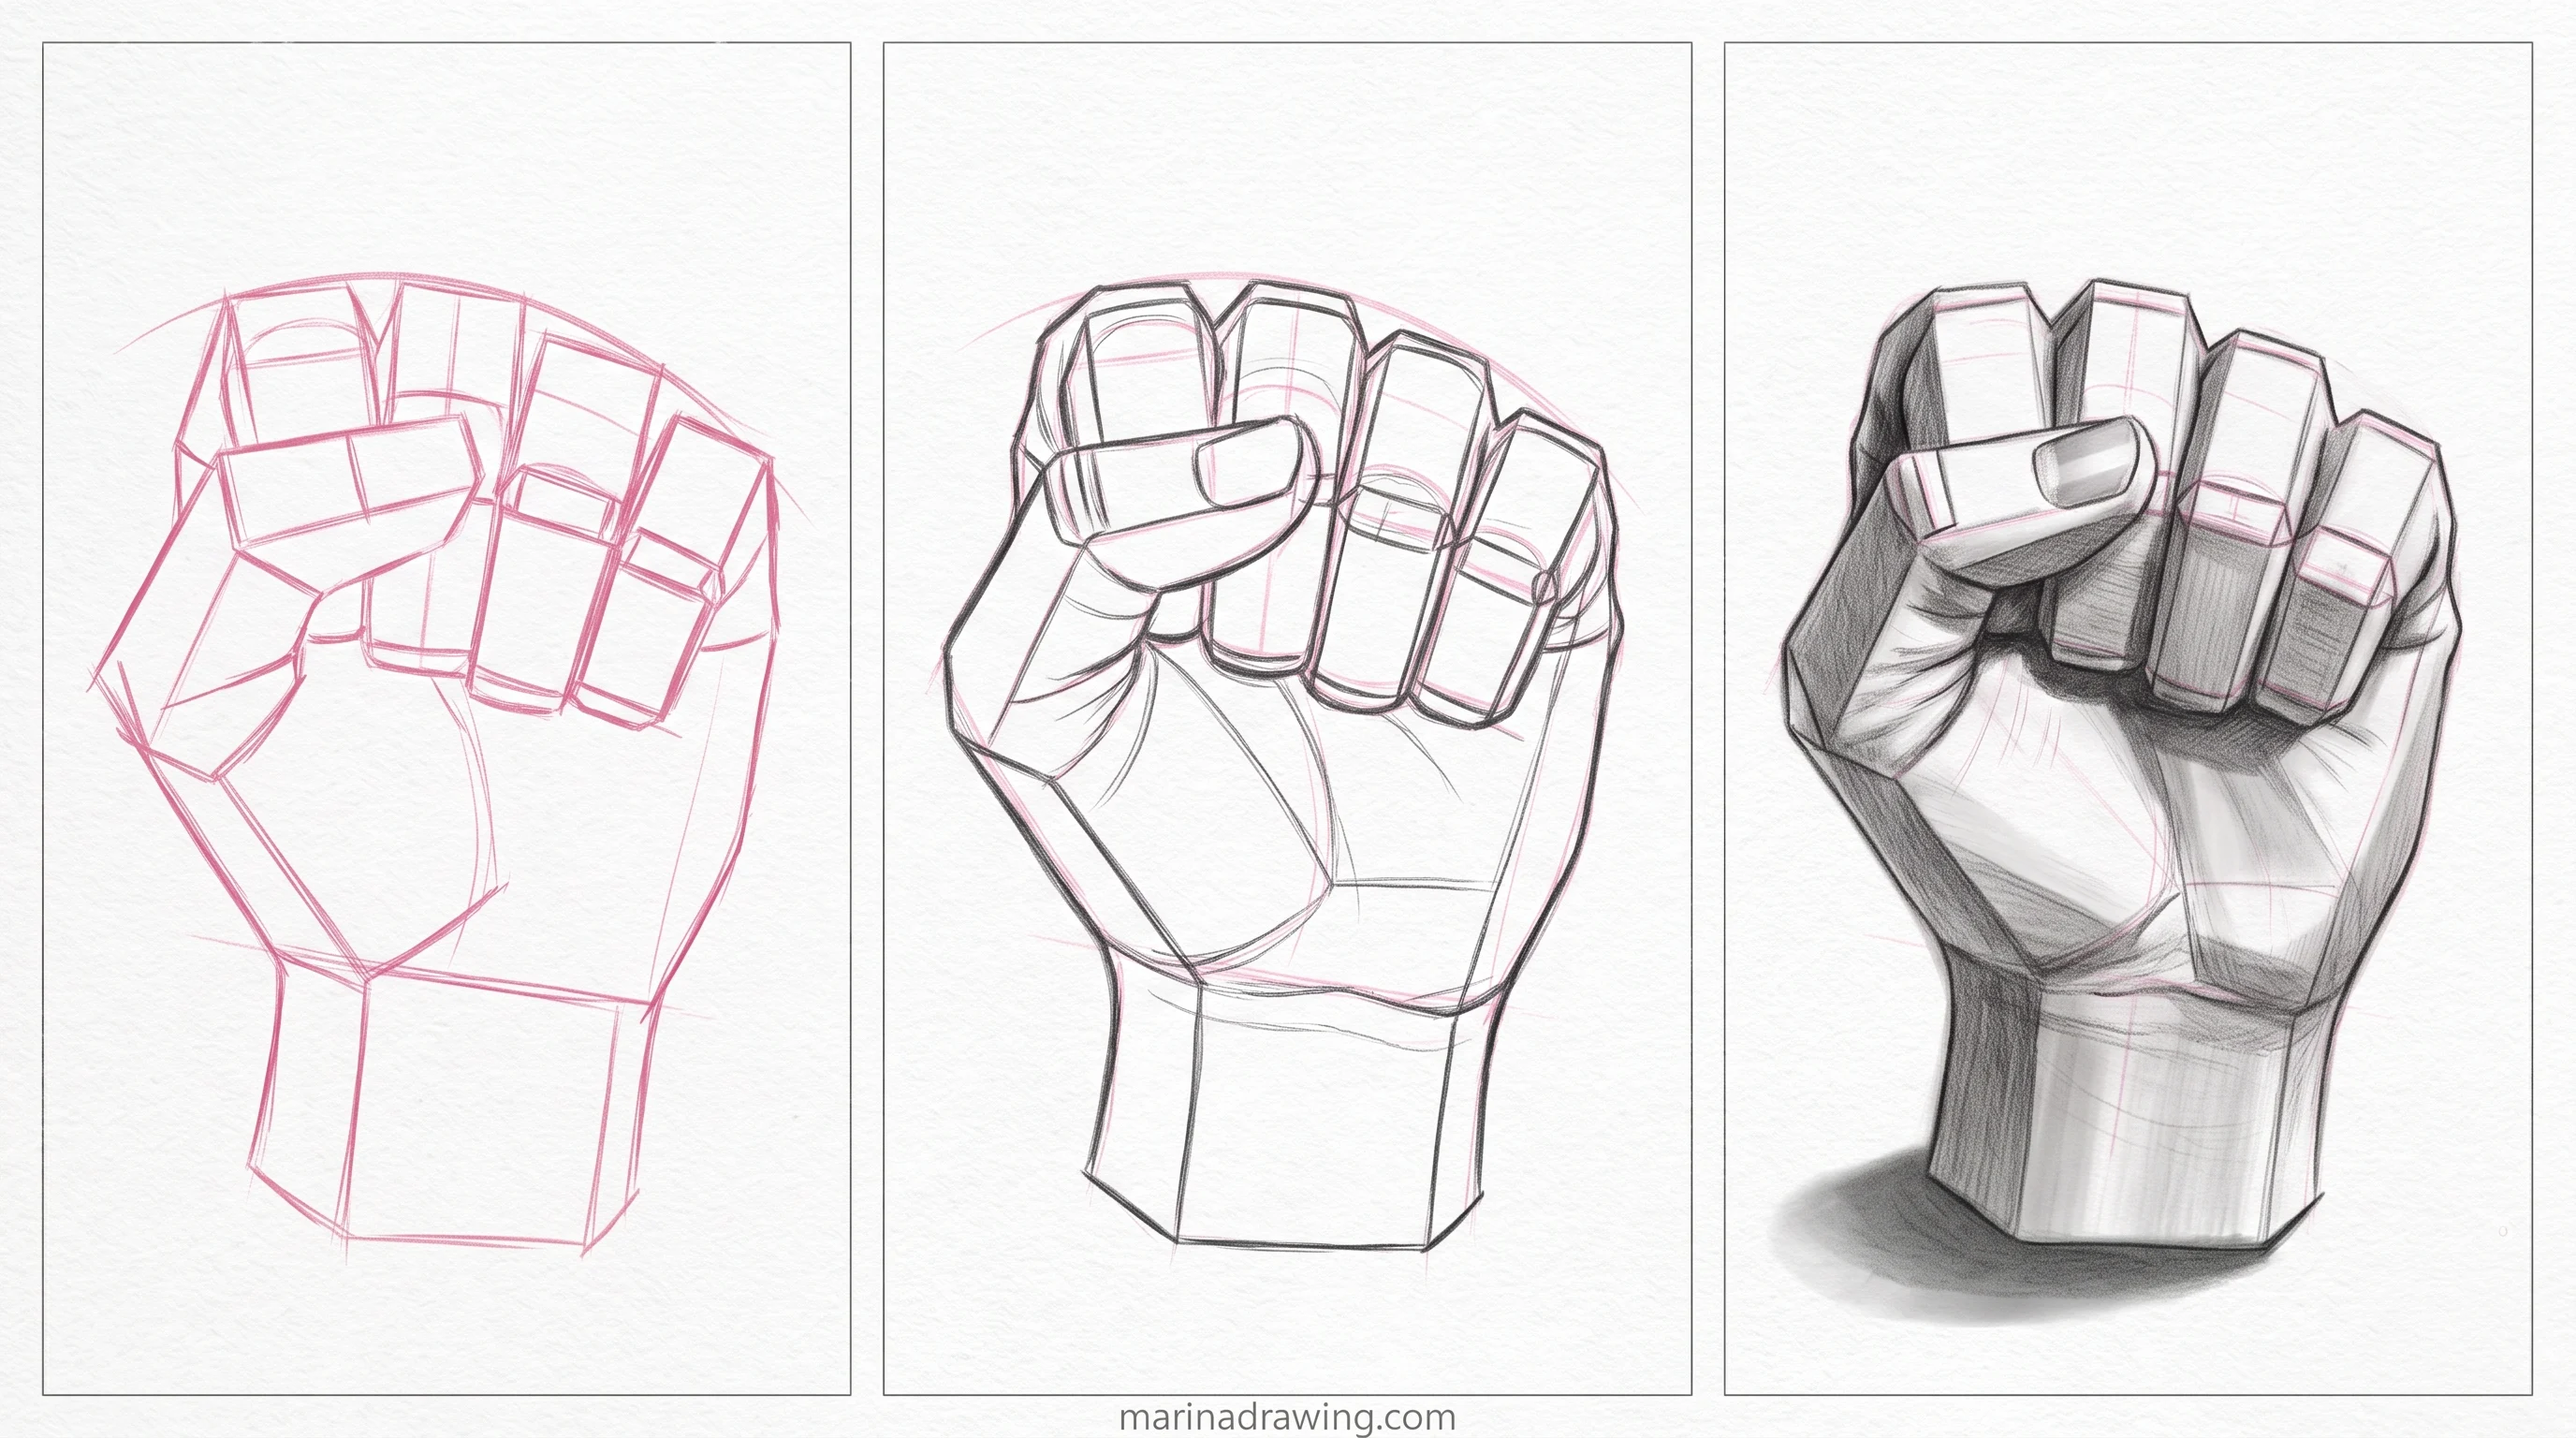
- Build each finger as a stack of boxes. Three boxes per finger, each shorter than the one before it, angled outward along the arc. Still construction. No rounding, no skin, no nails.
- Add contour last. Now go over the whole thing with one continuous line, rounding boxes into knuckles and the wedge into skin. This is the only pass meant to look finished.
Five steps. Your first two take seconds and decide the drawing.

The Box Method for Hands, in Plain Words
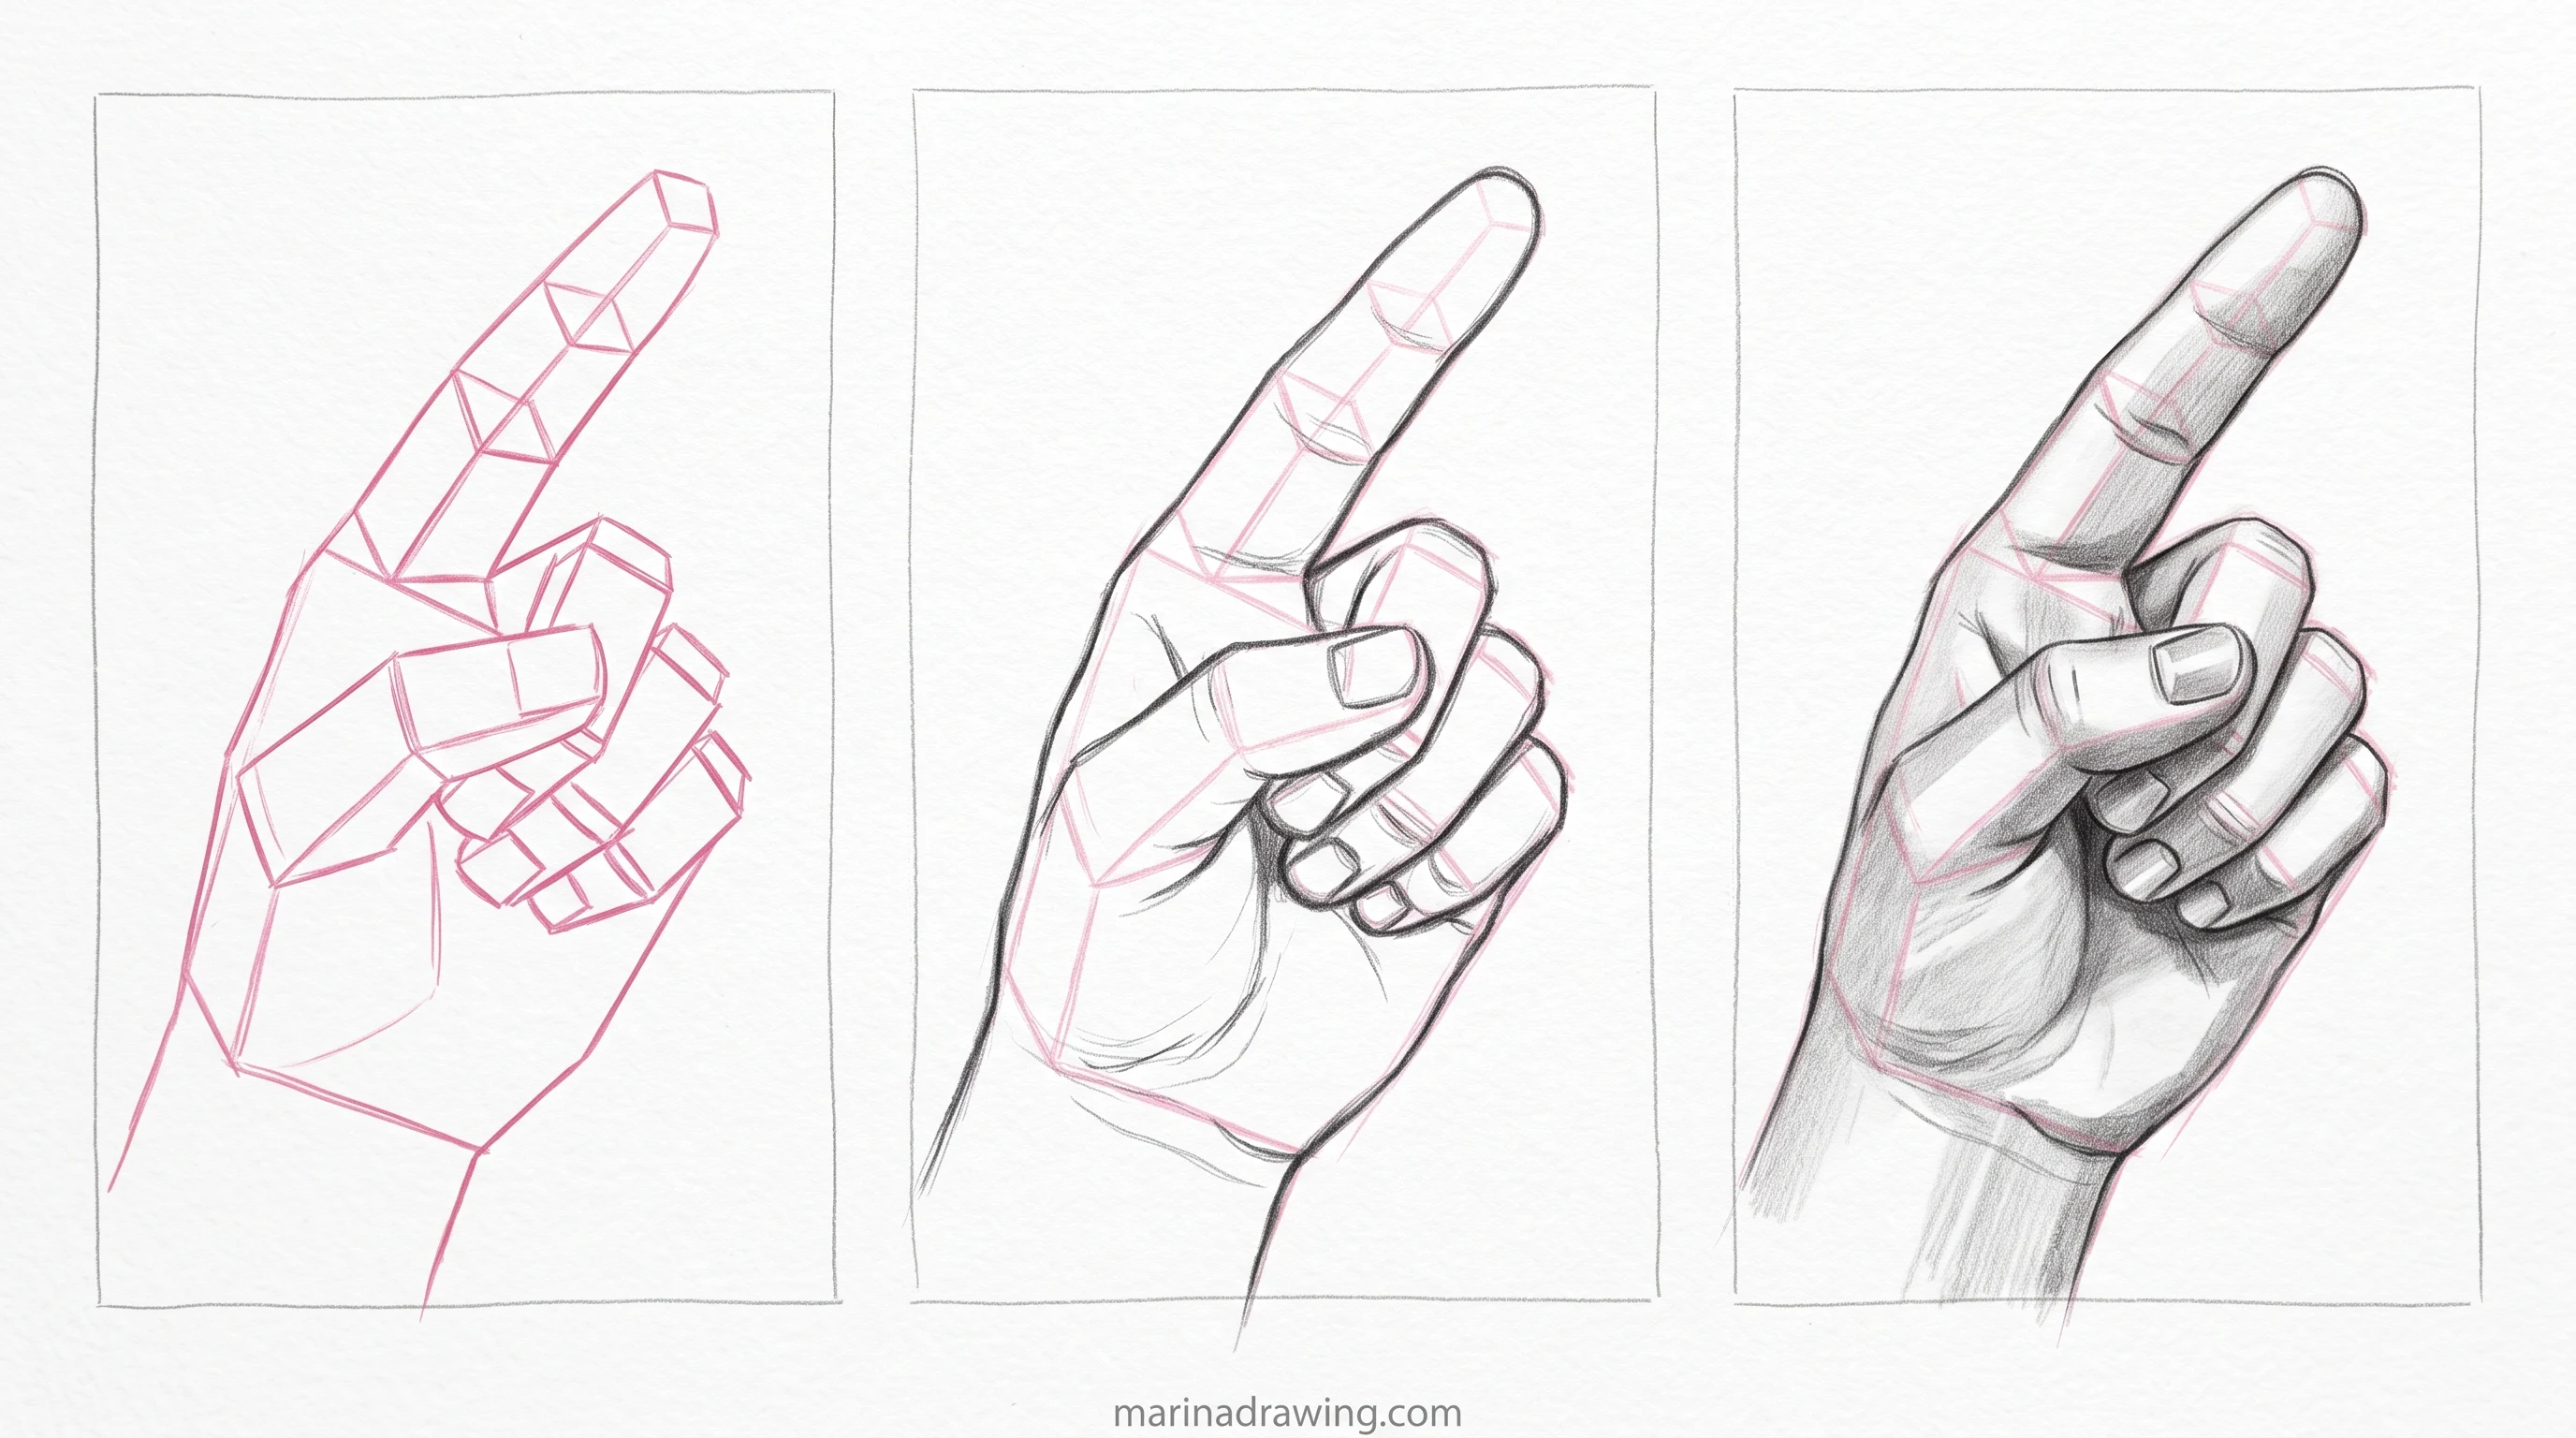
People call step four the box method, and the name makes it sound harder than you will find it.
A finger segment is a short box. You are drawing a matchstick with four sides, not a tube.
The reason is simple. A box shows you which way it faces, and a tube does not. When your middle segment tilts away from you, the box says so: its far end is narrower than its near end.
Three boxes per finger, shrinking toward the tip. The thumb gets two. That is 14 small boxes for your whole hand, and you put them down faster than one careful finger outline.
Keep them light. You can move a box for nothing; a finished-looking line costs you. If block-in itself is new to you, start with easy drawings for beginners and come back.
How to Draw Hands Easy: the Simple Five-Minute Version
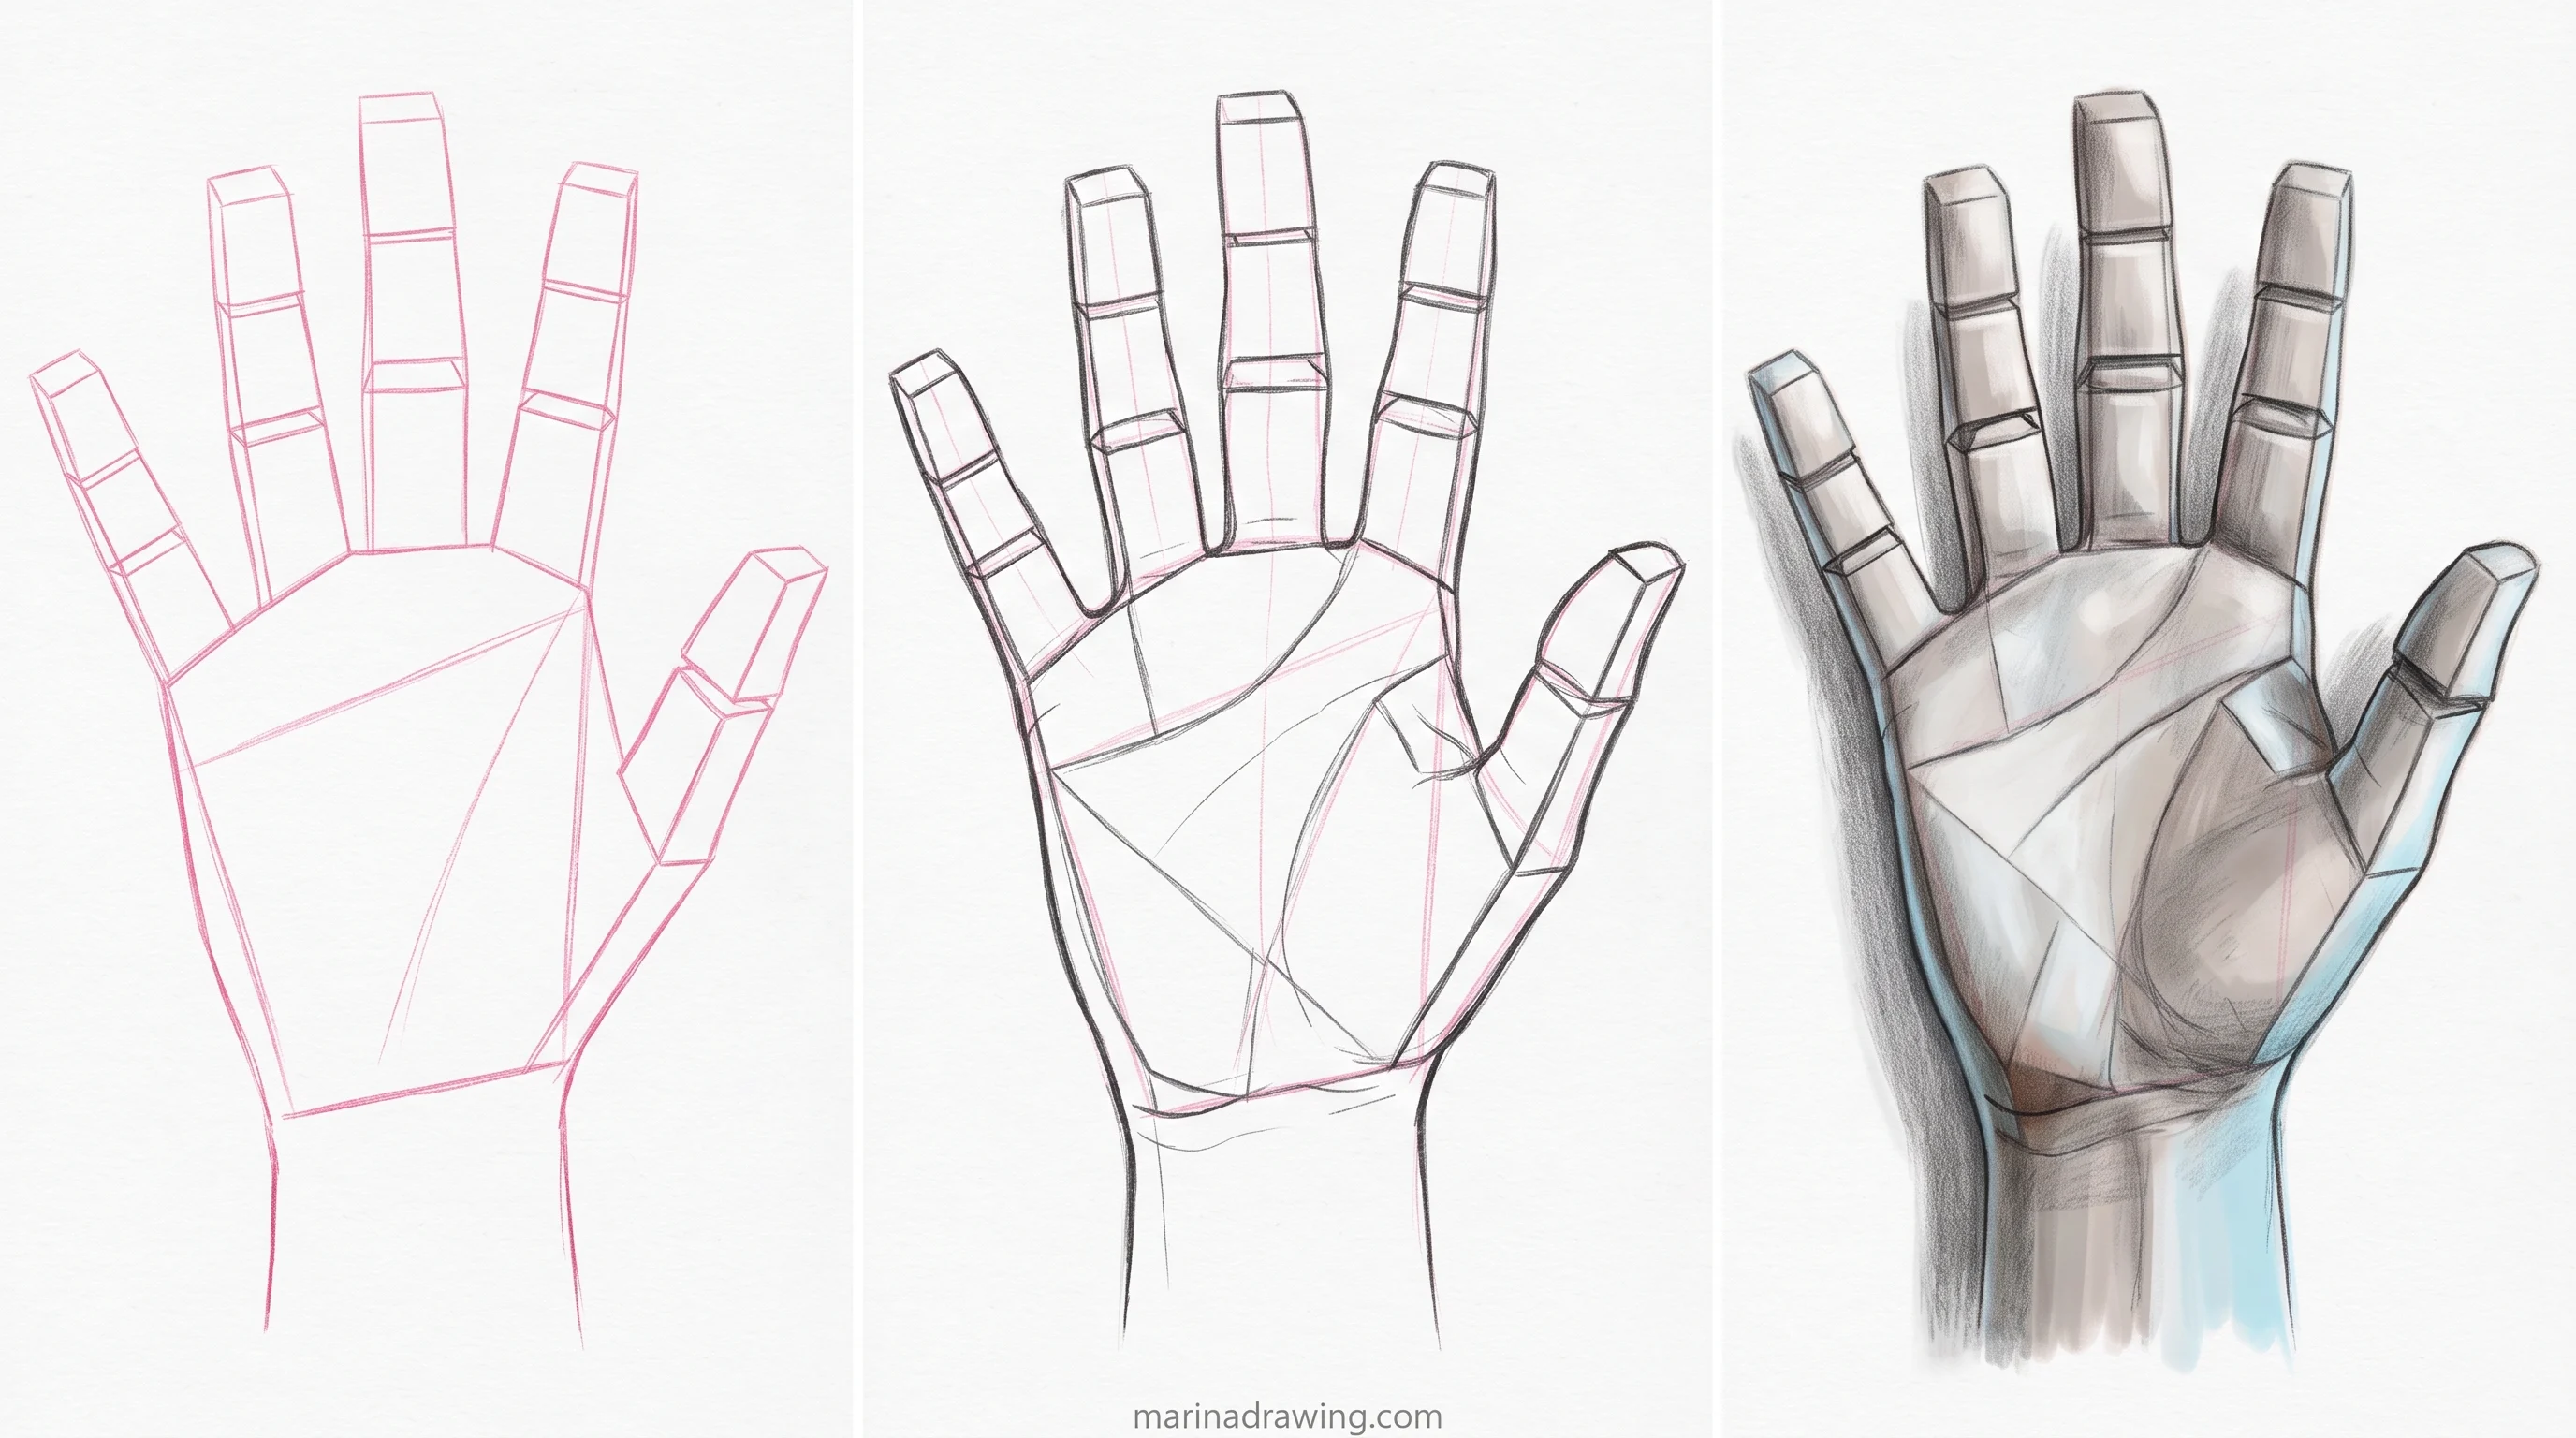
Short on patience? Cut the build order down to three moves. This is the easy version I use for warm-ups and the one I teach to absolute beginners.
- Draw a soft rectangle with a tilt. That is the palm.
- Curve one line across the top. That is the arc.
- Draw four straight sticks off the arc and one off the side for the thumb. Then thicken the sticks.
Five minutes, and your hand already reads better than a careful mitten. Basic, simple, and it holds up, because the two shapes that matter are still there. You can do 10 of these on one page while the kettle boils. The step-by-step graphite lessons use the same shortcut before the full build.
Checks That Catch a Wrong Angle Before Contour
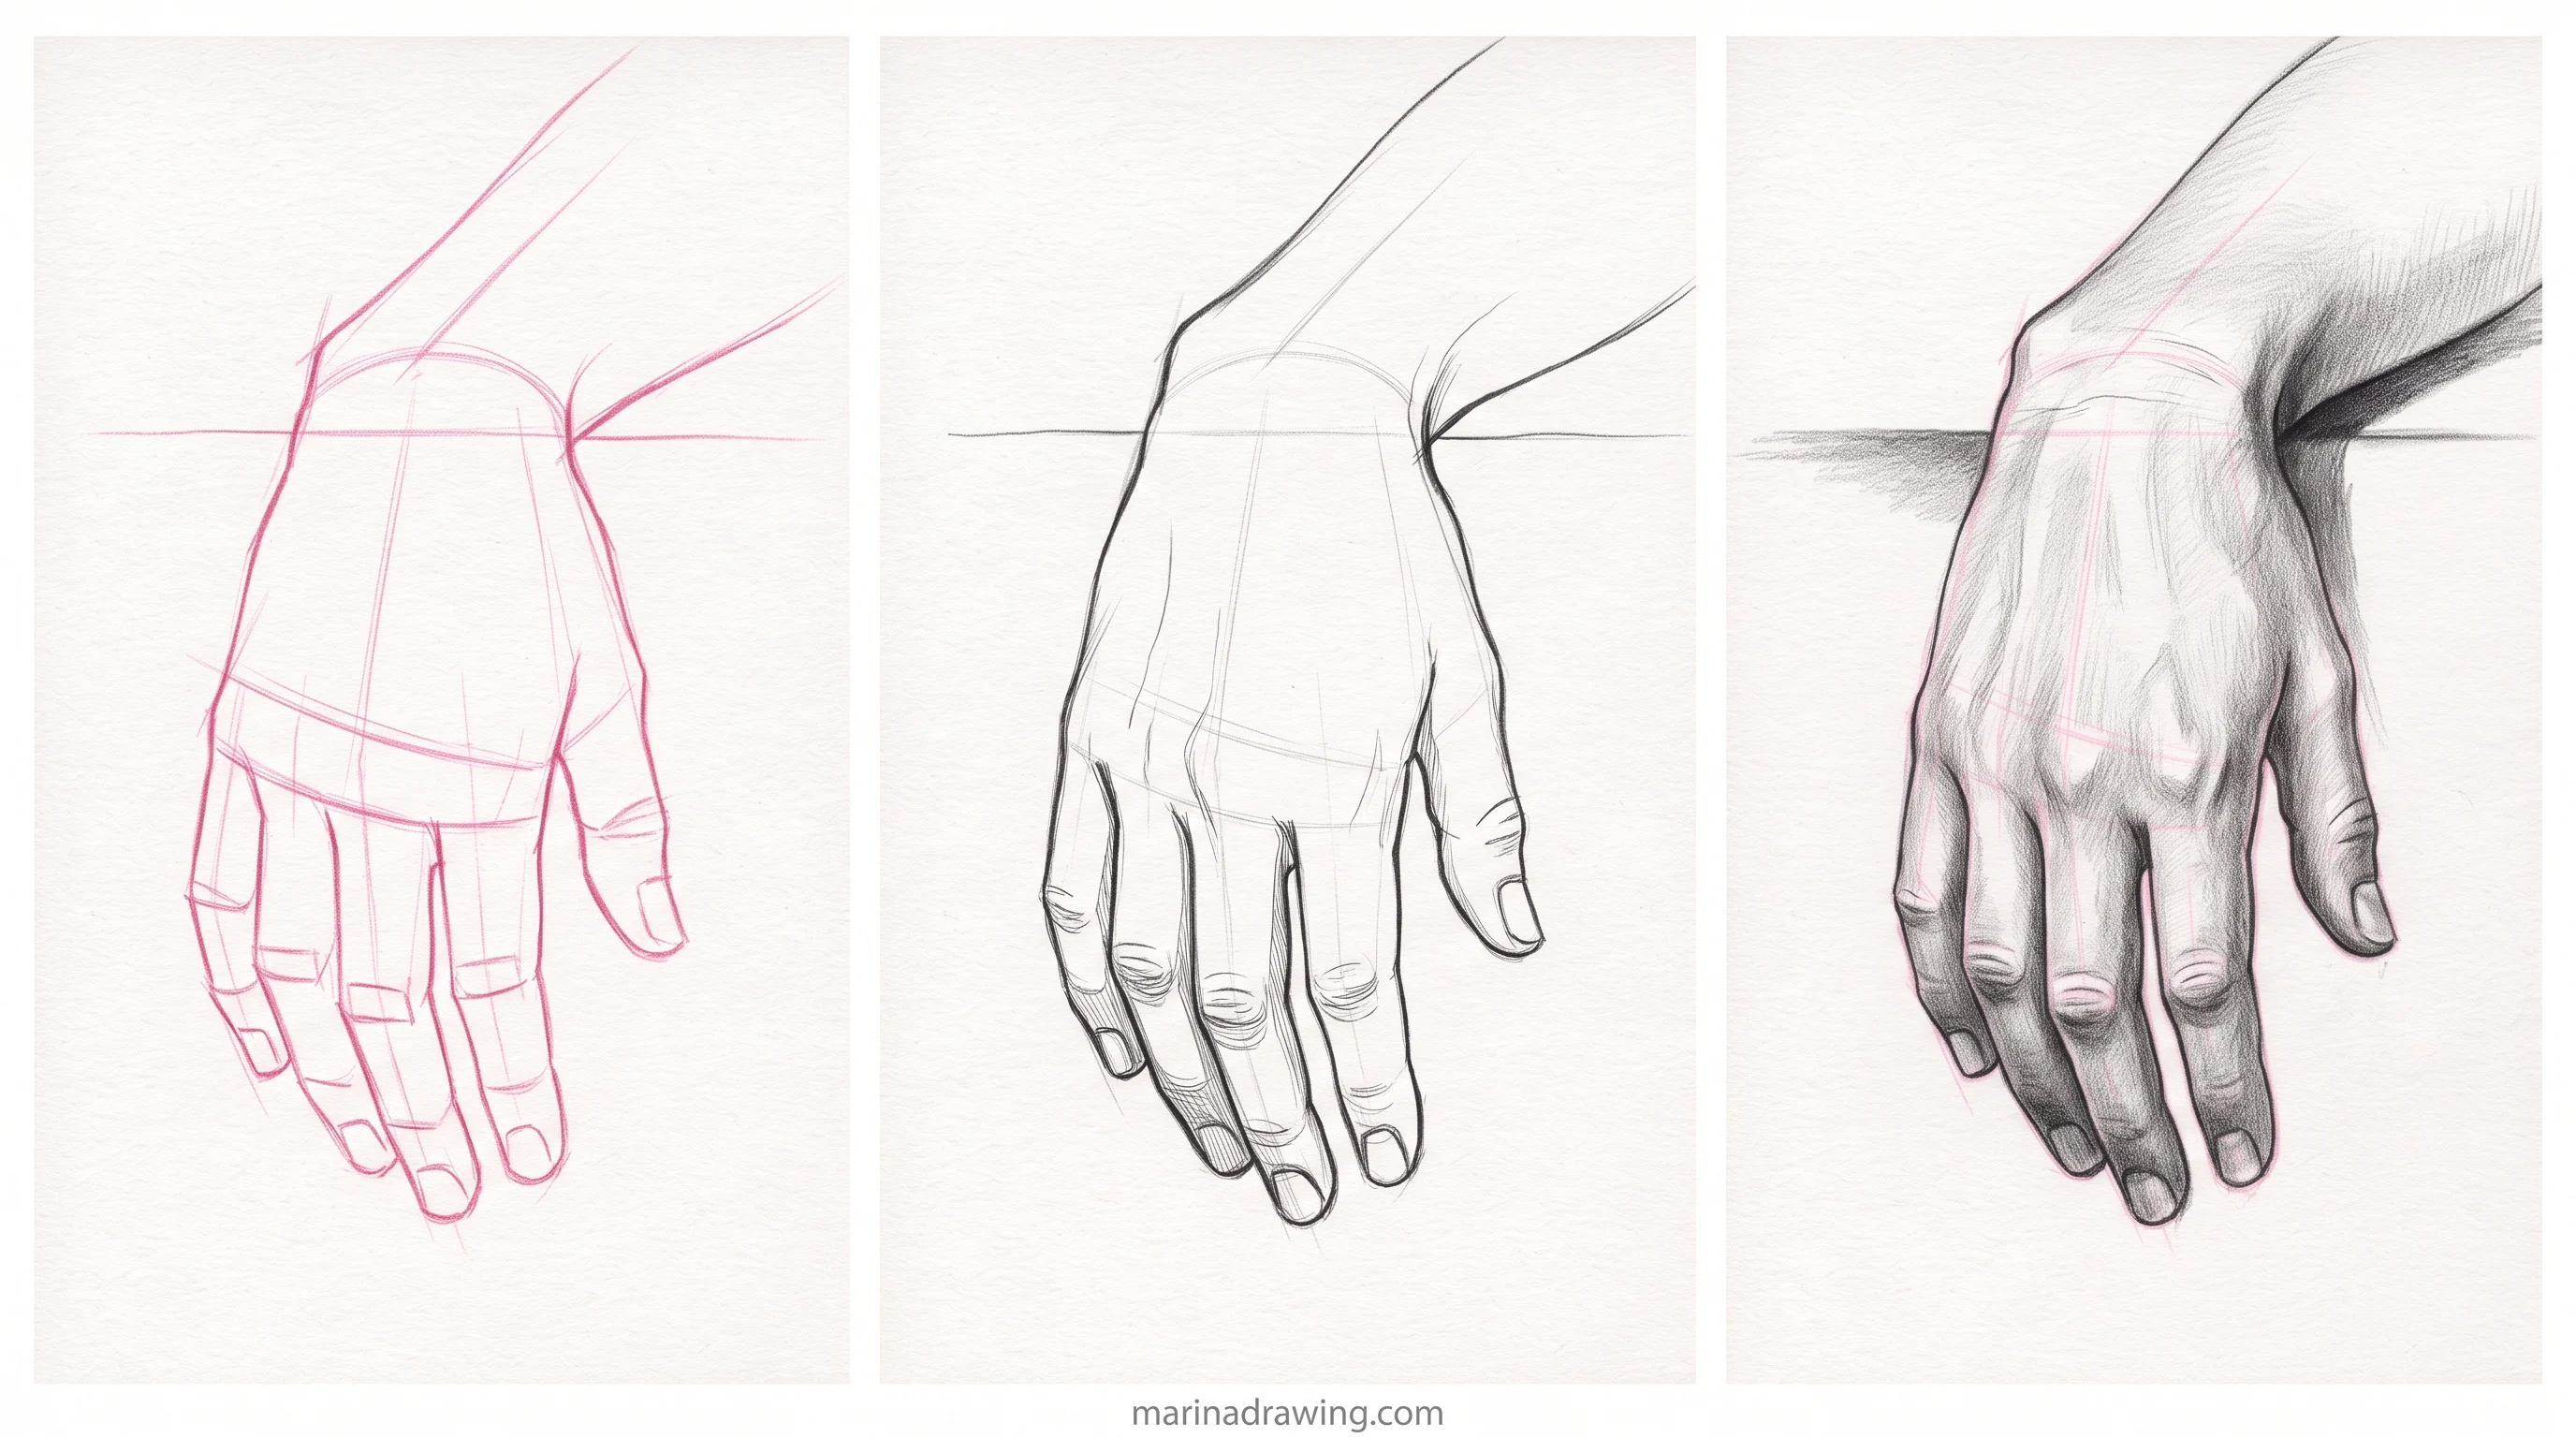
This is the part nobody hands you. Everyone lists the mistakes afterwards. Almost nobody gives you a way to test your own drawing while it is still boxes and the line can still move.
Run these three checks before your contour pass.
Construction lines that stay visible under the contour
Brushes that keep your palm wedge and box stack legible while the contour pass goes over them.
- Flip the page. Hold it to a window or mirror it on screen. A lopsided wedge jumps out at once, because your eye stops recognising a hand and starts reading geometry. If the shape looks flat and symmetrical after the flip, you never tilted it.
- Cover the fingers. Put your palm over everything above the arc. What is left should still read as a wedge with a near edge and a far edge. If it reads as a rectangle, step one got skipped.
- Lay a pencil along the arc. The four base points should sit on a curve. If the pencil edge touches all four at once, your arc is straight, and every finger is about to point the same way.
Two more, if your pose is stubborn. Measure where the thumb joint sits against the wrist crease, not against the index knuckle: it belongs nearer your wrist. And count your boxes out loud. Three per finger, narrowing to the tip.
These checks are the reason I stopped restarting drawings. A wrong angle caught at the box stage costs one erased line. Caught after contour, it costs the page. If you want the same catch-it-early habit applied to whole figures, that is what the course lessons drill.

Hand Proportions People Get Wrong, Including Arms and Legs
42 hours of pencil drawing training, lifetime access
The video course I point plateaued students to — full lessons on portraits, hands, and realistic shading, not another short tutorial.

A few numbers worth holding, once your wedge works, and the graphite course shows how to check them against a live model.
- Your palm and your middle finger are close to the same length.
- Your whole hand is roughly the length of your face, chin to hairline.
- The little finger tip reaches about the top joint of the ring finger.
- A hand is about one seventh of total body height, which is what keeps hands and arms and legs in scale on a full figure.
Use these to check a finished drawing, not to build one. Your hand can be perfectly proportioned and still look flat, because flatness is an angle problem, not a length problem.
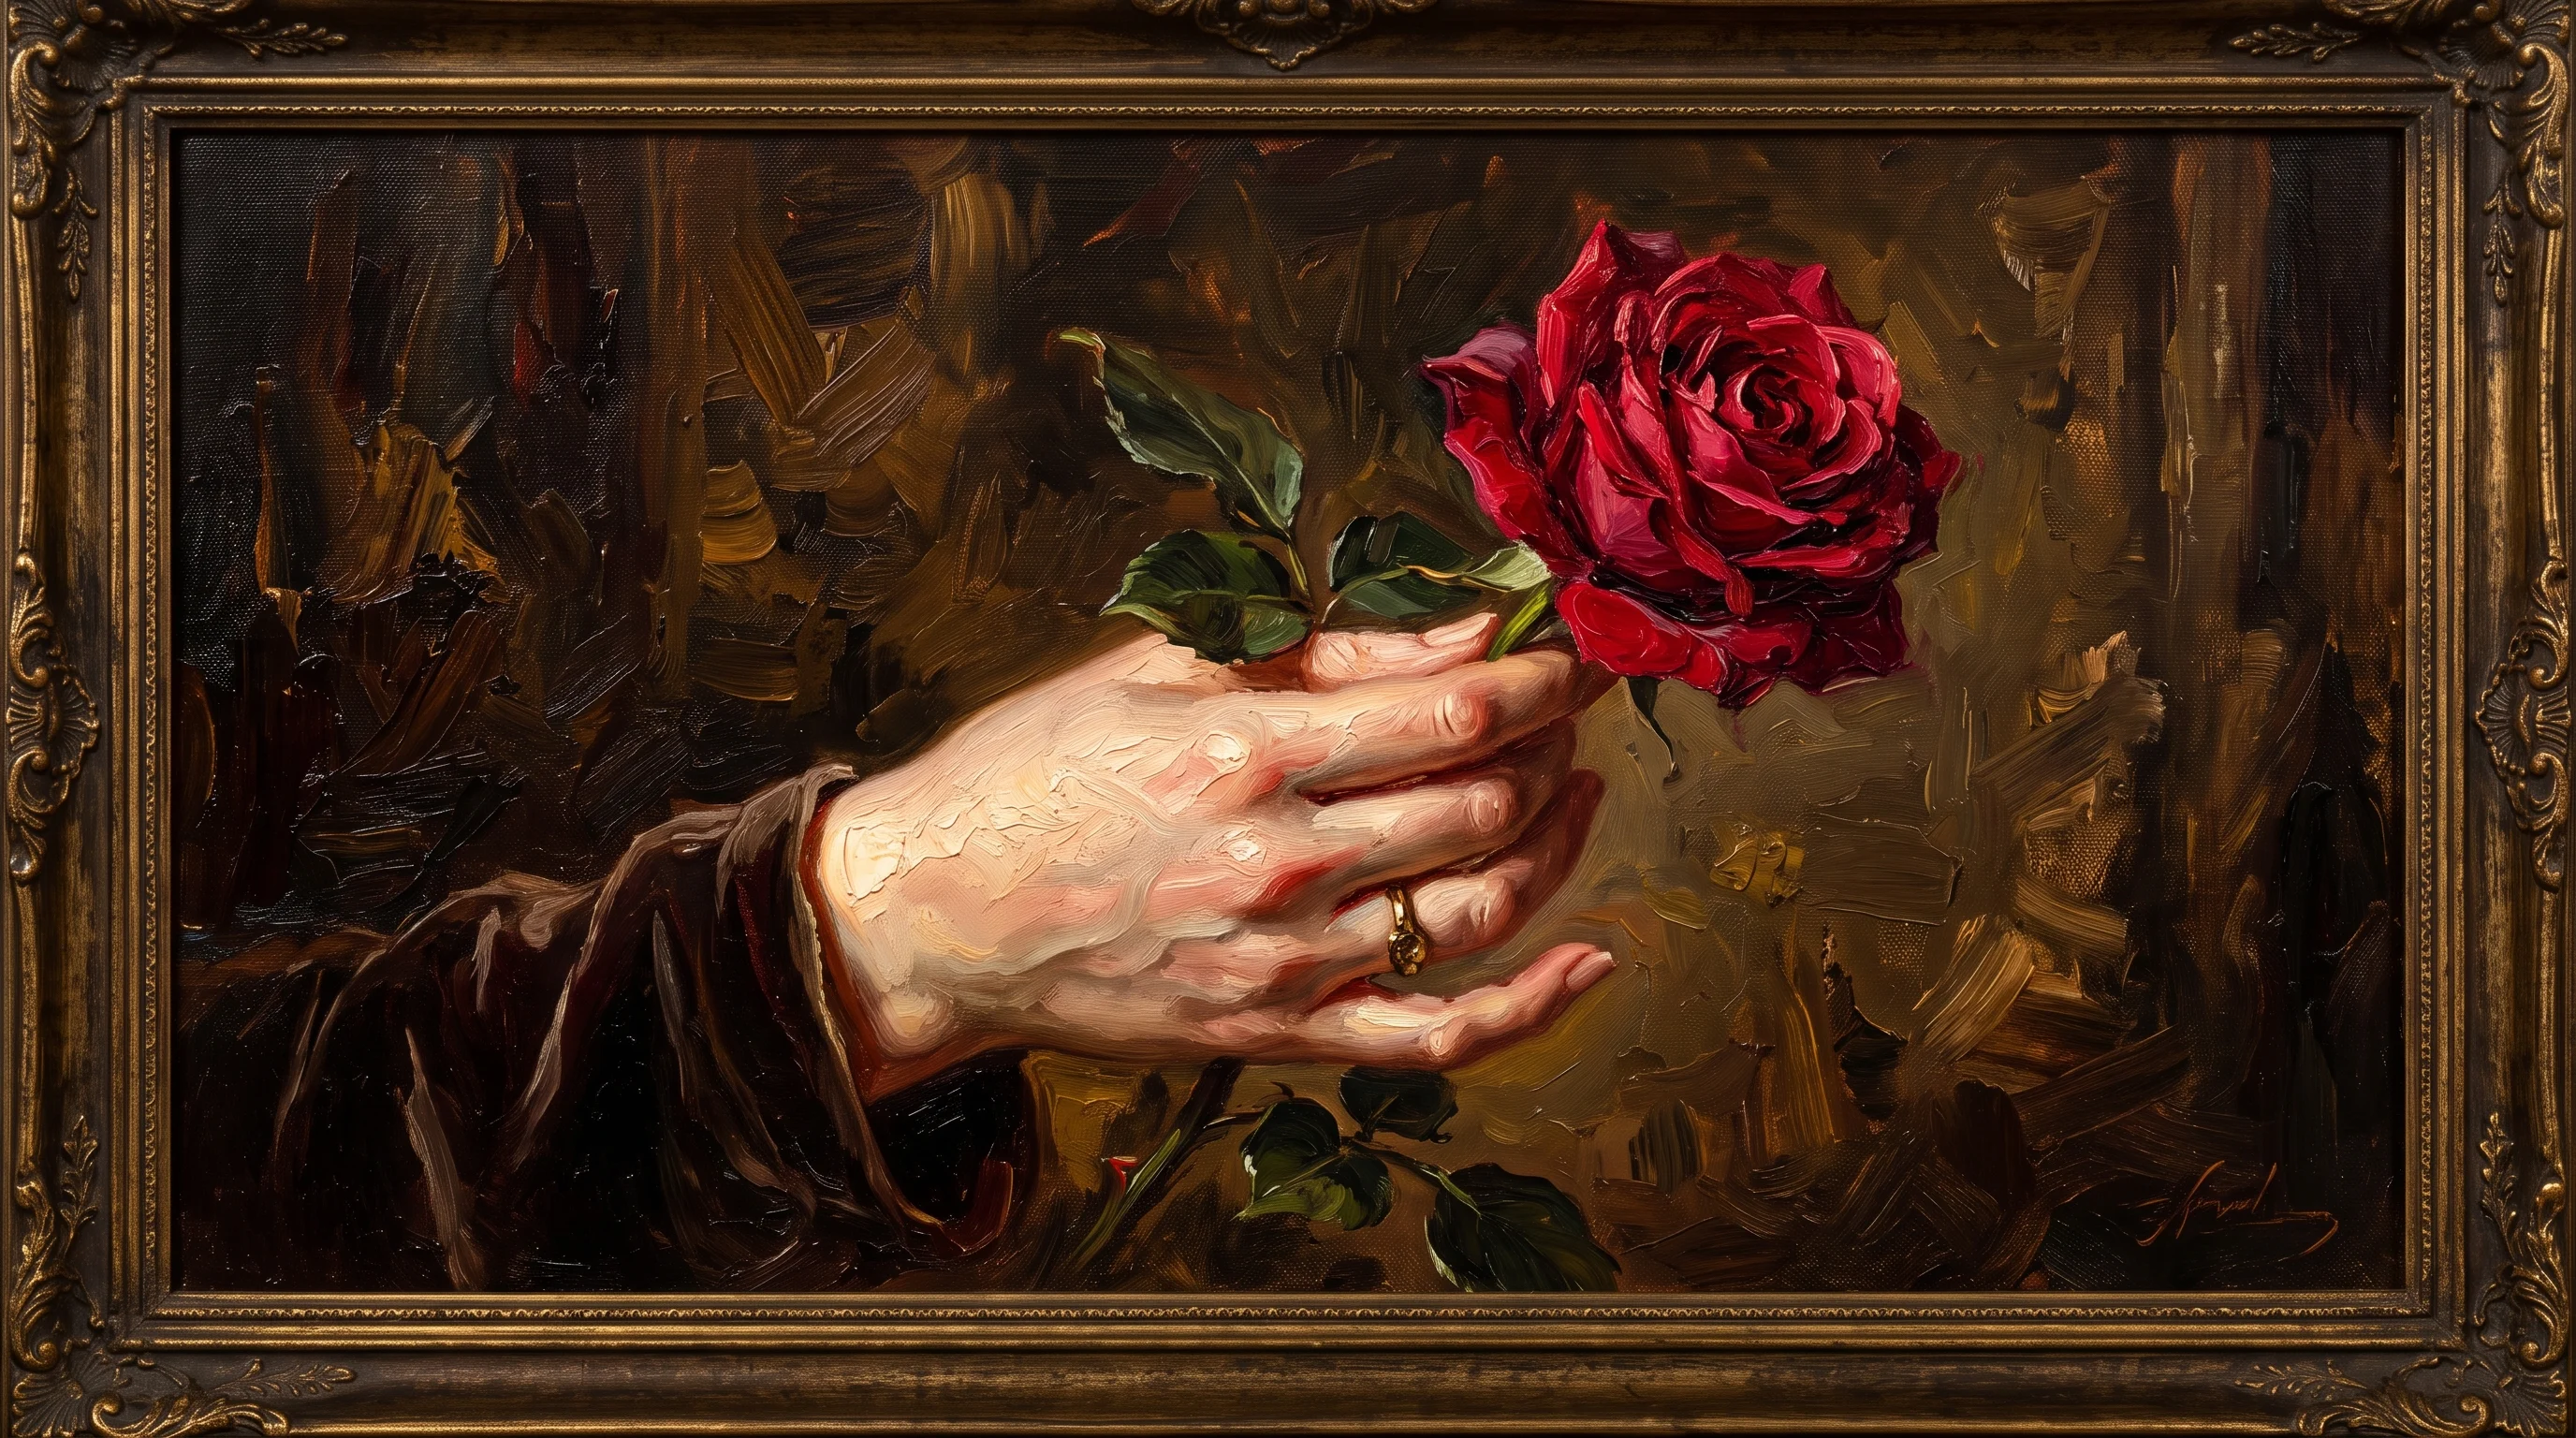
Your Other Hand Is the Best Reference You Have
You own a model that holds any pose for free and never cancels.
Draw your non-dominant hand. Put it on the table, on your knee, around a mug. Look at it for twice as long as you draw. Then stop at six to eight poses in one sitting, because past that the reference hand cramps and starts lying to you.
You are not cheating. It is the cheapest reference book you will ever own, and it is the first thing the graphite lessons tell you to put on the desk.
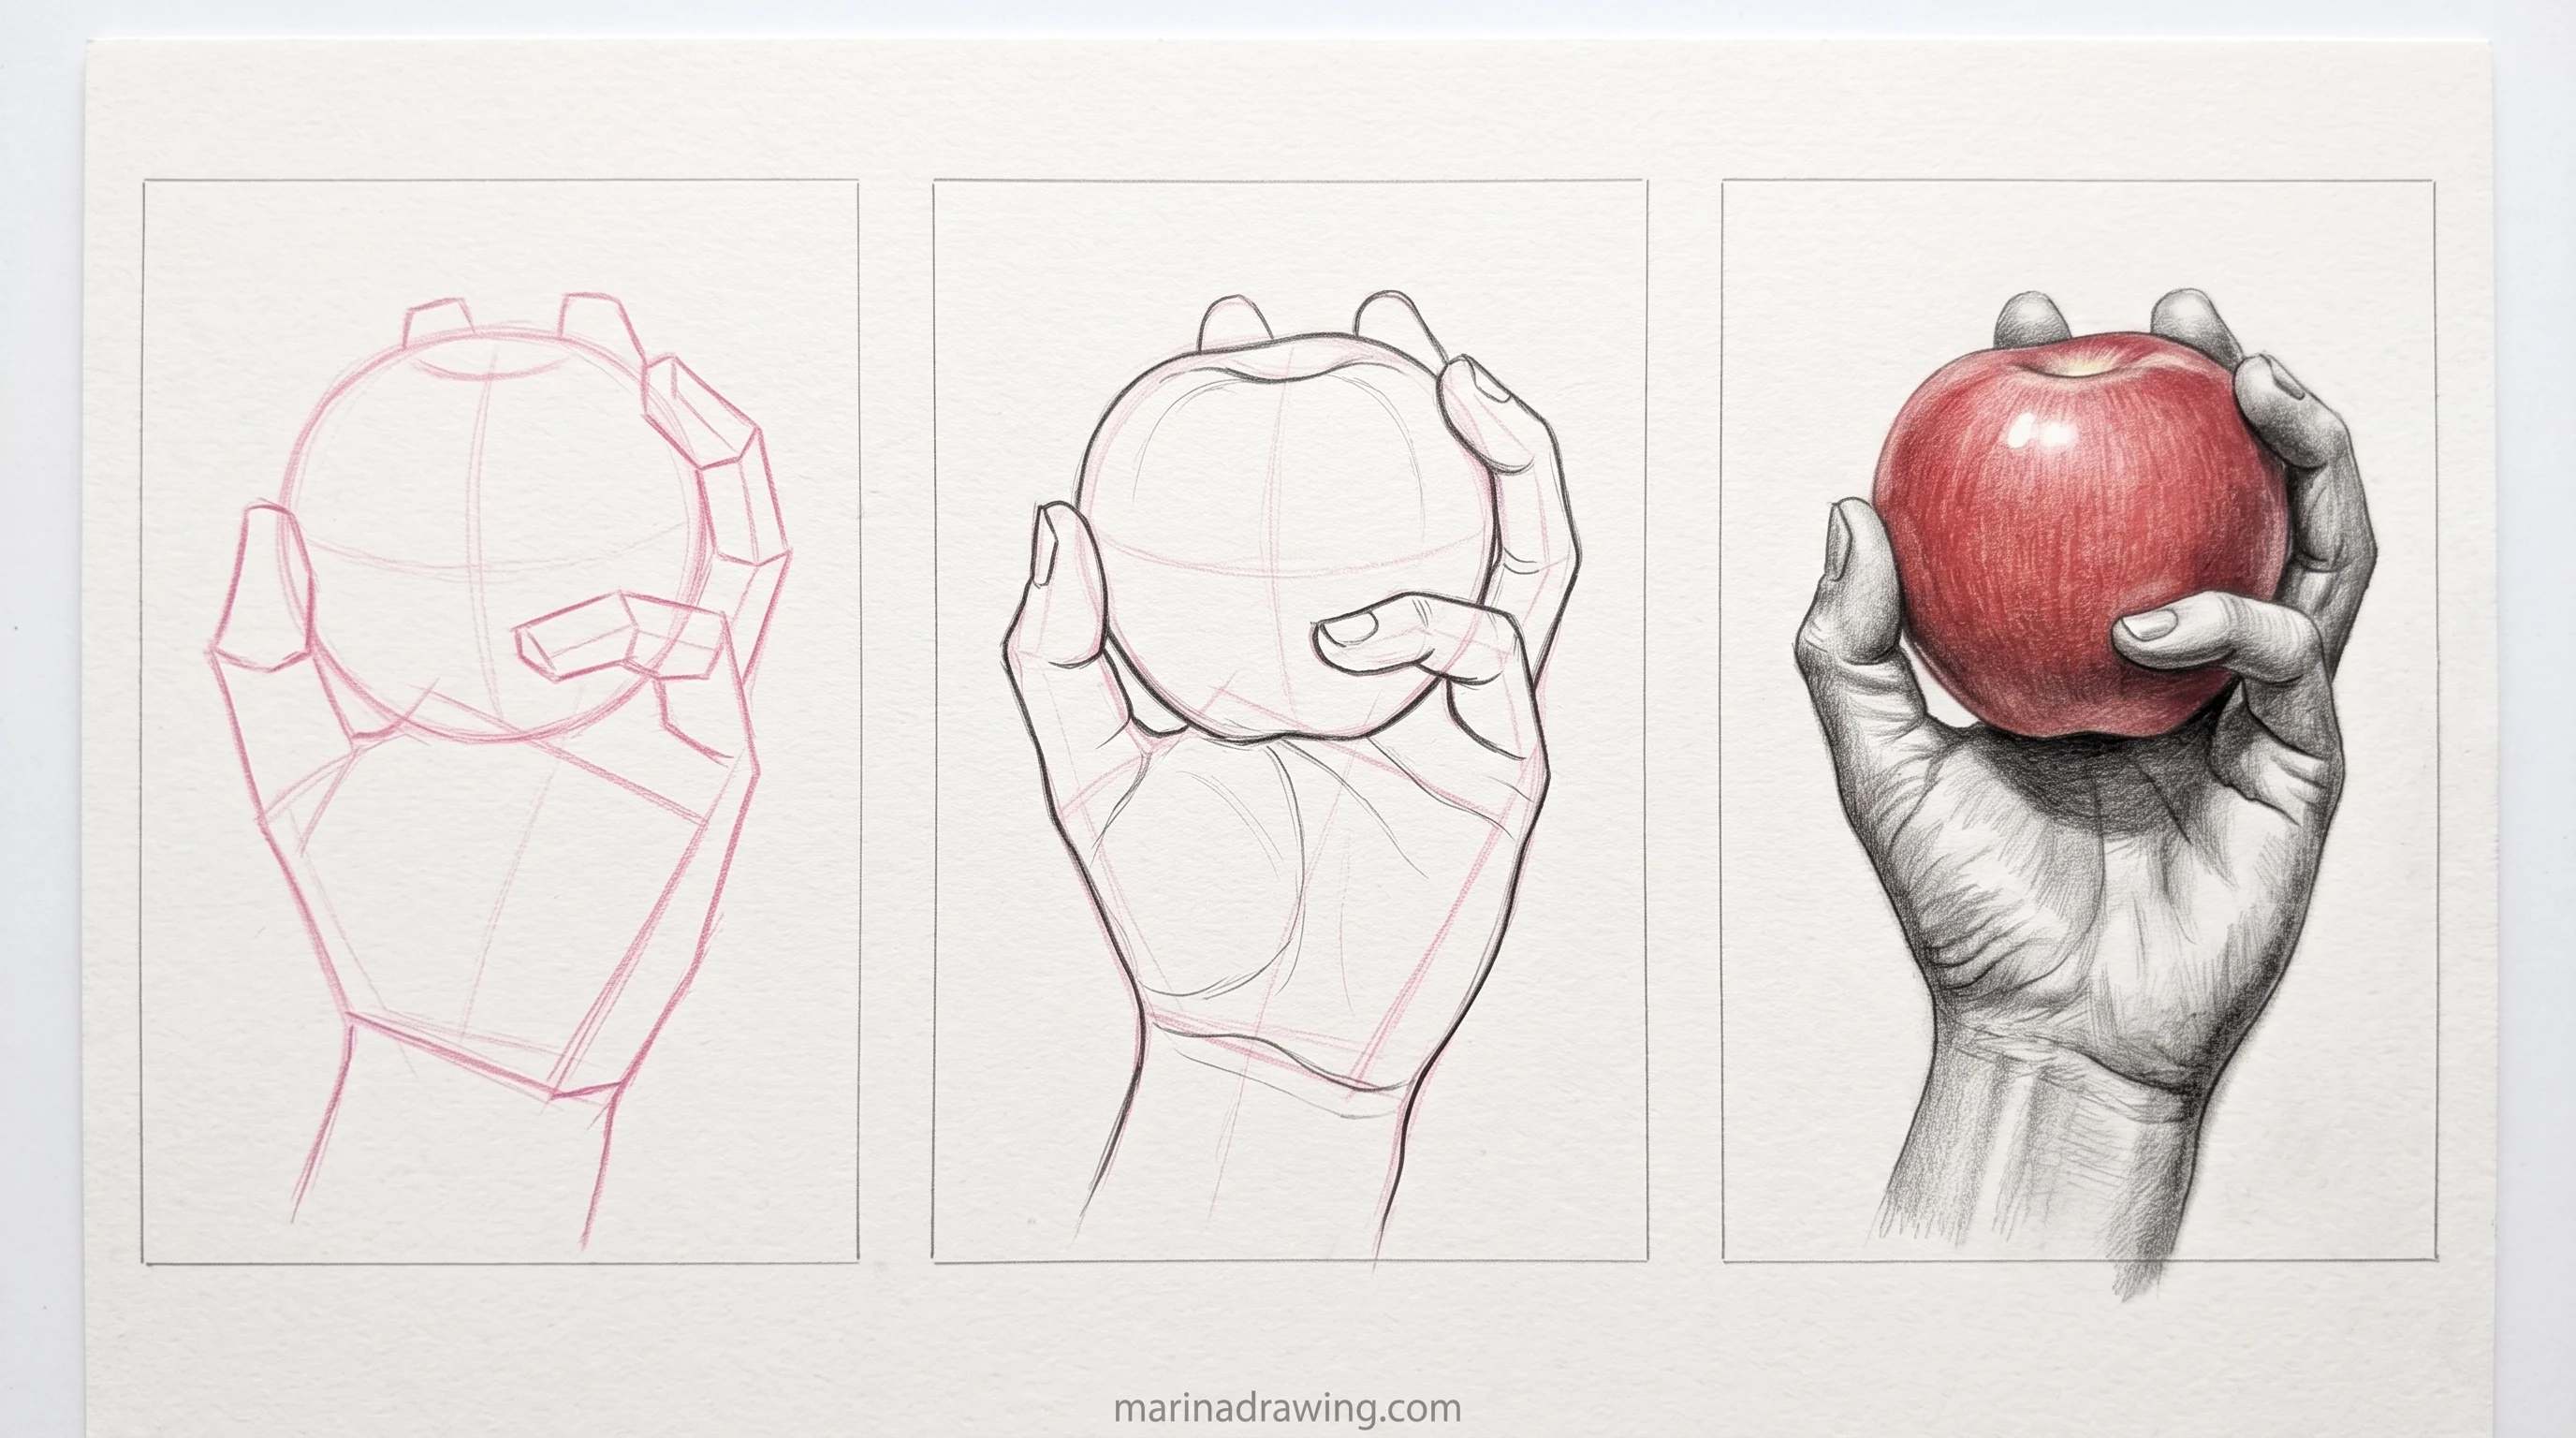
How to Draw Hands Holding Something
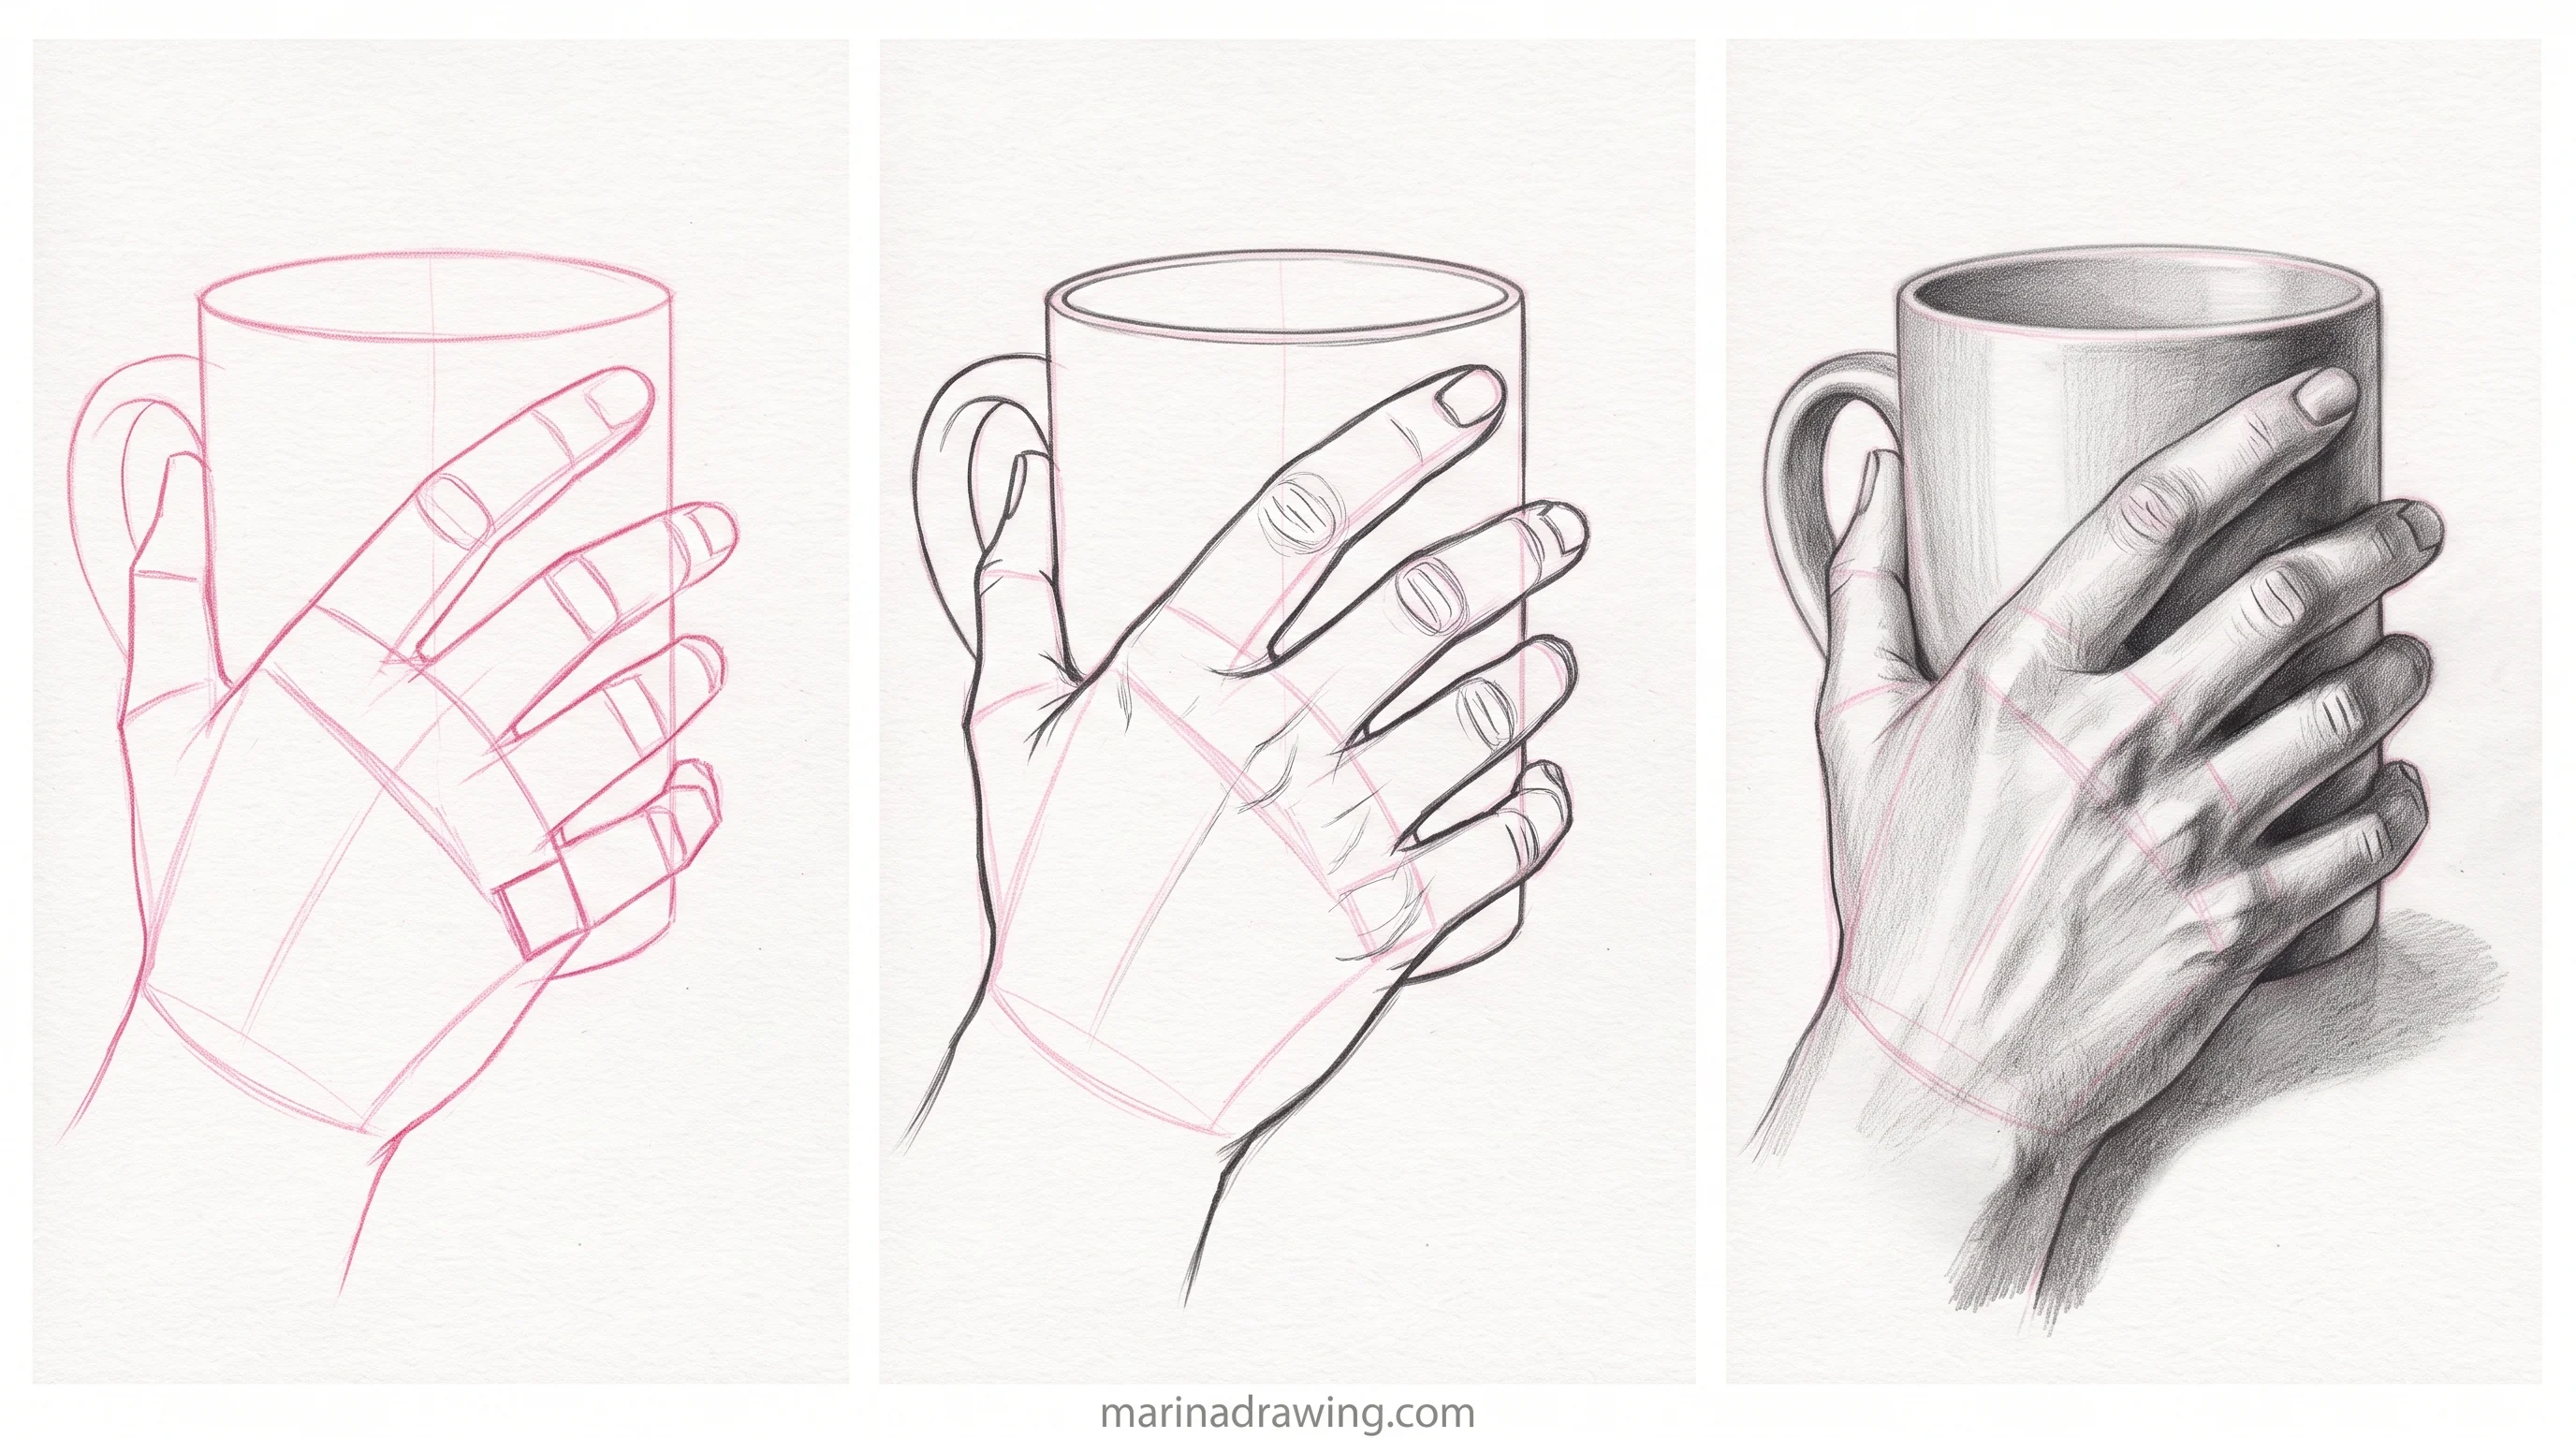
Block the object first. Always. Your mug, your pencil, your sword, your phone.
Then build your palm wedge around it, tilted the way the object forces the wrist to tilt.
The thumb goes on next. In a grip your thumb does most of the visible work: it presses from the far side, and you see it more than any single finger.
Your fingers are still boxes. They just wrap the object instead of the air. Where a finger disappears behind it, stop the box and start it again on the other side.
A hand drawn around nothing and then handed a mug never looks like it is holding anything. Grips are the poses I watched most often in the graphite lessons, because seeing the object blocked in first makes the order obvious.
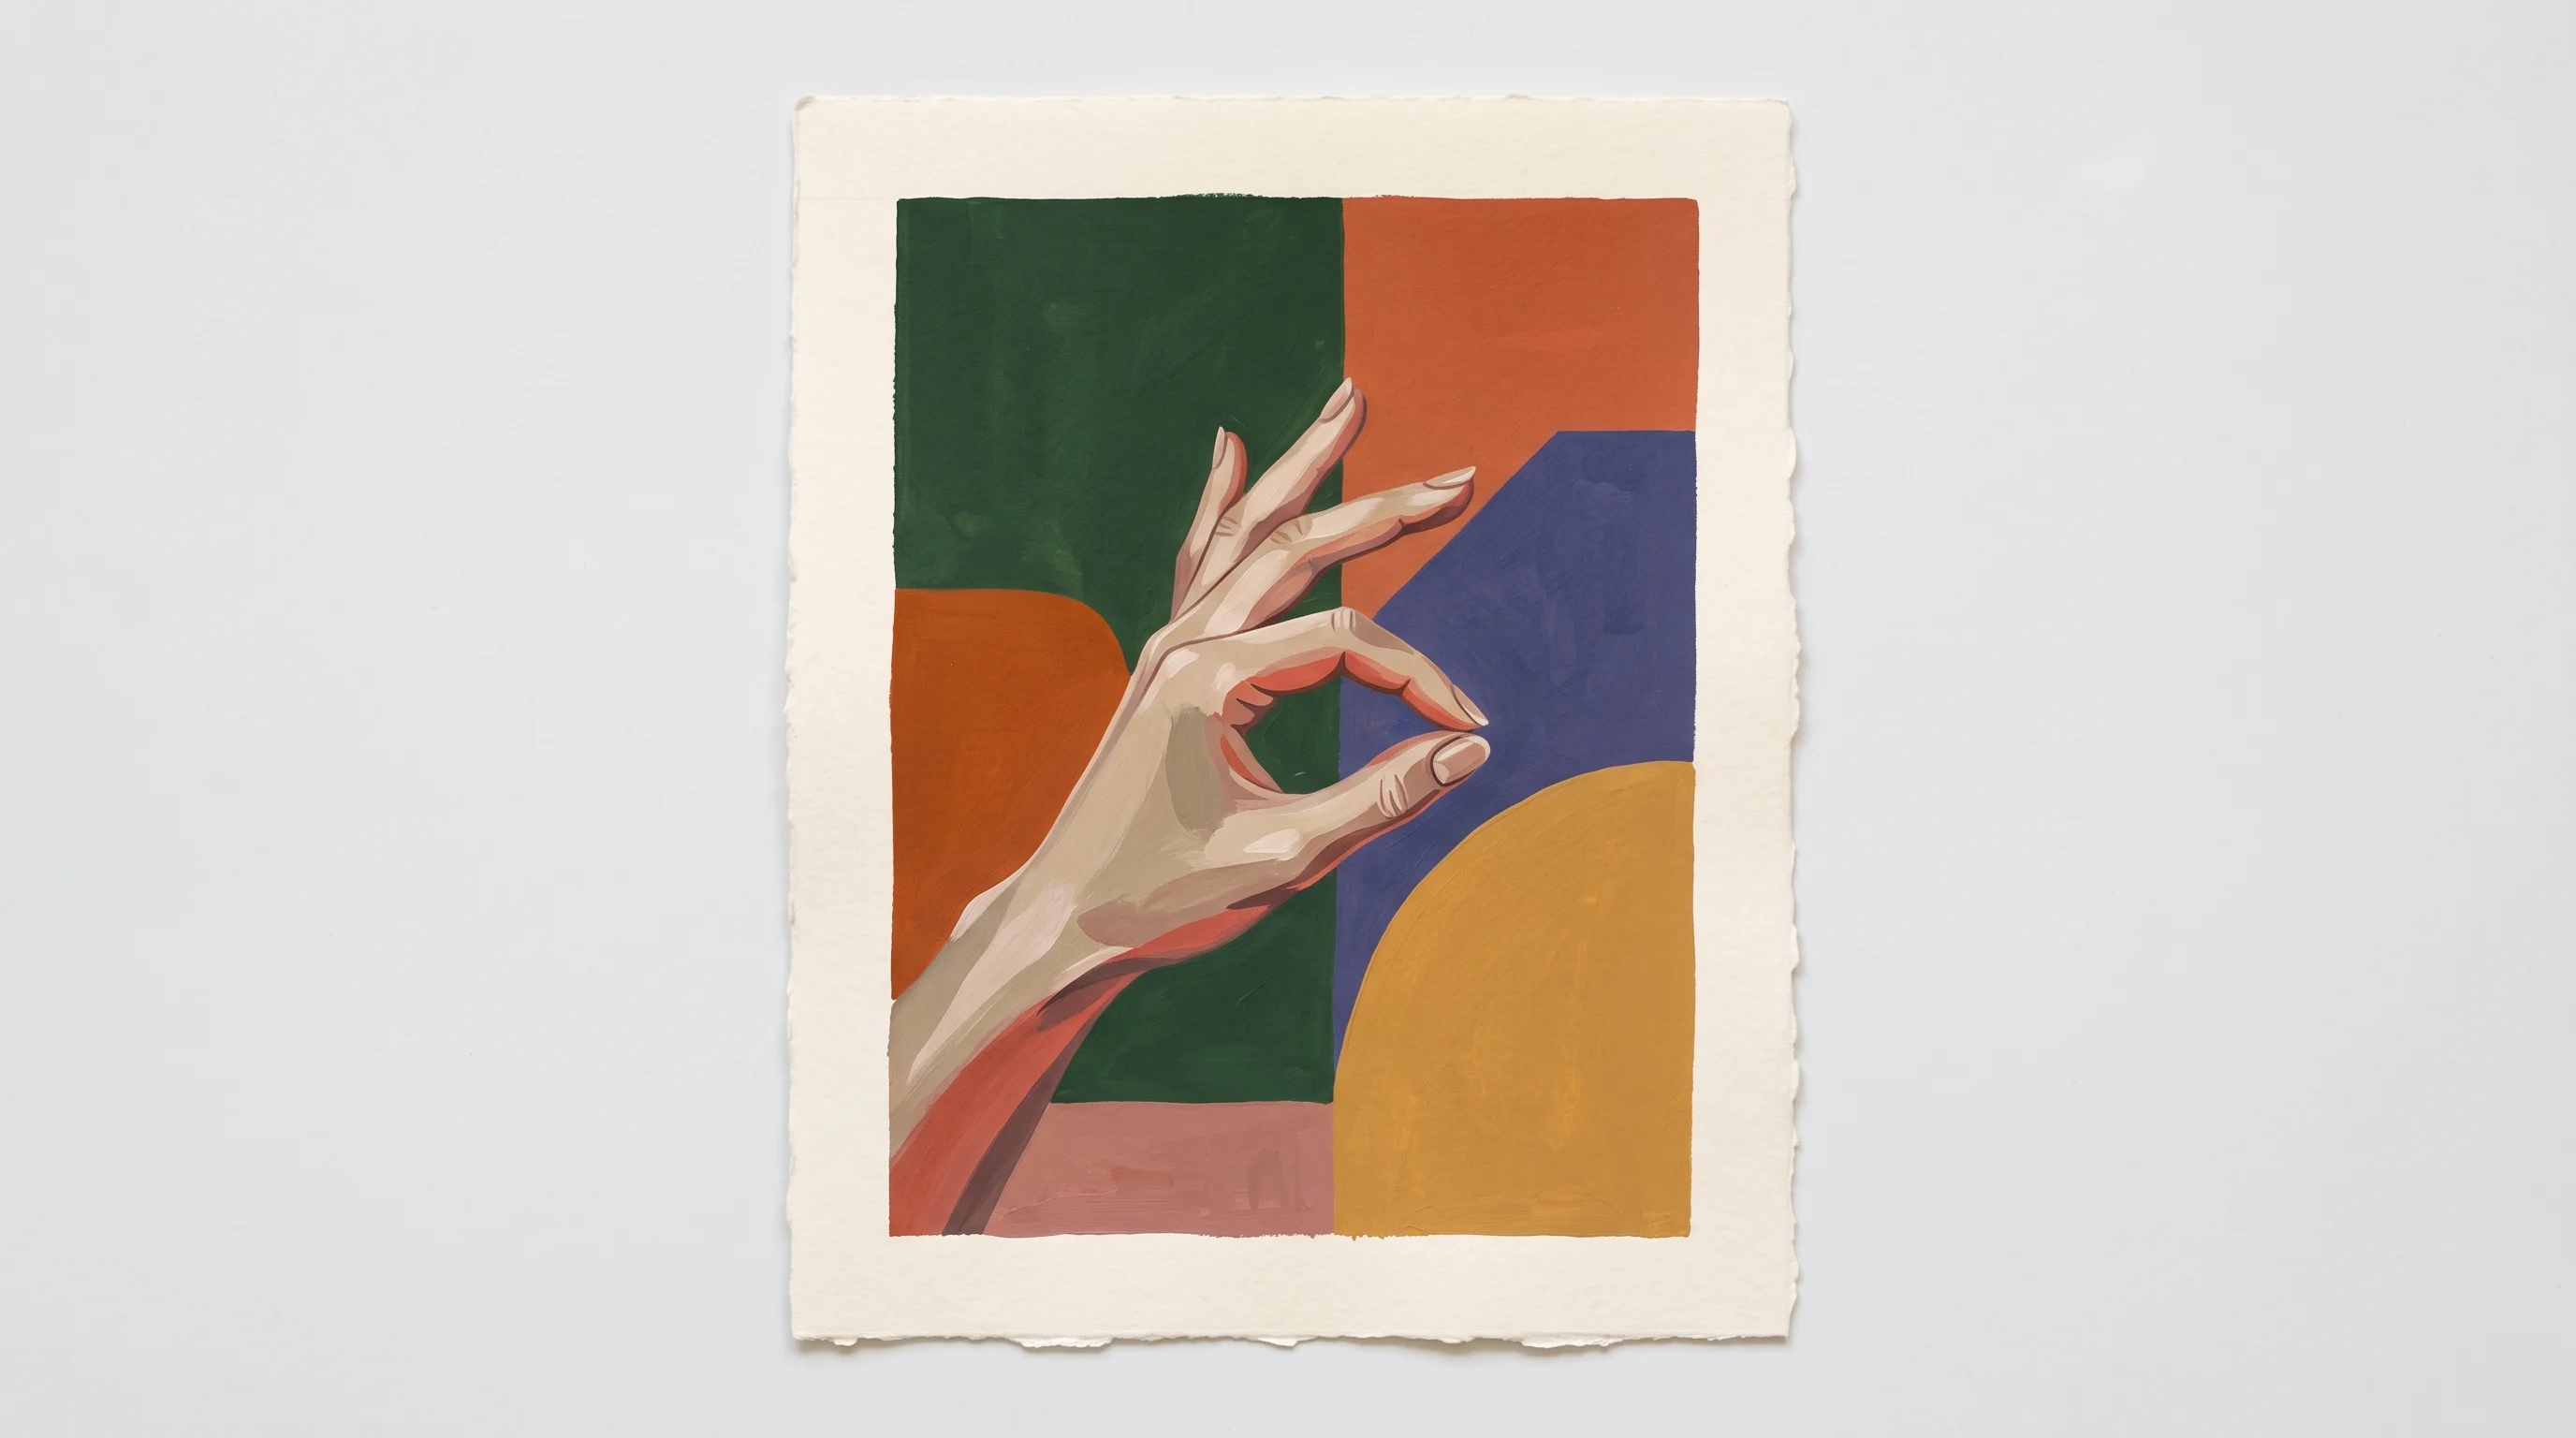
How to Draw Hands on Hips, Clasped, Clapping and Crossed
Four poses you will actually use, one rule each.
- Hands on hips. The thumb points forward and the four fingers wrap back over the hip. You see the back of the hand and almost no palm.
- Hands clasped together. Draw the lower hand fully, then lay the upper one over it. Interlocked fingers alternate, and only the top halves show.
- Hands clapping. Two palms meeting at a slight angle, never flat and parallel. One hand is always a little higher.
- Arms crossed. One hand tucks under the opposite arm and loses its fingers entirely. Draw the wedge, then hide most of it.
Notice what all four share: something is hidden. You draw every finger in full because you know it is there. Your viewer does not need to see it.


How to Draw Hands Behind the Back and Behind the Head
These two get searched constantly, and for the same reason: they let you show a whole figure while drawing very little hand.
Behind your back, hands overlap and foreshorten hard. You often see one wrist, part of one palm, and two or three fingers. Behind the head, the opposite: the palm turns away and the fingers spread across the hair, so the arc becomes the widest shape on the page.
You still start with the wedge. It just ends up mostly hidden. The same hiding trick carries over to figures, and I use it in how to draw portraits for hands resting near the face.

How to Draw Hands at Any Angle, Including the Back View
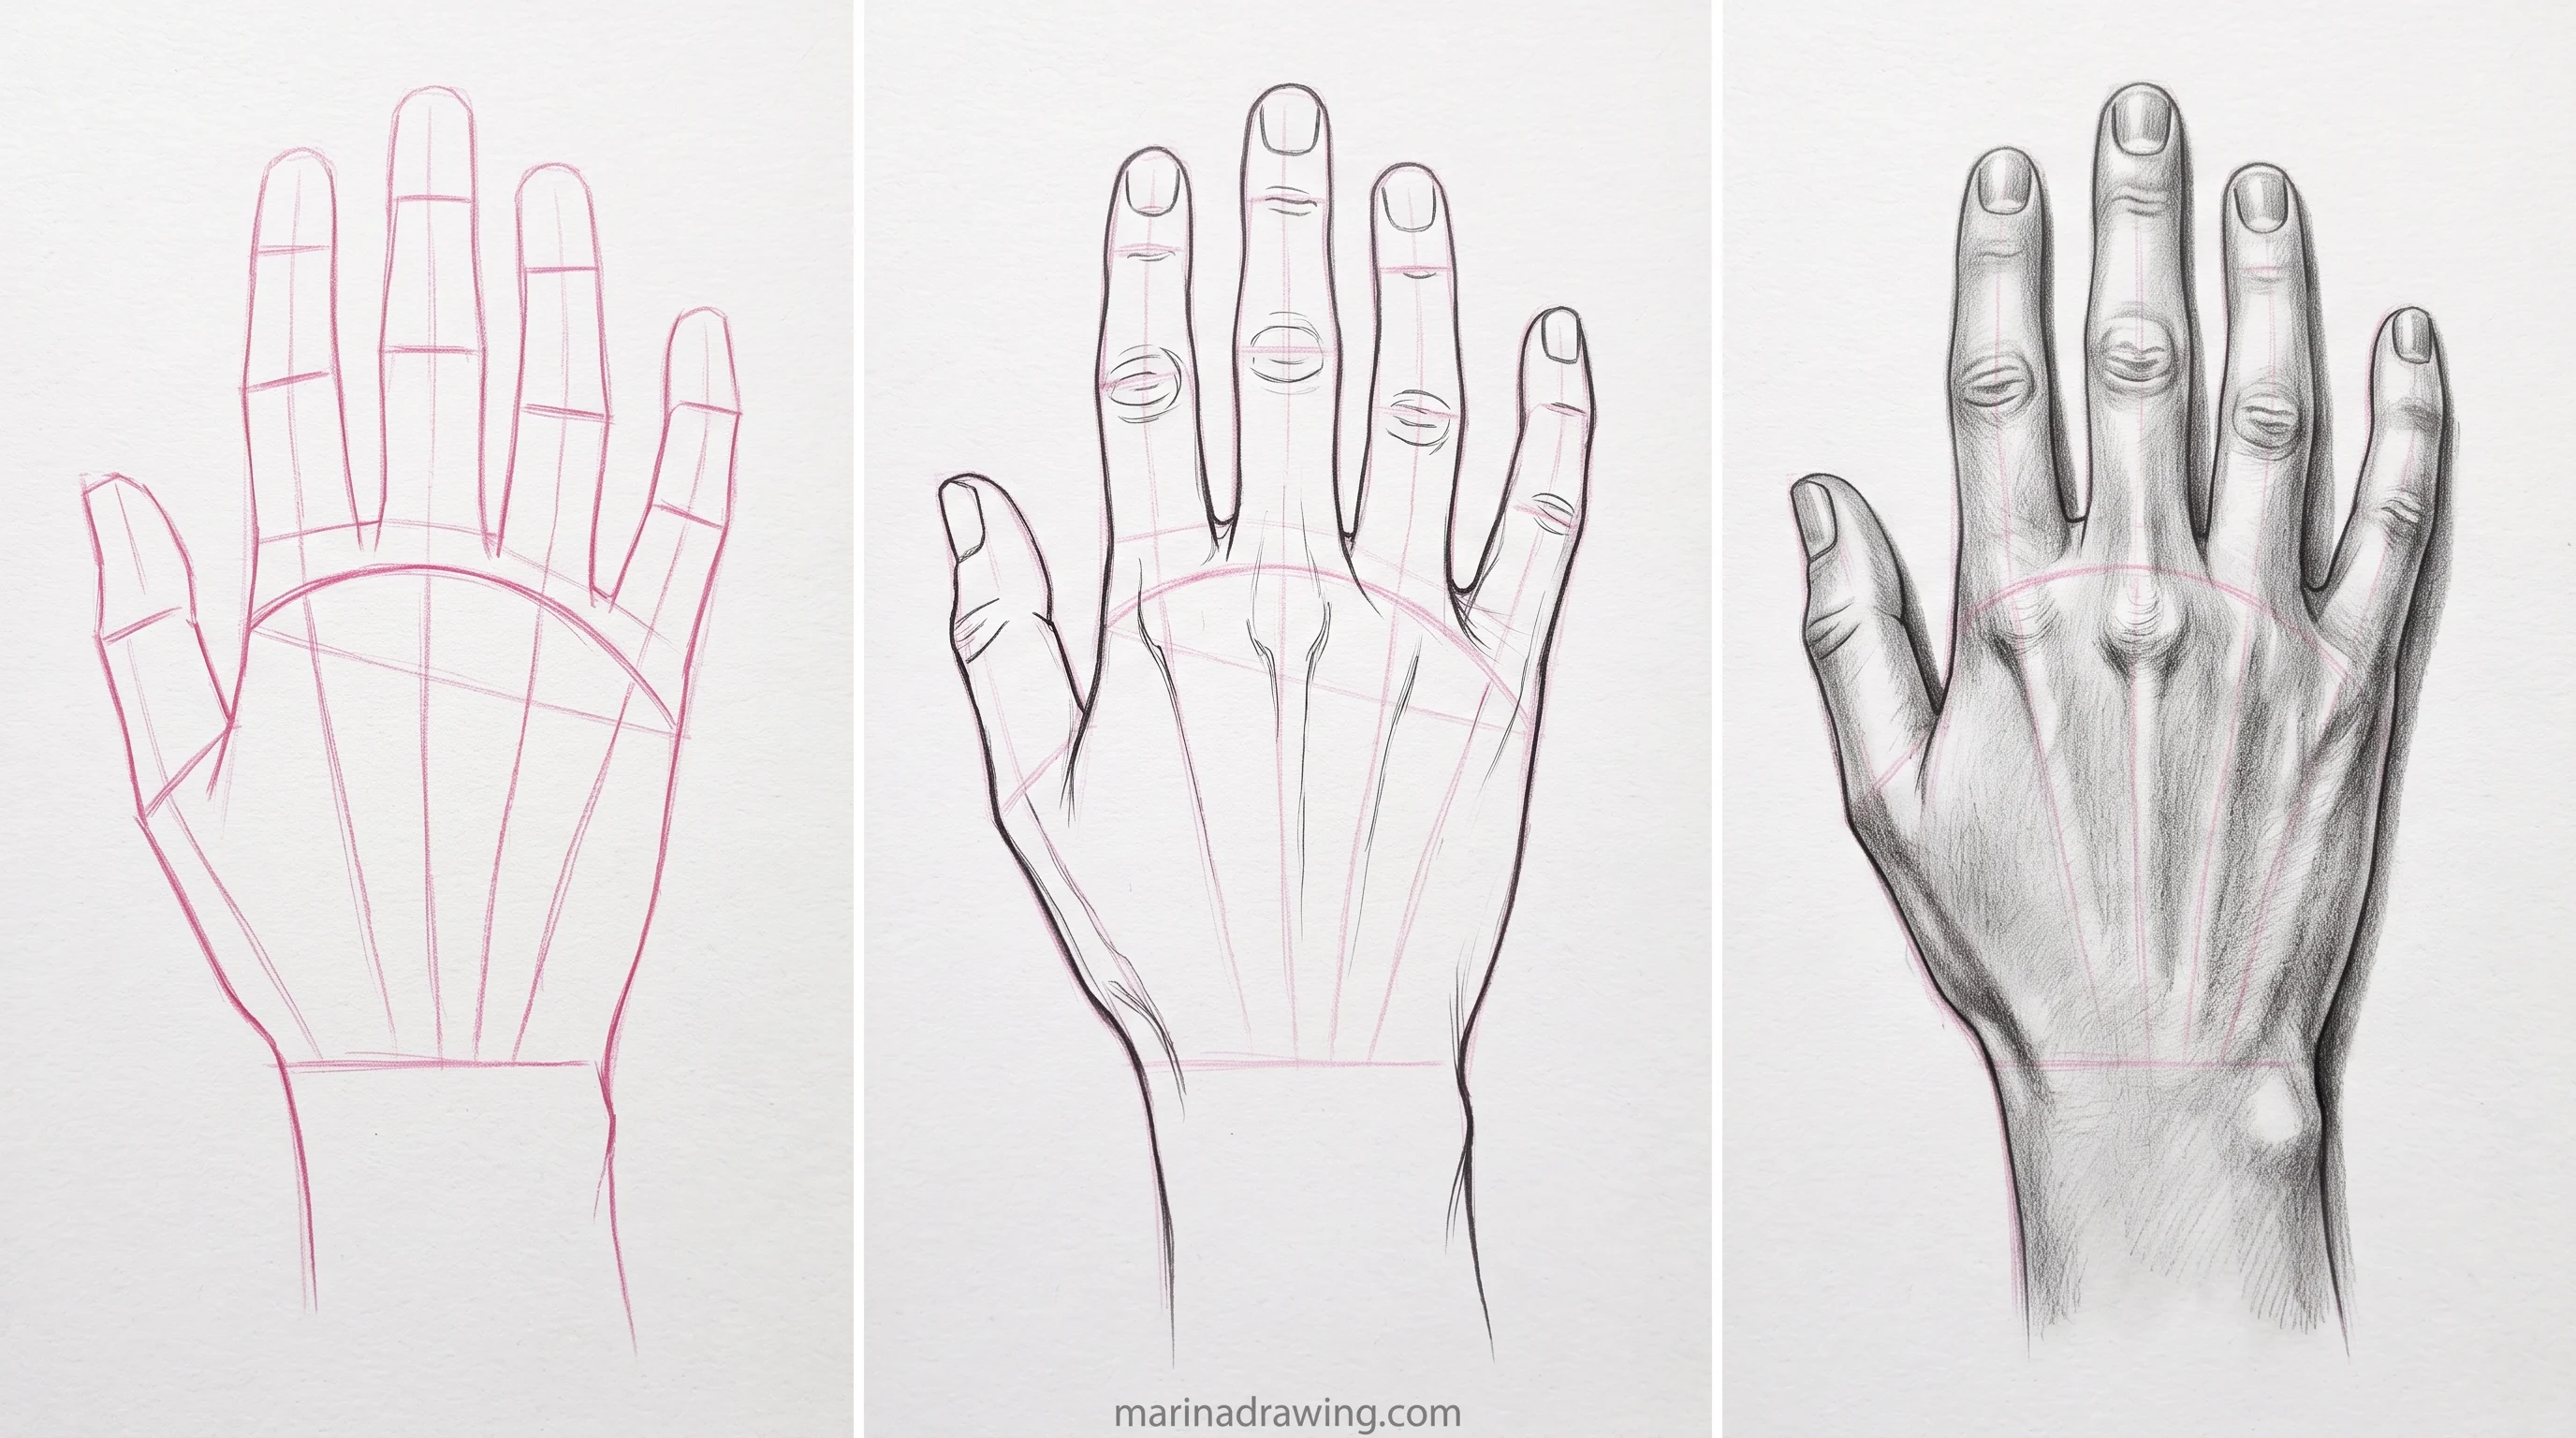
The back view is the easy one, and people are surprised by that. The back of your hand shows the knuckle arc directly, plus the tendons running from the arc to the wrist, so the two shapes you need are visible on the reference.
The palm view hides your arc under the pads, so mark it lightly anyway, even when you cannot see it.
For anything in between, rotate the wedge before you rotate the fingers. Turn the box in your head, redraw its near and far edges, then let the arc follow the box. That is what «any angle» really means: one shape rotating, not five sticks being rearranged.
Side view? Then your hand is thin, the thumb crosses in front, and your four fingers stack almost into one shape.
How to Draw Praying Hands, Holding Hands and Hands in Perspective
Three poses where the wedge still runs the show, and each one has a single trap. The video lessons build all three on camera, but the box logic below is enough to start.
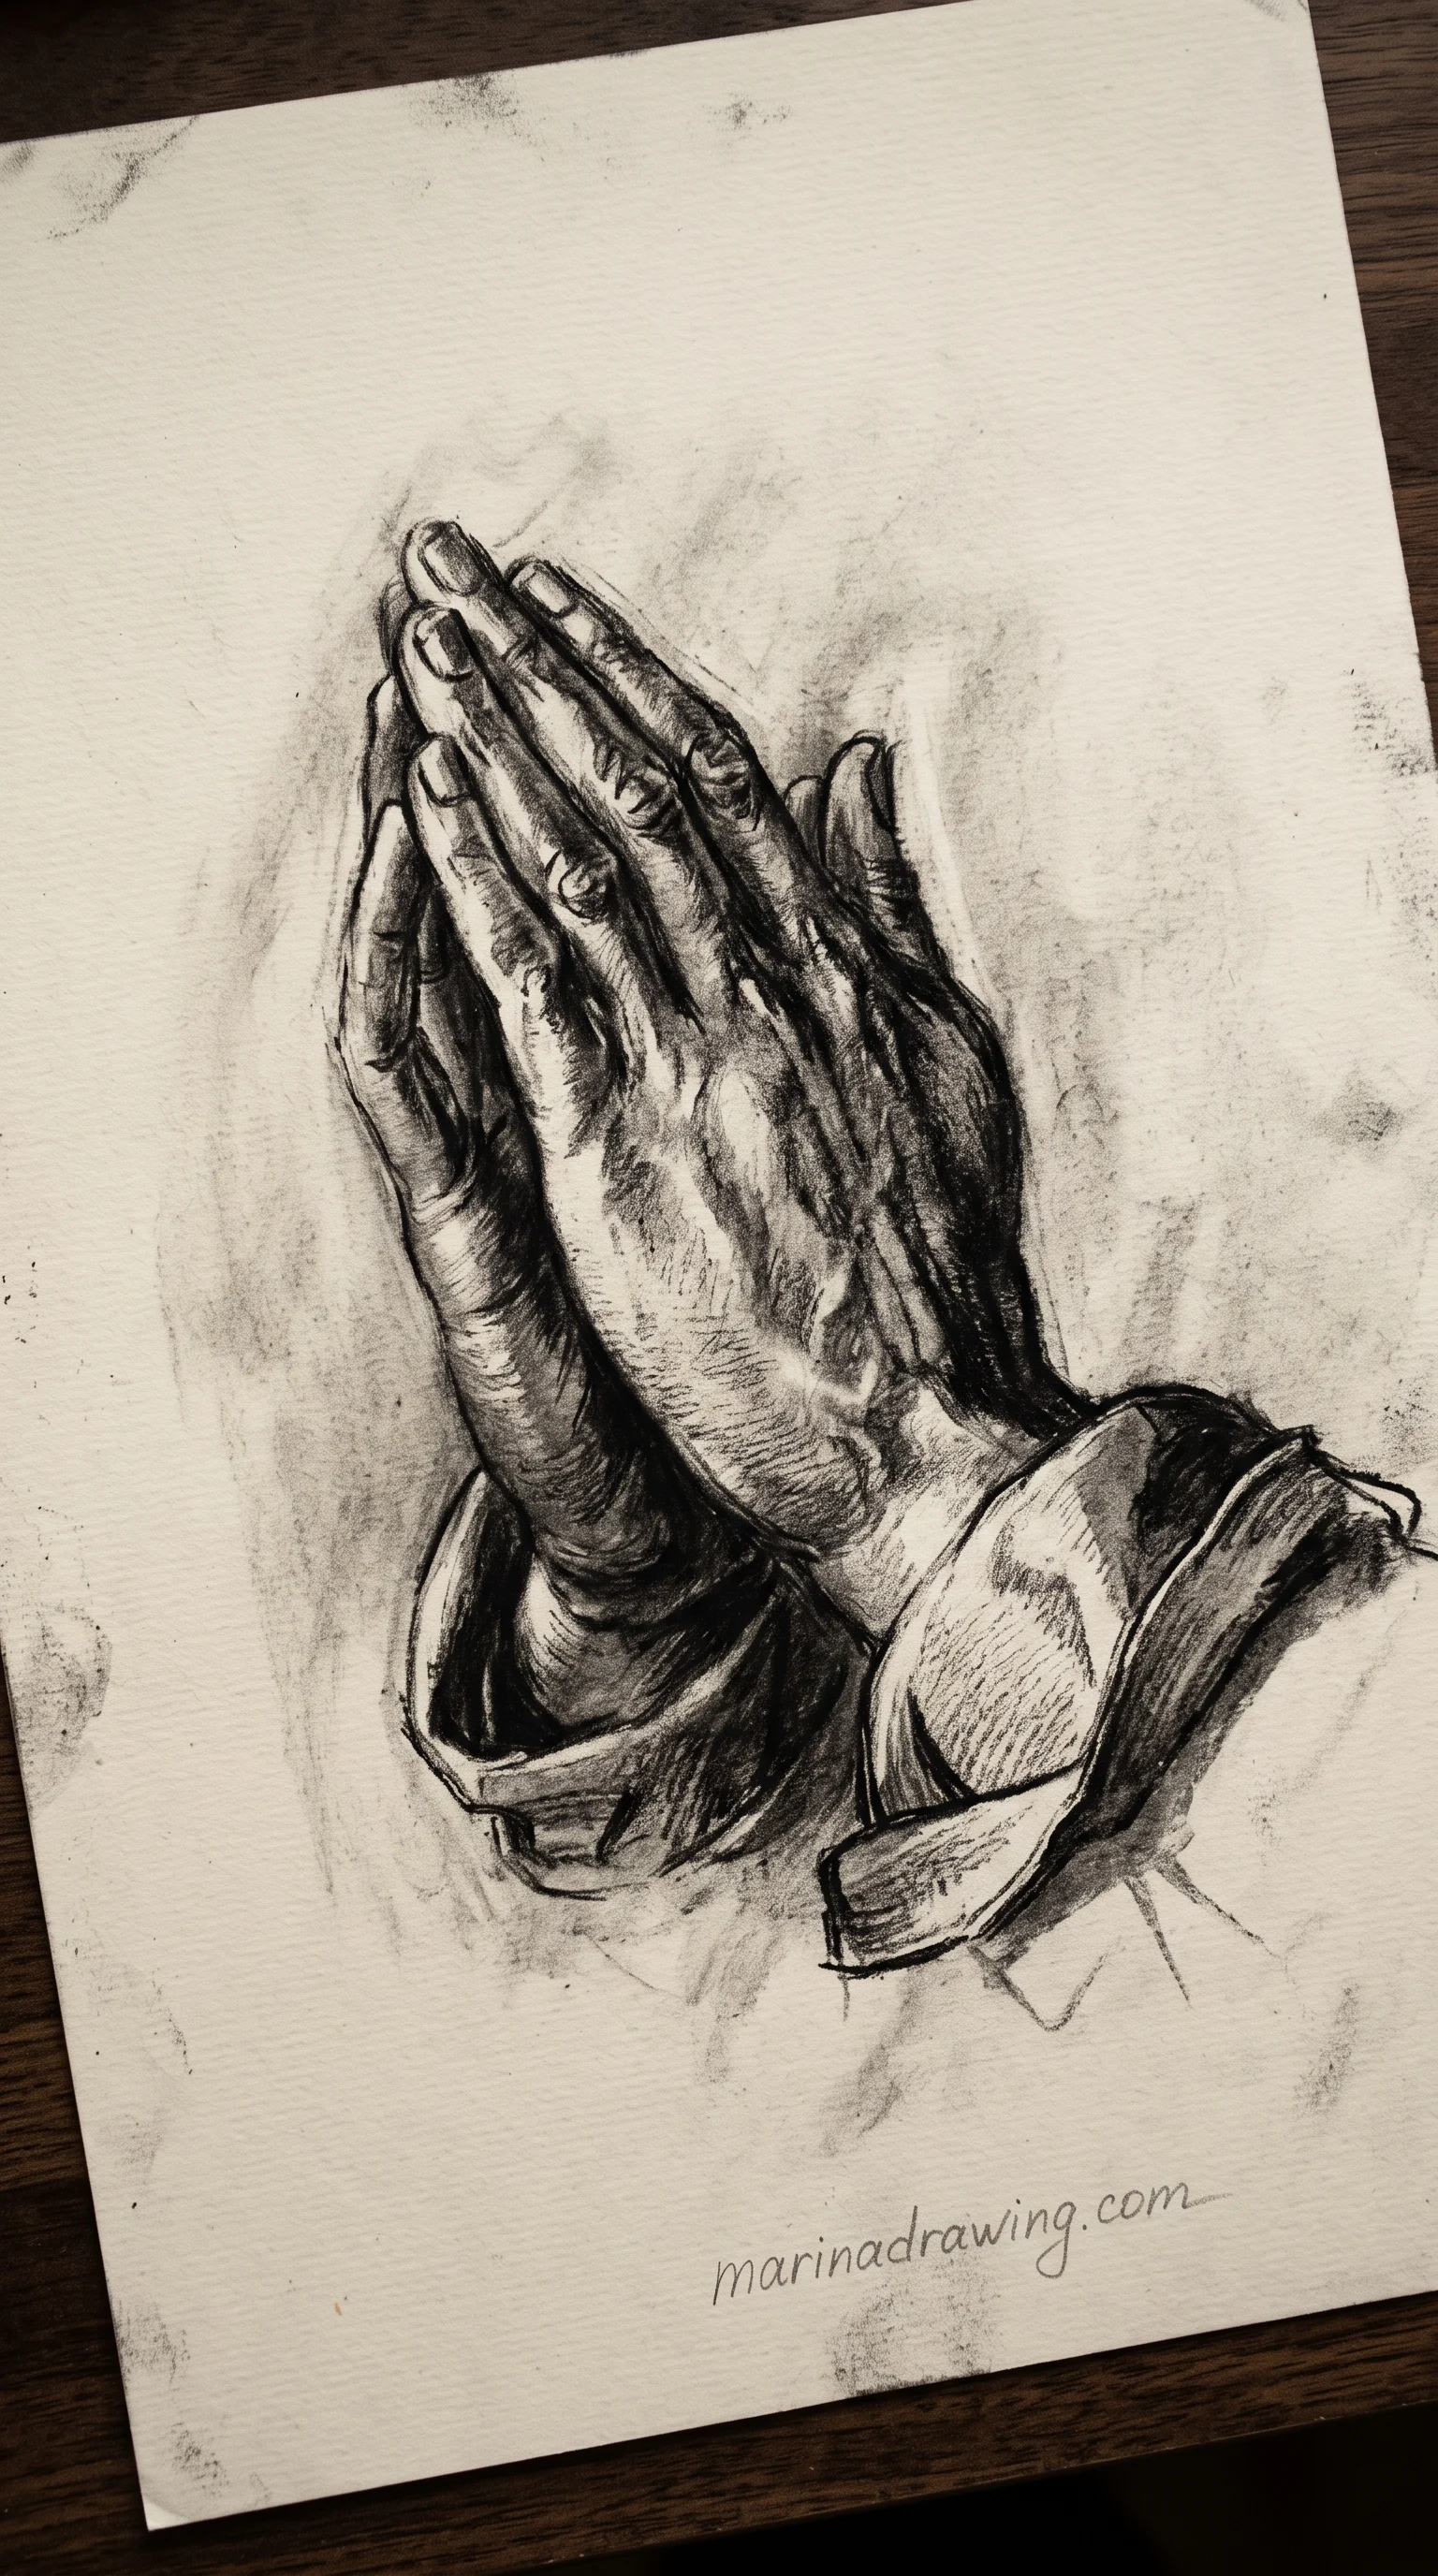
- Praying hands: draw one wedge, then mirror it. The two palms press flat, so you see mostly the outer edge of each hand, and the fingers of the far hand hide behind the near ones. Block the pair as one narrow box first, then split it down the middle.
- Holding hands: two wedges overlap, and one thumb always lies on top. Decide which thumb crosses before you draw a finger, otherwise you end up with ten fingers and no clear top hand.
- Hand perspective drawing: when the fingers point at you, the fingertips grow large and the palm shortens. Draw three boxes that shrink toward the wrist, put the knuckle arc on the biggest one, and let the fingers overlap the palm.
For easy hand drawings on your own hand, such as a small star, a heart or a thin bracelet line, keep the lines light and thin, and sketch the hand shape first so the doodle follows the knuckles instead of floating across them.
How to Draw Anime Hands, for a Girl or a Boy Character
42 hours of pencil drawing training, lifetime access
The video course I point plateaued students to — full lessons on portraits, hands, and realistic shading, not another short tutorial.
Anime style simplifies hands, but it does not let you drop the wedge, and the graphite lessons build the stylised version off the same construction. That is the trap. Your stylised hand goes wrong the moment the palm turns into a flat shape with noodles attached.
One pack instead of hunting a brush per stage
Pencil, ink and shading in a single bundle, so your block-in, your contour and your tone all come from one place.
What changes in anime style: knuckles disappear, joints get smoothed, and the whole hand shrinks a little against the head. A girl character usually gets slimmer fingers and a narrower wedge; a boy character gets a squarer palm and a thicker thumb. The arc stays in both.
What does not change: the thumb still sits low, your fingers still angle outward along the arc, and the hand still has thickness.
Draw the construction the normal way, then simplify on your contour pass. Simplify the construction itself and your stylised hand turns into a mitten with lines on it.

How to Draw Cartoon, Chibi and Cute Hands
Cartoon and chibi hands go further, and your shortcut here is an honest one: fewer fingers, fatter shapes.
- Chibi hands are often a rounded mitten with a thumb bump and no separate fingers at all.
- Comic-style hands keep four fingers but lose the middle joint.
- Cute hands read better slightly too small for the character, never too big.
Here is the part that matters. Your chibi mitten works because you chose it; a realistic mitten fails because you did not. Draw one built hand first, then flatten it on purpose.
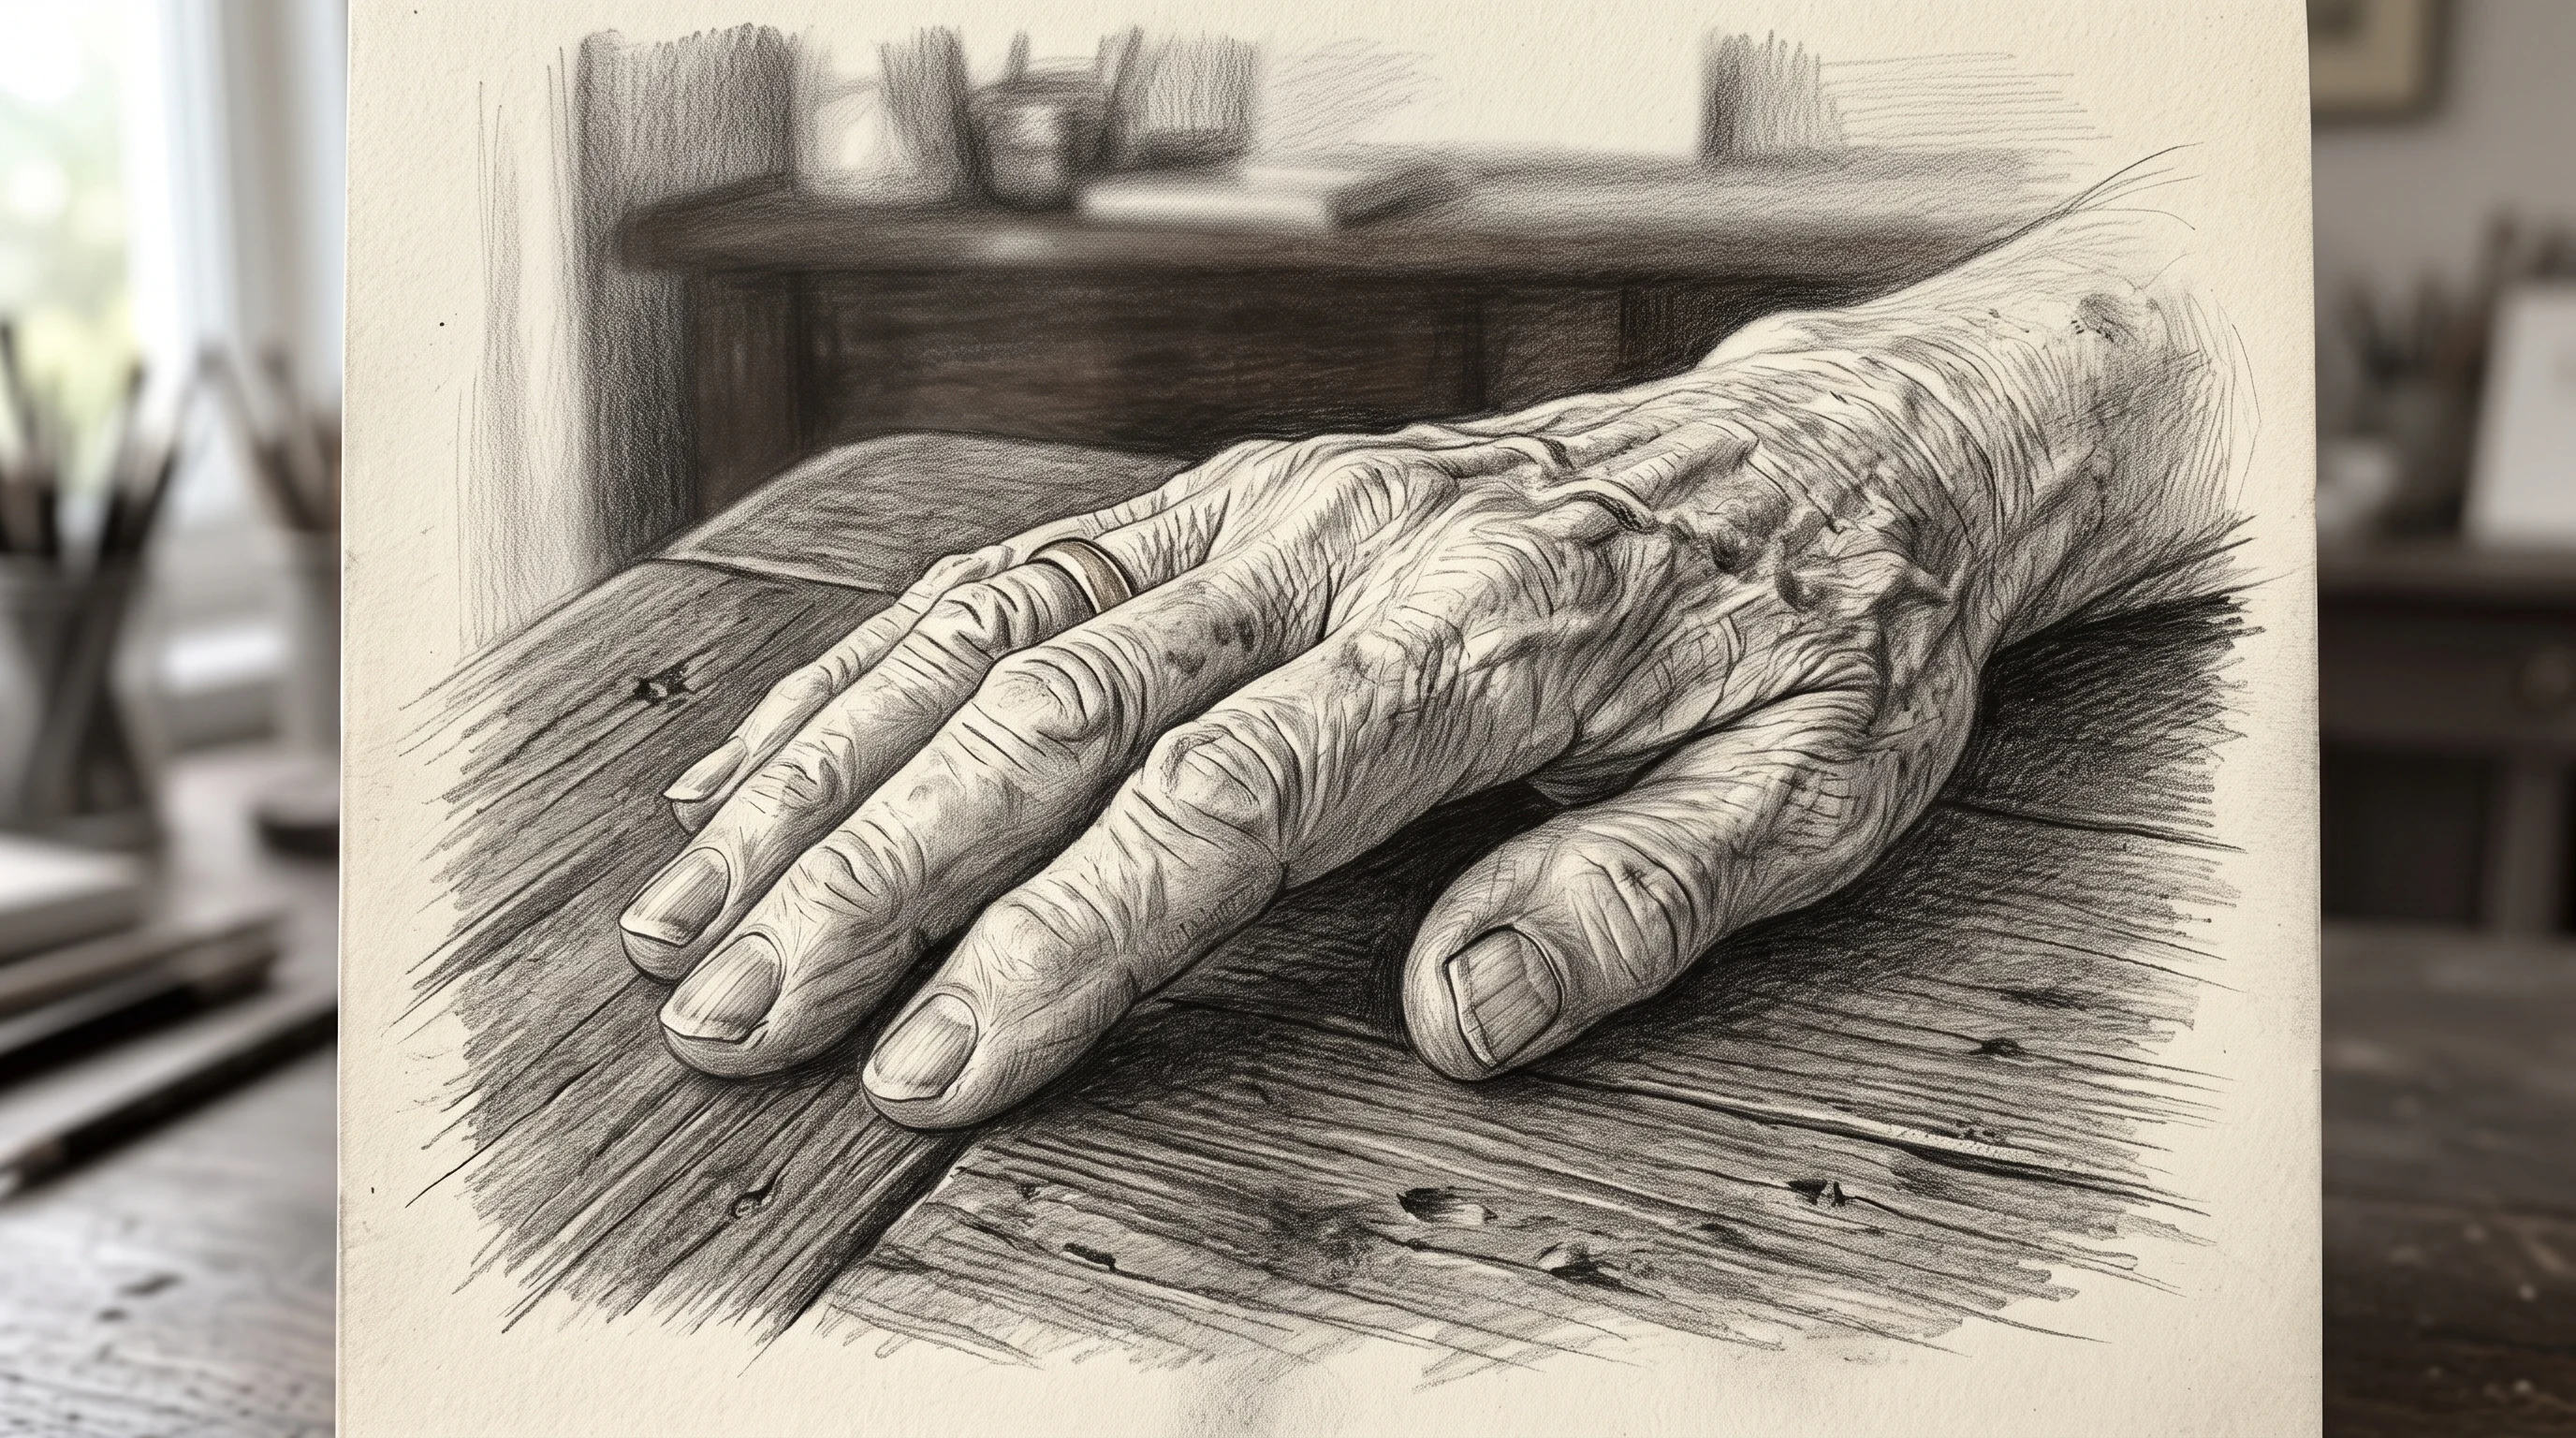
How to Draw Hands for Kids
With a child, skip construction entirely and let them trace.
Lay a hand flat on paper, draw around it, then add three creases per finger. Kids get a correct hand in two minutes, which buys the patience for everything else. Turkey drawings exist for a reason.
After a few traced hands, ask for one drawn from looking. The traced pages next to it do your teaching for you.
How to Draw Hands and Feet: What Carries Over
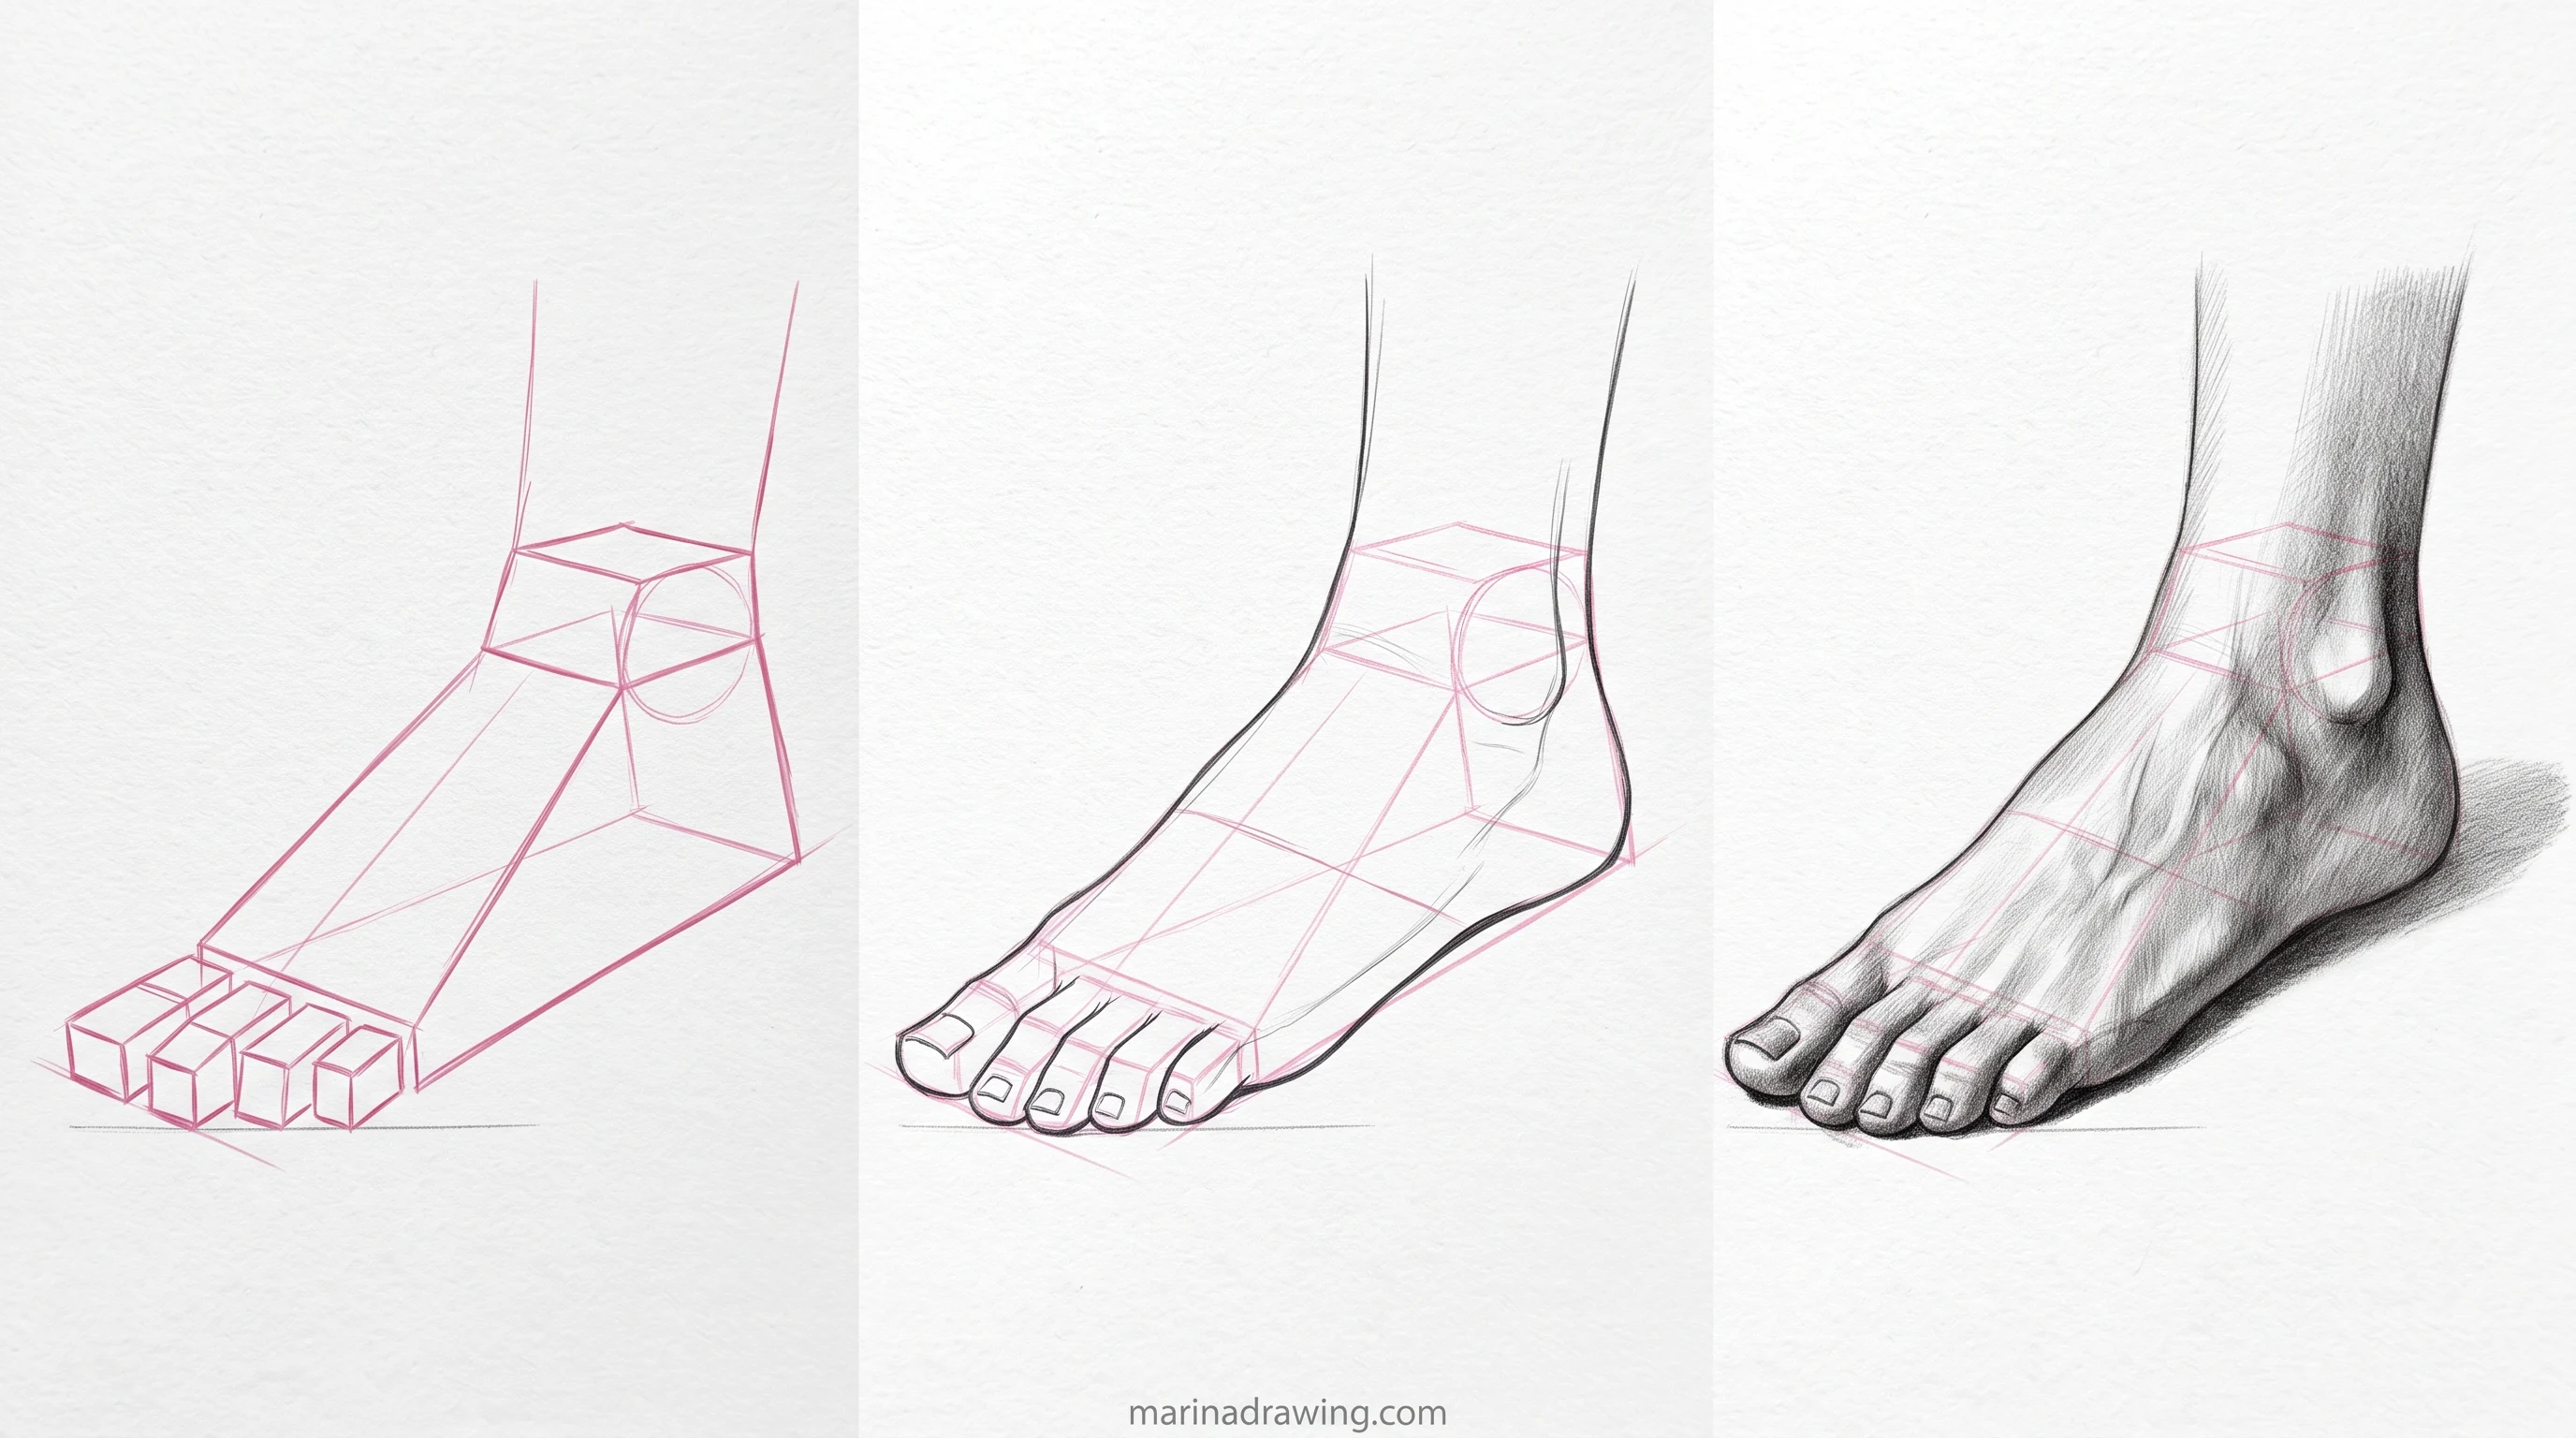
Almost all of it, and the same goes for the rest of the figure, which I walk through in anatomy drawing for self-taught artists. Your foot is the same idea: a wedge for the mass, an arc where the toes attach, short boxes for the toes.
Two differences. Your foot wedge is longer and lower, and the big toe replaces the thumb without being able to swing. So when hands and feet are both on your list, learn the hand first: the foot then costs you a fraction of the time.
Drawing Hands in Digital Art
On a tablet, everything above still applies to you. Three things get easier and one gets harder.

Shading the palm box once it is built
Soft-edge brushes that hold a gradient across your palm, where a default airbrush flattens the whole hand into one tone.
Easier: your construction goes on its own layer and vanishes with one tap. The flip check is a button. And you nudge a whole finger stack with the transform tool instead of erasing it.
Harder: the flip check works too well. Flip constantly and you hide the drift you should be learning to see. Flip twice per drawing, not twenty times.
Shading a built hand follows the same rules as anything else, and I cover them in realistic drawing and shading. One habit worth keeping from paper. Lock your construction layer at low opacity and leave it under the contour while you ink. When your line wanders off the box, you see it immediately.

Four Mistakes That Keep a Hand Looking Wrong
| Mistake | What it looks like on the page | The fix, in one move |
|---|---|---|
| Flat mitten palm | Hand lies on the paper like a glove | Rebuild the palm as a wedge with tilt |
| Thumb on the knuckle arc | Thumb looks stuck on, hand cannot grip | Drop it low, near the wrist, own joint |
| Straight to contour | Every fix means erasing finished line | Boxes first, contour last |
| Chart instead of angle | Proportions correct, hand still flat | Check the wedge tilt, not the lengths |
Drawing the palm as a flat mitten
The whole article is built around this one. A flat outline gives every finger the same base angle, so your hand stays paper-flat however carefully you render it. Go back to step one and block the wedge.
Attaching the thumb to the knuckle arc
Watching this one get corrected live is worth more than reading it, which is what the graphite lessons are for. Your thumb is not the fifth finger. It has its own joint, lower, nearer the wrist, moving on a different axis. Drawn off the arc, it looks glued on and your hand cannot grip or point. Place it in its own step.
Skipping straight to contour
Then every correction means erasing a line that already looks like art. That is slower, and it hurts more, so you talk yourself out of fixing things. Boxes are cheap. Use them.
Trusting a memorised proportion chart
Charts check length. Your flat hand is an angle fault. When your proportions are fine and the hand still looks pasted on, ignore the chart and rebuild your wedge tilt and your arc. When your real trouble is finger length, you need a proportion reference, and this article is the wrong one for you.
A Month of One Hand a Day: What Actually Gets Better
Tonight, give it 30 to 60 minutes. Draw your own free hand in four poses: relaxed, gripping a pencil, palm toward you, palm away. Run all five build steps every time, out loud if that helps. Leave the wedge and arc visible under the contour.
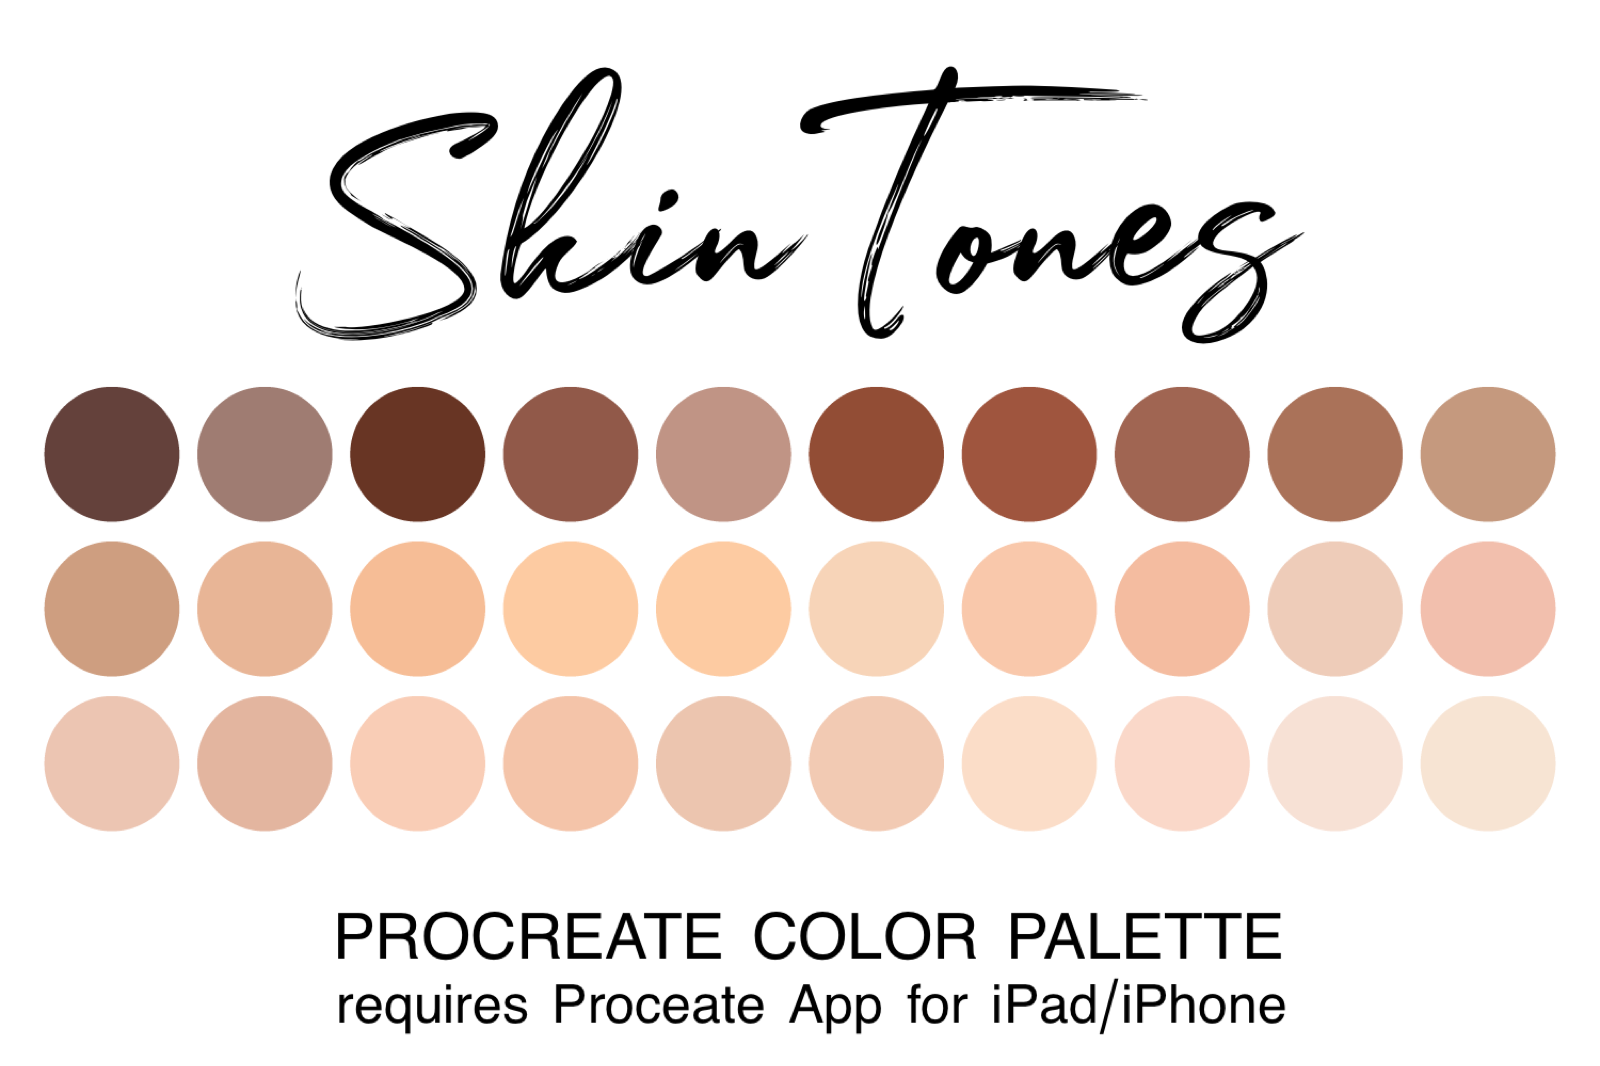
Value on the palm without guessing the halftone
A skin tone palette, so the shadow under your knuckle arc comes off a swatch instead of being mixed on the fly.
Cap your session at six to eight hands. Then do it again tomorrow. It is the same habit I lean on in drawing practice, and it works on hands faster than on anything else.
After a month your change shows up in the palm, not the fingers. The tilt appears without you deciding on it. Your arc lands right on the first pass instead of the second. And the poses you used to crop out, the fist, the hand coming toward you, stop being avoided.
That is the whole promise of a build order: you stop redrawing and start finishing.
Questions That Come Up Once the Palm Is Blocked In
Why do my hands look like mittens?
Because you drew the palm flat, with no thickness and no tilt, so every finger points the same way. Fix your wedge, not the fingers.
How do I draw hands easy, as a beginner?
Use the simple three-move version above: tilted rectangle, one curved arc, five sticks. It is basic on purpose, and it still beats a careful mitten.
How long should fingers be compared to the palm?
Your middle finger is roughly as long as your palm. Check it after your wedge works, not before.
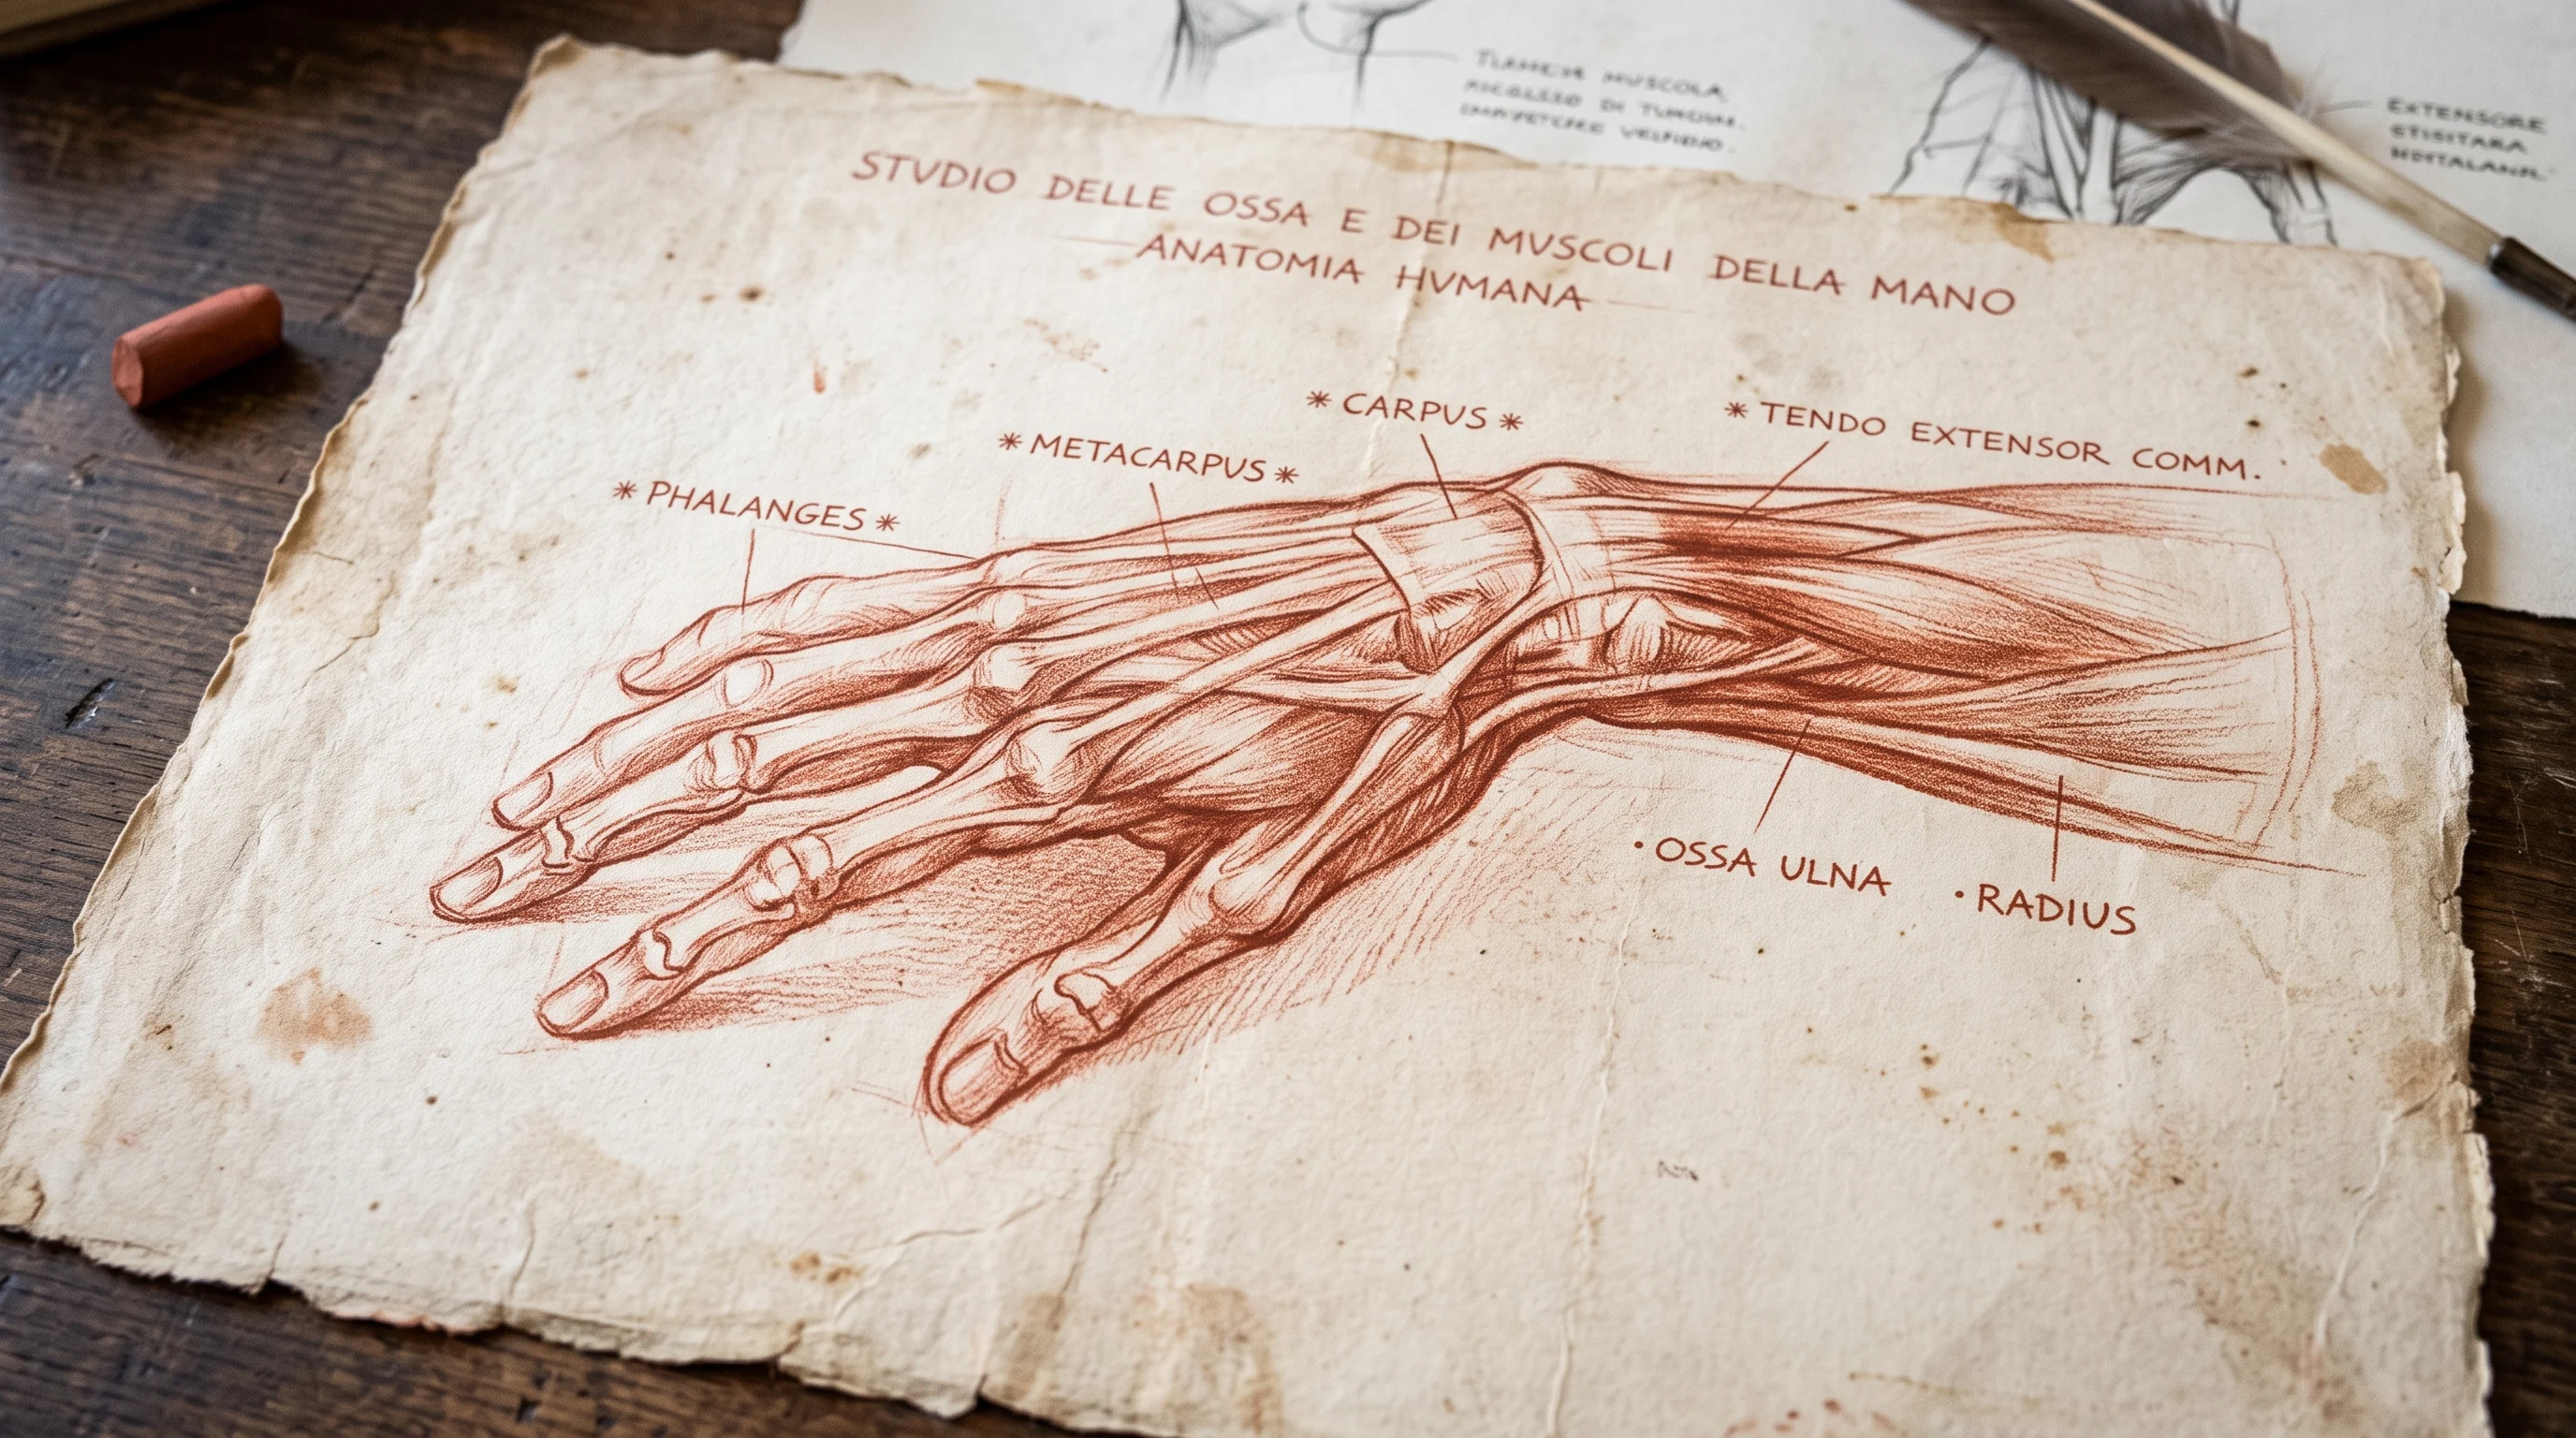
Do I need to learn hand anatomy?
Not for this, and the graphite course skips the bone names too. Your wedge and your arc are shape decisions. They fix the common failure without naming a bone.
How do I draw hands holding something?
Block the object first, then build your palm and thumb around it, the same order shown in the graphite lessons. Your fingers wrap the shape instead of the air.
How do I draw hands on hips?
Thumb forward, four fingers wrapping back over the hip. You mostly see the back of the hand.
How do I draw hands clasped together or clapping?
Draw the lower hand in full, then lay the second over it. For clapping, offset the two palms slightly, never flat and parallel.
How do I draw hands behind the back or behind the head?
Expect heavy overlap. Behind the back you see one wrist and a few fingers; behind the head the arc spreads wide and the palm turns away.
How do I draw hands at any angle, including the back view?
Rotate the wedge first, then let the arc follow it. The back view is the friendliest, because the knuckle arc is visible on your own hand.
How do I draw anime hands for a girl or a boy character?
Build them normally, then simplify on the contour pass. Slimmer fingers for a girl, a squarer palm and thicker thumb for a boy. Keep the arc in both styles.
How do I draw cartoon, chibi and cute hands?
Fewer joints, fatter shapes, sometimes no separate fingers at all, the way I simplify animals in easy animal drawings. Your chibi hand works because the flattening is a choice.
How do I draw hands for kids?
Trace a real hand on the page, add three creases per finger, and move on. Two minutes, correct result, patience preserved.
How do I draw hands and feet together?
Same method for you, and it is the one I keep coming back to in easy drawings for kids too. A foot is a longer, lower wedge with an arc for the toes and a big toe in place of the thumb.
Do arms and legs need the same treatment?
They need the same scale check from you. A hand is about one seventh of body height, which keeps your arms and legs believable around it.
What about digital art on a tablet?
Identical build order. Keep your construction on its own layer, flip twice per drawing, and do not let the button replace your eye.
Is it cheating to use my own hand as reference?
No. It is always in the room, in the exact pose you need, and it costs nothing. Stop at six to eight poses before it cramps.
Would a book or a course get me there faster?
A book gives you plates to copy. A course shows the construction happening, which is the part that is invisible in a finished drawing, and that is why I recommend watching the graphite lessons while you build along.